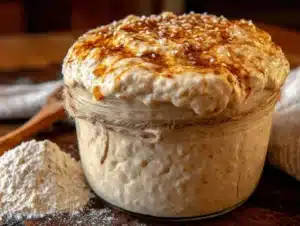
I had been looking for a sourdough starter that actually worked without turning into a science experiment that took over my kitchen counters. For a while, I just accepted that homemade bread wasn’t going to taste like the crusty, tangy loaves from the bakery down the street. Every time I tried following those complicated starter tutorials, something went wrong. Either it got moldy, or it never bubbled, or I just forgot to feed it because the schedule was too demanding. It felt like everyone online made it look so simple, but my kitchen smelled like disappointment.
Then I realized the problem wasn’t me. It was the method. Most guides jump straight into complicated ratios and temperature controls that scare off beginners. So I stripped it back. No fancy tools, no digital scales obsessing over grams, no worrying about the perfect hydration percentage. Just flour, water, a jar, and patience. That’s honestly all you need.
This 7-day method is designed for people who want to bake bread but don’t want to become a microbiologist first. You don’t need to clear your schedule or buy expensive equipment. You just need to show up for five minutes each day. The starter does all the hard work. By day seven, you will have a bubbly, active starter ready to make your first loaf. And let me tell you, that first pancake you make with the discard will make you feel like a baking genius.
Why You’ll Love This Recipe
Making your own sourdough starter from scratch is one of those kitchen skills that changes how you think about bread forever. It isn’t just about saving money or avoiding store-bought yeast. It is about creating something alive in your kitchen that rewards you with incredible flavor.
- Incredibly Simple : You only need two ingredients. Flour and water. That is it. No sugar, no yeast packets, no weird additives.
- No Special Equipment : A glass jar, a spoon, and a kitchen towel are all you need. No stand mixer, no proofing basket, no thermometer.
- Perfect for Beginners : This 7-day method breaks down every step so you know exactly what to look for. No guesswork.
- Cost-Effective : A bag of flour costs less than a single loaf of artisan bread. Your starter will keep producing for years.
- Incredibly Rewarding : There is something magical about watching those first bubbles appear. It feels like you are bringing something to life.
- Versatile : Once your starter is active, you can use it for bread, pancakes, waffles, crackers, pizza dough, and so much more.
What makes this method different from the rest is the forgiving schedule. Most starter guides demand feedings every 12 hours, which is impossible for people with jobs, kids, or lives. This method uses a once-daily feeding routine that works around your schedule. You don’t need to wake up at 6 AM to feed your starter. Feed it when you get home from work. Feed it after dinner. It doesn’t care. It just wants food and time.
Honestly, the first time I saw my starter double in size after a feeding, I called my mom to tell her. She thought I was crazy. But if you have ever nurtured something from nothing, you understand. This is the kind of kitchen project that makes you feel capable. It is patient. It forgives mistakes. And it rewards you with bread that tastes like love.
What Ingredients You Will Need
This recipe uses the simplest ingredients you probably already have in your pantry. The beauty of a sourdough starter is that it doesn’t require anything fancy. Just two humble ingredients working together with time and patience.
- All-Purpose Flour : This is your best friend for starting a sourdough starter. It is reliable, cheap, and easy to find. I recommend using unbleached all-purpose flour if you can find it. The bleaching process can sometimes slow down fermentation. But honestly, bleached flour works too. I have used both and the difference is minimal for beginners. King Arthur Flour and Gold Medal are my go-to brands. They have consistent protein content that gives your starter structure.
- Whole Wheat Flour (Optional but Recommended) : Whole wheat flour is packed with nutrients and natural yeast that live on the grain. Using a 50/50 mix of whole wheat and all-purpose flour for the first few days can jumpstart your starter. The wild yeast love the extra minerals. After day 3 or 4, you can switch to all-purpose flour only. If you don’t have whole wheat flour, don’t stress. All-purpose flour works fine. It just might take an extra day or two to get going.
- Filtered or Tap Water : Water quality matters more than you think. Chlorinated tap water can kill the natural yeast you are trying to cultivate. If your tap water smells like a swimming pool, use filtered water or let tap water sit out overnight to let the chlorine evaporate. Room temperature water is best. Cold water slows down fermentation, and hot water can kill the yeast. Aim for water that feels neutral on your wrist, like bathwater temperature.
- Rye Flour (Optional but Powerful) : If you want to speed things up, rye flour is like rocket fuel for sourdough starters. It is packed with nutrients and natural yeasts. Even adding just one feeding with rye flour can make your starter take off. I keep a small bag of rye flour in my pantry just for this purpose. It is not necessary, but it is a nice trick to have in your back pocket.
That is literally it. No sugar, no honey, no potato flakes, no commercial yeast. Your starter does not need any of that. In fact, adding sugar can actually disrupt the natural balance of bacteria and yeast you are trying to establish. Trust the process. Flour and water are all you need.
Equipment Needed
You do not need a fancy kitchen to make a sourdough starter. In fact, you probably already own everything you need. Here is what I use and recommend:
- Glass Jar or Container : A wide-mouth mason jar is perfect. It is easy to clean, you can see through it to monitor bubbles, and it is cheap. I use a 32-ounce jar. Avoid metal or plastic containers. Metal can react with the acidic starter, and plastic can absorb odors and is hard to clean thoroughly. Glass is your friend.
- Kitchen Scale (Optional but Helpful) : You can absolutely make a starter using cups and spoons. But a kitchen scale makes it more consistent and easier to manage. If you have one, use it. If you don’t, no worries. I made my first starter using measuring cups and it turned out great.
- Wooden or Silicone Spoon : Metal spoons can react with the acidic starter. Use a wooden spoon, silicone spatula, or chopstick for stirring. I keep a dedicated wooden spoon just for my starter.
- Kitchen Towel or Coffee Filter : You need to cover your jar loosely so air can flow in but dust and bugs stay out. A clean kitchen towel secured with a rubber band works perfectly. Coffee filters are great too because you can see through them.
- Rubber Band or Marker : This is for marking the height of your starter after feeding. It helps you see how much it rises. A simple rubber band around the jar at the starting level is all you need.
That is the complete list. No proofing baskets, no lame knives, no bannetons. Just a jar, a spoon, and a towel. If you have those three things, you are ready to go.
Preparation Method

This 7-day method is designed to be forgiving and straightforward. Follow these steps daily, and by day seven, you will have a bubbly, active starter ready to bake with.
Day 1: The Beginning
- Combine 60 grams (about 1/2 cup) of all-purpose flour and 60 grams (about 1/4 cup) of room temperature water in your clean glass jar.
- Stir thoroughly until no dry flour remains. The mixture will look like a thick paste. That is normal.
- Scrape down the sides of the jar with a spatula.
- Cover loosely with a kitchen towel or coffee filter and secure with a rubber band.
- Place the jar in a warm spot in your kitchen. On top of the refrigerator or near the stove works well. Avoid drafty windows or cold countertops.
- Let it sit undisturbed for 24 hours.
Do not expect to see much activity on day one. You might notice a few tiny bubbles or a slight change in smell. That is fine. Your starter is just waking up.
Day 2: First Signs of Life
- Check your starter. It might look slightly different. Some bubbles may have formed on the surface. The smell might be a little sour or even a bit funky.
- Discard half of the starter. Yes, you have to throw some away. This is important for maintaining the right balance of food and yeast. Do not skip this step.
- Add 60 grams (about 1/2 cup) of all-purpose flour and 60 grams (about 1/4 cup) of room temperature water to the remaining starter.
- Stir well, scrape down the sides, cover, and return to its warm spot.
- Mark the height of the starter with a rubber band so you can track its rise tomorrow.
You might see more bubbles today, or you might not. Some starters are shy at first. Do not worry. Keep going.
Day 3: The Waiting Game
- Your starter might smell stronger today. Some people describe it as smelling like dirty socks or cheese. That is totally normal. The bacteria are establishing themselves.
- Discard half of the starter again.
- Feed with 60 grams (about 1/2 cup) of all-purpose flour and 60 grams (about 1/4 cup) of water.
- Stir, cover, and let it sit.
- Check the rubber band mark after 6 to 8 hours. You might notice the starter has risen slightly. If not, keep going.
Day 3 is often when beginners get discouraged because the starter seems inactive. Trust me, this is normal. The initial burst of activity on day 2 was from bad bacteria, not good yeast. Now the good bacteria are taking over, and it takes time.
Day 4: Patience Pays Off
- By day 4, your starter should start showing more consistent activity. You might see a layer of bubbles on top or small bubbles throughout.
- Discard half and feed with 60 grams (about 1/2 cup) of all-purpose flour and 60 grams (about 1/4 cup) of water.
- This time, pay attention to how long it takes to show activity. If it doubles in size within 12 hours, you are on the right track.
- If it still looks flat, do not panic. Some starters take longer. Keep feeding daily.
Day 5: Getting Stronger
- Your starter should smell more pleasant now. It might smell like yogurt or fresh bread. The funky smell should be fading.
- Discard half and feed again.
- Watch for the starter to double in size within 6 to 8 hours after feeding. This is a great sign that your starter is becoming active.
- If it doubles, you are almost there. If not, keep going. Some starters need a few extra days.
Day 6: Almost Ready
- Your starter should be consistently doubling in size within 6 to 8 hours. It should be bubbly, airy, and smell pleasantly sour.
- Discard half and feed one more time.
- If your starter doubles within 6 hours, it is ready for the float test tomorrow.
Day 7: The Float Test
- Feed your starter as usual in the morning.
- After 4 to 6 hours, drop a small spoonful of your starter into a glass of room temperature water. If it floats, your starter is active and ready to bake with.
- If it sinks, give it another day or two of feedings. The float test is not the only measure of readiness, but it is a good indicator.
- Congratulations! You now have a living sourdough starter. You can use it immediately or store it in the refrigerator for later.
Cooking Tips & Techniques
After making countless starters over the years, I have learned a few tricks that make the process smoother and more reliable. Here are my best tips for success.
Use a kitchen scale for consistency. Measuring by volume with cups is fine, but a scale gives you consistent ratios every time. I use a cheap digital scale that cost me fifteen dollars. It is one of the best investments I have made for my baking. When you feed your starter, you want equal parts flour and water by weight. That consistency helps your starter develop predictably.
Keep your starter warm but not hot. Yeast loves warmth. The ideal temperature for fermentation is around 75 to 80 degrees Fahrenheit. If your kitchen is cold, your starter will take longer to develop. I have placed my jar on top of the refrigerator where it is slightly warmer. In winter, I sometimes put it in the oven with the light on. Just make sure the oven is off and no one accidentally preheats it.
Do not overthink the discard. Throwing away starter feels wasteful, I know. But it is essential for maintaining the right balance. If you do not discard, your starter will become too acidic and stop growing. Save your discard in a separate container in the refrigerator. You can use it to make sourdough pancakes, crackers, waffles, or even discard brownies. It adds incredible flavor to baked goods.
Watch for the signs, not the clock. Every starter develops at its own pace depending on your kitchen temperature, flour type, and water quality. Do not get hung up on exact timing. Look for visual cues instead. Your starter should double in size, look bubbly and airy, and smell pleasantly sour before you use it. If it is flat and smells like nail polish remover, it is hungry and needs more frequent feedings.
Do not stress about perfection. I have killed starters. I have forgotten to feed them for three days. I have left them in a cold kitchen during a snowstorm. And every time, I have been able to revive them with a few consistent feedings. Sourdough starter is resilient. It forgives mistakes. Do not let perfectionism stop you from trying.
Variations & Adaptations
Once you have a healthy starter, the possibilities are endless. Here are some variations and adaptations to keep things interesting.
Gluten-Free Sourdough Starter. You can absolutely make a gluten-free starter using brown rice flour, sorghum flour, or a gluten-free all-purpose blend. The process is the same, but gluten-free starters tend to be thinner and more liquid. They also ferment faster, so you might need to feed them twice a day. Do not expect them to rise as dramatically as wheat-based starters. They are ready when they are bubbly and smell sour.
Whole Wheat or Rye Starter. If you prefer a more robust flavor, feed your starter with whole wheat or rye flour exclusively. These flours are packed with nutrients that produce a tangier, more complex starter. The texture will be thicker and the bubbles smaller, but the flavor payoff is incredible. I keep a rye starter going in my fridge just for making dark, hearty rye breads.
Stiff Starter vs. Liquid Starter. Most beginners make a liquid starter with equal parts flour and water. But you can also make a stiff starter with less water. Stiff starters have a lower hydration level and produce a milder, less tangy flavor. They are popular in Italian and French baking. To make a stiff starter, use 60 grams of flour and only 40 grams of water. The texture will be like play dough.
Flavor Variations. Once your starter is established, you can influence its flavor by adjusting your feeding schedule. Feed it more frequently for a milder flavor. Let it go longer between feedings for a tangier, more sour flavor. I like to feed my starter once a day for a balanced flavor. If I want extra tang for a specific bread recipe, I let it go 24 hours without feeding before using it.
Serving & Storage Suggestions
Once your starter is active and bubbly, you need to know how to store it properly so it stays healthy and ready to use.
Refrigerator Storage. If you do not plan to bake every day, store your starter in the refrigerator. Feed it, let it sit at room temperature for an hour, then cover it tightly and put it in the fridge. It will go dormant and can last up to two weeks without feeding. When you are ready to bake, take it out, feed it, and let it come back to room temperature. It usually takes one or two feedings to wake it up fully.
Room Temperature Storage. If you bake frequently, you can keep your starter on the counter. Feed it once a day at the same time. This keeps it active and ready to use at a moment’s notice. Just make sure you discard and feed consistently. A starter left at room temperature without feeding for more than 24 hours will become hungry and produce a strong acetone smell.
Freezing Your Starter. You can freeze sourdough starter for long-term storage. Spread it thinly on parchment paper, freeze it, then break it into pieces and store in a freezer bag. When you want to revive it, thaw a piece and feed it. It might take a few feedings to bounce back, but it will work.
Drying Your Starter. Another long-term storage method is drying. Spread your starter thinly on parchment paper and let it dry completely at room temperature. Break it into flakes and store in an airtight jar. To revive, crush the flakes and mix with equal parts flour and water. This is how sourdough starters have been preserved for centuries.
Using Discard. Do not throw away your discard! Store it in a separate container in the refrigerator and use it within a week. Sourdough discard is perfect for pancakes, waffles, crackers, quick breads, and even pizza dough. It adds a subtle tangy flavor that makes everything better. I have a whole collection of discard recipes that I rotate through.
Nutritional Information & Benefits
Sourdough bread made from a natural starter offers several nutritional benefits compared to bread made with commercial yeast. Here is what makes it special.
- Lower Glycemic Index : The fermentation process breaks down some of the carbohydrates and gluten, making sourdough bread easier to digest and causing a slower rise in blood sugar levels.
- Increased Nutrient Availability : Fermentation breaks down phytic acid, a compound that can block the absorption of minerals like iron, zinc, and magnesium. This means your body can actually use more of the nutrients in the bread.
- Natural Preservative : The lactic acid produced during fermentation acts as a natural preservative. Sourdough bread stays fresh longer than commercial bread without any additives.
- Gut Health : While most of the probiotics are killed during baking, the prebiotic fibers and organic acids produced during fermentation can still benefit your gut microbiome.
- Lower Gluten Content : The long fermentation process breaks down some of the gluten proteins. While sourdough is not gluten-free, many people with mild gluten sensitivities find it easier to digest.
Estimated nutritional values per slice of homemade sourdough bread (based on a standard recipe using white flour): approximately 120 calories, 23 grams of carbohydrates, 4 grams of protein, 0.5 grams of fat, and 1 gram of fiber. These values will vary based on your specific recipe and flour choices.
Conclusion
Making your own sourdough starter from scratch is one of those kitchen projects that feels intimidating until you actually do it. Then you wonder why you waited so long. This 7-day method strips away all the complexity and leaves you with a simple, reliable process that works. You do not need to be a professional baker. You do not need expensive equipment. You just need flour, water, and a little bit of patience.
The first time you bake a loaf of bread using your own starter, you will understand why people have been doing this for thousands of years. There is something deeply satisfying about creating something so fundamental from such simple ingredients. It connects you to generations of bakers who came before you.
I encourage you to experiment with your starter. Try different flours. Adjust your feeding schedule. Use your discard in creative ways. Your starter is a living thing, and it will adapt to your kitchen and your schedule. It becomes a reflection of how you bake.
Have you made your own sourdough starter? I would love to hear about your experience. Drop a comment below and let me know how it turned out. Share your first loaf, your discard creations, or any questions you have. And if you found this guide helpful, share it with a friend who has been thinking about trying sourdough. Happy baking!
Frequently Asked Questions
Why is my sourdough starter not bubbling?
This is the most common question I get. If your starter is not bubbling, it is usually because it is too cold or it needs more time. Check the temperature of your kitchen. If it is below 70 degrees Fahrenheit, your starter will be sluggish. Move it to a warmer spot. Also, make sure you are using unbleached flour. Bleached flour has fewer nutrients for the yeast to feed on. Give it a few more days of consistent feedings before you worry.
Can I use whole wheat flour instead of all-purpose flour?
Absolutely! Whole wheat flour is actually better for starting a sourdough starter because it contains more nutrients and natural yeast. It will ferment faster and produce a more robust starter. The only downside is that whole wheat starters tend to be a little less predictable in terms of rise. I recommend starting with a 50/50 mix of whole wheat and all-purpose flour for the first few days, then switching to all-purpose once your starter is established.
What do I do if my starter smells like acetone or nail polish remover?
That smell means your starter is hungry. It has consumed all the available food and is producing acids as a byproduct. This is not a problem. Simply discard half and feed it as usual. The smell should disappear within a few hours after feeding. If the smell persists, try feeding your starter twice a day for a couple of days until it stabilizes.
How long can I keep my sourdough starter in the refrigerator?
You can keep your starter in the refrigerator for up to two weeks without feeding. After that, it will start to develop a layer of dark liquid on top called hooch. That is just alcohol produced by the yeast. Pour it off or stir it back in, then feed your starter. It will bounce back after one or two feedings at room temperature. For long-term storage, I recommend drying or freezing your starter.
Can I skip the daily discard and just keep adding flour and water?
I do not recommend skipping the discard. If you keep adding flour and water without discarding, your starter will become too large and too acidic. The acidity will eventually kill the yeast and your starter will stop working. Discarding is essential for maintaining the right balance of food and waste products. Think of it like cleaning your pet’s cage. You would not just keep adding food without removing the waste.
Pin This Recipe!
The Best Easy Beginner Sourdough Starter (7-Day Method)

A simple, forgiving 7-day method for creating a bubbly, active sourdough starter from scratch using just flour and water. Perfect for beginners who want to bake artisan bread without complicated tools or schedules.
- Prep Time: 5 minutes per day
- Cook Time: 0 minutes
- Total Time: 7 days
- Yield: 1 active sourdough starter (about 1 cup)
- Category: Starter
- Cuisine: American
Ingredients
- All-purpose flour (unbleached preferred)
- Whole wheat flour (optional, recommended for first few days)
- Filtered or tap water (room temperature, non-chlorinated)
- Rye flour (optional, for faster fermentation)
Instructions
- Day 1: Combine 60 grams (about 1/2 cup) all-purpose flour and 60 grams (about 1/4 cup) room temperature water in a clean glass jar. Stir until no dry flour remains. Scrape down sides, cover loosely with a towel or coffee filter, and place in a warm spot. Let sit undisturbed for 24 hours.
- Day 2: Discard half the starter. Add 60 grams (about 1/2 cup) all-purpose flour and 60 grams (about 1/4 cup) room temperature water. Stir well, scrape down sides, cover, and return to warm spot. Mark the height with a rubber band.
- Day 3: Discard half the starter. Feed with 60 grams (about 1/2 cup) all-purpose flour and 60 grams (about 1/4 cup) water. Stir, cover, and let sit. Check after 6-8 hours for rise.
- Day 4: Discard half and feed with 60 grams (about 1/2 cup) all-purpose flour and 60 grams (about 1/4 cup) water. Watch for doubling in size within 12 hours.
- Day 5: Discard half and feed again. Look for doubling within 6-8 hours. The smell should become pleasant (yogurt-like).
- Day 6: Discard half and feed. Starter should consistently double within 6-8 hours and be bubbly and airy.
- Day 7: Feed as usual. After 4-6 hours, perform the float test: drop a spoonful of starter into a glass of room temperature water. If it floats, it’s ready to use. If not, continue daily feedings.
Notes
Use unbleached all-purpose flour for best results. Keep starter in a warm spot (75-80°F). If kitchen is cold, place on top of refrigerator or in oven with light on (oven off). Discard is essential for balance; save it for pancakes, crackers, or waffles. Starter is resilient; if neglected, revive with consistent feedings. The float test is a good indicator of readiness but not the only measure.
Nutrition
- Serving Size: 1 slice of bread (ma
- Calories: 120
- Fat: 0.5
- Carbohydrates: 23
- Fiber: 1
- Protein: 4
Keywords: sourdough starter, beginner sourdough, 7-day starter, homemade starter, easy sourdough, sourdough for beginners, natural yeast starter