I figured making a crispy chicken Caesar salad wrap would be a quick, straightforward grab-and-go lunch. It took about two tries and a small kitchen disaster to realize that getting the chicken crispy and the wrap fresh was a balancing act I hadn’t quite mastered. Honestly, I expected soggy lettuce or limp wraps, but what actually happened was a surprisingly crunchy, bright wrap that stayed fresh enough for meal prep without feeling like a sad, wilted mess by day three.
There I was, juggling the idea of comfort food with convenience — you know, that elusive “make-ahead” meal that doesn’t make you regret not eating it right away. The chicken, coated in a crunchy, golden crust, paired with Caesar salad’s creamy tang, wrapped snugly in a tortilla, seemed simple enough on paper. But the real trick was timing and layering to keep everything crisp and flavorful.
I’ve since made these wraps a staple in my weekly routine. They’ve saved me from the dreaded “what’s for lunch?” panic more times than I care to admit. Plus, they’re perfect for those who, like me, aren’t huge fans of eating cold leftovers that lose their charm. The subtle crunch of the chicken, the cool crunch of Romaine, and that punch of garlicky Caesar dressing — it all just clicks.
What’s stuck with me is how this recipe feels like a little victory every time I pull one from the fridge and unwrap it for a quick meal. No soggy surprises, no last-minute scrambling, just a solid, tasty wrap that hits the spot. If you’re looking for a meal prep recipe that makes weekday lunches way easier, this one’s got your back.
Why You’ll Love This Recipe
From my many kitchen trials and errors with these Easy Crispy Chicken Caesar Salad Wraps, I can say this recipe is genuinely a keeper. Here’s why it’s earned a spot in my meal prep lineup:
- Quick & Easy: Ready in under 30 minutes, it’s perfect for busy weeknights or prepping lunches for the week.
- Simple Ingredients: No need to hunt down fancy stuff — just pantry staples and fresh produce you probably already have.
- Perfect for Meal Prep: These wraps hold up well in the fridge, making them ideal for packing ahead without getting soggy.
- Crowd-Pleaser: Kids, coworkers, friends — they all give these wraps thumbs up thanks to the crispy chicken and savory dressing.
- Unbelievably Delicious: That crispy coating combined with creamy Caesar dressing is like comfort food that’s actually good for you.
What makes this recipe stand out? It’s the balance — the chicken is fried up just right to keep it crispy, but the Caesar salad is layered thoughtfully so the wrap won’t get soggy. I also like to toss the romaine in a light coating of dressing instead of drowning it, which keeps everything fresh and flavorful. Plus, swapping classic Caesar with a little twist, like adding fresh lemon juice or a sprinkle of Parmesan right before wrapping, gives it a subtle zing that’s addictive.
This isn’t just another chicken wrap recipe; it’s the kind that makes you pause mid-bite because the flavors and textures are spot-on. For anyone juggling meal prep with a busy schedule, these wraps offer a satisfying, no-fuss solution that tastes like you took way more time than you actually did.
What Ingredients You Will Need
This recipe uses simple, wholesome ingredients to deliver bold flavor and satisfying texture without the fuss. Most of these are pantry staples, plus fresh produce you can find year-round. Here’s what you’ll need to make your Easy Crispy Chicken Caesar Salad Wraps:
- Chicken Breast: Boneless, skinless, about 1 pound (450 g), sliced into strips for even cooking.
- All-Purpose Flour: ½ cup (60 g) to coat the chicken before frying, helps the breadcrumb stick.
- Eggs: 2 large, beaten, for the classic breading step.
- Panko Breadcrumbs: 1 cup (100 g), for that irresistible crunch. I recommend Japanese-style Panko for extra crispiness.
- Parmesan Cheese: ¼ cup (25 g), finely grated, mixed into the breadcrumbs for a savory boost.
- Romaine Lettuce: About 3 cups, chopped. Crisp and fresh is key here to keep the wrap from getting soggy.
- Caesar Dressing: ½ cup (120 ml), choose your favorite brand or homemade if you’re feeling fancy. I like a dressing with a bit of tang and garlic punch.
- Flour Tortillas: 6 large (about 10-inch / 25 cm diameter), soft but sturdy enough to hold the fillings. Whole wheat or gluten-free options work well too.
- Fresh Lemon Juice: 1 tablespoon, optional but adds brightness when tossed with the salad.
- Salt and Pepper: To taste, essential for seasoning the chicken and salad.
- Olive Oil or Vegetable Oil: For frying the chicken strips, about ¼ cup (60 ml).
If you want to swap ingredients, you can use almond flour instead of all-purpose flour for a gluten-free twist. Greek yogurt mixed with a bit of lemon juice can replace Caesar dressing for a lighter version. For an extra hit of flavor, try adding chopped fresh herbs like parsley or a pinch of smoked paprika to the breadcrumb mix.
Equipment Needed
- Large Skillet or Frying Pan: For frying the chicken strips. A non-stick or cast iron skillet works best to get a nice golden crust.
- Mixing Bowls: At least two — one for the egg wash and one for the flour and breadcrumb mixtures.
- Tongs or Fork: To turn the chicken strips carefully while frying without losing the coating.
- Paper Towels: To drain excess oil from the fried chicken and keep them crispy.
- Cutting Board and Knife: For prepping the chicken and chopping the romaine lettuce.
- Measuring Cups and Spoons: To get those flour and breadcrumb amounts just right.
- Spatula: Helpful for flipping and transferring the chicken strips.
- Optional: A salad spinner to dry the lettuce well, which really helps keep the wraps from getting soggy during storage.
If you don’t have a skillet, a shallow baking dish and oven broiler can work to crisp the chicken, but the stove-top method gives better control over the crust. Also, using a good-quality non-stick skillet makes cleanup easier and helps prevent the chicken from sticking and falling apart.
Preparation Method

- Prep the Chicken: Start by slicing 1 pound (450 g) of boneless, skinless chicken breasts into strips about ½ inch (1.25 cm) thick. Season lightly with salt and pepper.
- Set Up Breading Stations: In one shallow bowl, place ½ cup (60 g) all-purpose flour. In a second bowl, beat 2 large eggs. In a third, mix 1 cup (100 g) panko breadcrumbs with ¼ cup (25 g) grated Parmesan cheese.
- Coat the Chicken: Dredge each chicken strip first in the flour, shaking off excess, then dip into the beaten eggs, and finally coat thoroughly with the breadcrumb and Parmesan mixture. Press the crumbs in gently to help them stick.
- Heat the Oil: Pour about ¼ cup (60 ml) vegetable or olive oil into a large skillet over medium heat. Let it warm until shimmering but not smoking (about 3-4 minutes).
- Fry the Chicken: Add the coated chicken strips in batches without crowding the pan. Cook for 3-4 minutes per side, or until golden brown and cooked through (internal temperature should reach 165°F / 74°C). Use tongs to flip gently.
- Drain Excess Oil: Transfer cooked chicken to a paper towel-lined plate to soak up any excess oil and maintain crispiness.
- Prepare the Salad: Chop about 3 cups of fresh Romaine lettuce. Toss lightly with ½ cup (120 ml) Caesar dressing and 1 tablespoon fresh lemon juice if using. Don’t overdress — you want a light coating to keep the lettuce crisp.
- Assemble the Wraps: Lay out the 6 large flour tortillas. Divide the dressed romaine evenly among them, then top with 3-4 chicken strips per wrap. Add an extra sprinkle of Parmesan if you like.
- Wrap It Up: Fold in the sides of each tortilla and roll tightly from the bottom up to enclose the filling. Wrap each in parchment paper or foil for easy storage.
- Store or Serve: These wraps can be eaten immediately or stored in the refrigerator for up to 3 days. If prepping ahead, keep them chilled and unwrap just before eating to maintain that great texture.
Pro tip: If your chicken starts to lose crispiness after a day, a quick zap in the oven at 350°F (175°C) for 5 minutes refreshes the crunch without drying it out. Also, make sure your lettuce is very dry before tossing in dressing to avoid sogginess, a mistake I’ve made too often!
Cooking Tips & Techniques
Perfecting these Easy Crispy Chicken Caesar Salad Wraps isn’t rocket science, but a few tricks make a world of difference:
- Dry Your Lettuce Well: Use a salad spinner or pat it dry. Wet lettuce leads to soggy wraps faster than you want.
- Don’t Overdo the Dressing: Toss lightly so the salad stays crisp. You can always add more dressing when eating.
- Use Panko Breadcrumbs: They’re the secret to that light, airy crunch on the chicken. Regular breadcrumbs tend to get dense.
- Oil Temperature Matters: Too hot and the coating burns; too cool and it absorbs oil and gets greasy. Medium heat works best.
- Fry in Batches: Crowding the pan drops the oil temperature and leads to soggy chicken.
- Wrap Tightly: Rolling the tortilla snugly keeps everything together and makes eating less messy.
- Reheat Gently: If you want to reheat, a brief oven warm-up refreshes the chicken, but microwaving can make the wrap soggy.
I’ve learned the hard way that skipping the flour step or rushing the breading process results in bits falling off during frying. Taking the time to set up a proper breading station and gently pressing the coating on really pays off. Also, multitasking by prepping the salad while the chicken cooks saves time and keeps things moving smoothly.
Variations & Adaptations
Not everyone likes their Caesar salad the same way, and these wraps are flexible enough to handle a few twists:
- Grilled Chicken Option: Skip the frying and grill the chicken strips with a sprinkle of Italian seasoning for a lighter, smoky flavor.
- Low-Carb Version: Swap the flour tortillas for large lettuce leaves or low-carb wraps for a keto-friendly meal prep option.
- Spicy Kick: Add a dash of cayenne pepper or hot sauce to the breadcrumb mix or drizzle some sriracha in the wrap for heat.
- Dairy-Free: Use a dairy-free Caesar dressing and omit Parmesan from the breadcrumb coating. Nutritional yeast can be a nice substitute.
- Fresh Veggie Boost: Add thinly sliced cucumbers, cherry tomatoes, or shredded carrots inside the wrap for extra crunch and color.
One variation I personally love is swapping classic Caesar dressing for a creamy avocado cilantro dressing, which adds a fresh, herbaceous note that pairs beautifully with the crispy chicken. For a heartier version, adding crispy bacon bits or a slice of ripe avocado makes the wrap feel like a meal that’s anything but boring.
Serving & Storage Suggestions
These Easy Crispy Chicken Caesar Salad Wraps are best served chilled or at room temperature. They’re perfect as a quick lunch or light dinner — just unwrap and enjoy. For presentation, cut each wrap diagonally to show off the colorful layers inside, and serve with a side of crunchy veggie sticks or your favorite chips.
For storage, individually wrap the prepared wraps in parchment paper or foil and refrigerate. They’ll hold up well for up to 3 days, making them ideal for meal prep. Avoid wrapping them too tightly or stacking them, which can flatten the filling and lead to sogginess.
Reheating is a bit tricky since you want to keep the chicken crispy but not wilt the lettuce. My go-to method is to remove the lettuce and reheat the chicken strips separately in a 350°F (175°C) oven for 5 minutes, then reassemble the wrap. If you’re in a rush, microwaving wrapped in a paper towel for 30 seconds works but expect softer textures.
Flavors actually mellow and meld nicely if you let the wraps sit overnight, but the key is keeping that salad dressing light and fresh. Sometimes a quick squeeze of fresh lemon juice just before eating brightens everything right back up.
Nutritional Information & Benefits
Each Easy Crispy Chicken Caesar Salad Wrap offers an estimated 350-400 calories, depending on tortilla size and dressing amount. They provide a good balance of protein from the chicken, fiber from the romaine lettuce and tortilla, and healthy fats from the olive oil and dressing.
Key benefits include:
- High Protein: Chicken breast is lean and filling, supporting muscle repair and satiety.
- Vitamins & Minerals: Romaine lettuce offers vitamin A, K, and folate, essential for immune and bone health.
- Healthy Fats: Olive oil and Caesar dressing contribute monounsaturated fats, beneficial for heart health.
- Low in Added Sugars: This recipe keeps sugars minimal, focusing on savory flavors.
If you have dietary restrictions, swapping to gluten-free tortillas or dairy-free dressings makes this recipe inclusive without sacrificing flavor. Just watch the breading ingredients if gluten is a concern.
Conclusion
Easy Crispy Chicken Caesar Salad Wraps have become one of my favorite meal prep hacks because they’re just that dependable — crispy, fresh, and simple to make. What I love most is how easy it is to customize them to suit whatever mood or dietary need I’m dealing with that week. Plus, having a ready-to-go lunch that actually tastes great cold or warmed up is a total win.
Cooking is about finding those recipes that feel like a small daily win, and this wrap has done exactly that for me. If you give this recipe a try, don’t hesitate to tweak it with your favorite extras or spices — that’s how it really becomes your own.
Would love to hear about your twists or how these wraps fit into your meal prep routine!
Frequently Asked Questions
Can I use rotisserie chicken instead of frying my own?
Absolutely! Using shredded rotisserie chicken saves time. Just toast the chicken strips in a skillet with a little oil to add some crispness before assembling the wraps.
What type of tortilla works best for these wraps?
Large flour tortillas about 10 inches (25 cm) in diameter are ideal because they’re flexible and hold the filling well. Whole wheat or gluten-free tortillas are great alternatives depending on your preference.
How do I keep the wraps from getting soggy during meal prep?
Dry your lettuce thoroughly, toss lightly with dressing, and wrap the tortillas tightly in parchment paper. Store refrigerated and assemble or add dressing fresh if possible.
Can I bake the chicken instead of frying it?
Yes, bake coated chicken strips at 400°F (200°C) for about 15-20 minutes, flipping halfway, until golden and cooked through. The texture will be slightly different but still tasty.
Are these wraps freezer-friendly?
They’re best fresh or refrigerated for up to 3 days. Freezing is not recommended because the lettuce and dressing don’t freeze well and can become watery upon thawing.
For more easy and crowd-pleasing recipes, you might enjoy the crispy buffalo chicken tater tot casserole or the savory bacon jam sliders with cheddar — both fantastic for meal prep and game day snacking!
Pin This Recipe!
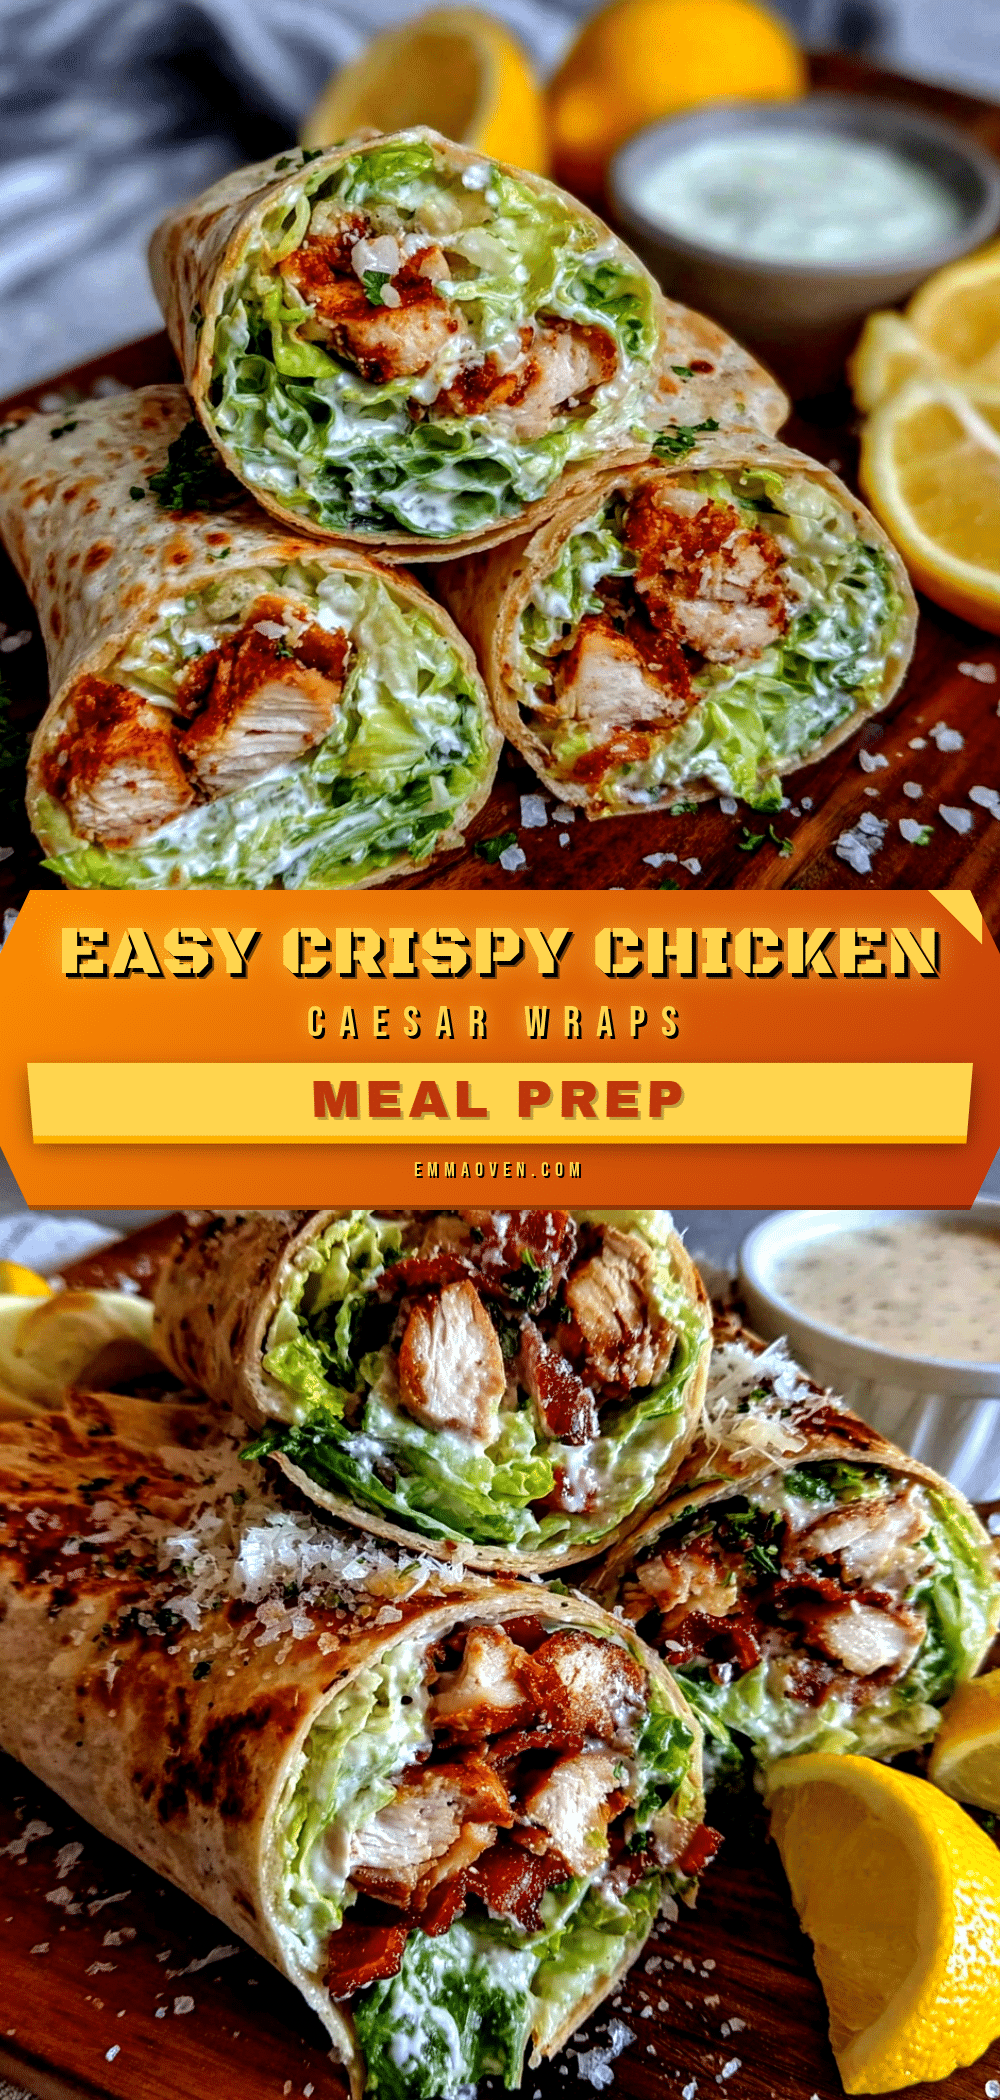
Easy Crispy Chicken Caesar Salad Wraps for Perfect Meal Prep

A quick and easy crispy chicken Caesar salad wrap recipe perfect for meal prep, featuring crunchy chicken, fresh romaine, and creamy Caesar dressing wrapped in a soft tortilla.
- Prep Time: 15 minutes
- Cook Time: 15 minutes
- Total Time: 30 minutes
- Yield: 6 servings 1x
- Category: Main Course
- Cuisine: American
Ingredients
- 1 pound boneless, skinless chicken breast, sliced into strips
- ½ cup all-purpose flour (60 g)
- 2 large eggs, beaten
- 1 cup panko breadcrumbs (100 g), preferably Japanese-style
- ¼ cup grated Parmesan cheese (25 g)
- 3 cups chopped romaine lettuce
- ½ cup Caesar dressing (120 ml)
- 6 large flour tortillas (about 10-inch diameter)
- 1 tablespoon fresh lemon juice (optional)
- Salt and pepper to taste
- ¼ cup olive oil or vegetable oil (60 ml) for frying
Instructions
- Slice chicken breasts into ½ inch thick strips and season with salt and pepper.
- Set up breading stations: place flour in one bowl, beaten eggs in another, and mix panko breadcrumbs with Parmesan cheese in a third bowl.
- Dredge each chicken strip in flour, dip into eggs, then coat thoroughly with breadcrumb and Parmesan mixture, pressing gently to adhere.
- Heat oil in a large skillet over medium heat until shimmering but not smoking (about 3-4 minutes).
- Fry chicken strips in batches without crowding, cooking 3-4 minutes per side until golden brown and cooked through (internal temperature 165°F).
- Drain cooked chicken on paper towels to remove excess oil and keep crispy.
- Chop romaine lettuce and toss lightly with Caesar dressing and lemon juice if using, ensuring a light coating.
- Lay out tortillas and divide dressed romaine evenly among them, then top with 3-4 chicken strips per wrap. Add extra Parmesan if desired.
- Fold in sides of tortillas and roll tightly from bottom up to enclose filling. Wrap each in parchment paper or foil for storage.
- Serve immediately or refrigerate up to 3 days. Reheat chicken in oven at 350°F for 5 minutes to refresh crispiness before assembling if desired.
Notes
Dry lettuce thoroughly to avoid soggy wraps. Toss lettuce lightly with dressing. Fry chicken in batches to maintain oil temperature and crispiness. Reheat chicken in oven to refresh crispiness. Wrap tortillas tightly for storage. Variations include grilling chicken, using low-carb wraps, or dairy-free dressings.
Nutrition
- Serving Size: 1 wrap
- Calories: 350400
- Sugar: 3
- Sodium: 600
- Fat: 18
- Saturated Fat: 4
- Carbohydrates: 30
- Fiber: 3
- Protein: 30
Keywords: chicken wrap, Caesar salad wrap, crispy chicken, meal prep, easy lunch, quick dinner, healthy wrap