“Wow, those cookies look like little explosions!” my niece exclaimed, eyes wide as she pointed at the tray of sugar cookies decorated with vibrant royal icing. Honestly, I didn’t expect much when I first tried this recipe. I was just aiming for a quick, festive treat to brighten up a last-minute celebration. But those Perfect Firework Sugar Cookies with Royal Icing turned out to be a real showstopper.
It all started when a friend casually dropped by with a box of store-bought sugar cookies for our Fourth of July barbecue. Don’t get me wrong—they were fine. But after a day of experimenting with cookie dough and icing, I wanted something that felt homemade but still had that wow factor. I found myself mixing and tweaking late into the night, testing different icing consistencies and color combos to capture the sparkle of fireworks on a cookie canvas.
What surprised me most was how approachable this recipe is, even if royal icing usually feels intimidating or fussy. The dough is soft yet sturdy enough to hold shapes perfectly, and the icing dries with a smooth, glossy finish that’s just begging to be admired before eating. Over several tries, these cookies became my go-to for celebrations—not just for Independence Day, but for birthdays, anniversaries, and any time a little extra sparkle is needed.
There’s something quietly satisfying about watching the colors spread and settle, like catching a tiny firework in your hands. And that’s why these cookies stuck with me—they’re more than a dessert. They’re a small, joyful moment you can bake and share.
Why You’ll Love This Recipe
This Perfect Firework Sugar Cookies recipe with royal icing is genuinely one of those rare treats that looks as fantastic as it tastes. Here’s why it’s become a favorite in my kitchen:
- Quick & Easy: The dough comes together in about 15 minutes, and the whole process is perfect for busy days or last-minute parties.
- Simple Ingredients: You probably already have everything on hand—basic pantry staples like flour, sugar, butter, and eggs.
- Perfect for Celebrations: Whether it’s a holiday, birthday, or just a cheerful weekend, these cookies bring instant festive vibes.
- Crowd-Pleaser: Kids love the colorful designs, and adults appreciate the classic sugar cookie flavor with a smooth royal icing finish.
- Unbelievably Delicious: The cookies balance a tender crumb with just enough crisp on the edges, while the royal icing adds a sweet, glossy touch that sets this recipe apart.
What makes this recipe uniquely mine? I’ve honed the icing to be thick enough for detailed piping but easy enough to flood the cookies without pooling or cracking. Plus, I use a hint of vanilla and almond extract in both the dough and icing for a subtle depth of flavor that surprises everyone. This isn’t your run-of-the-mill sugar cookie; it’s a little festive masterpiece you can actually pull off at home.
Honestly, these cookies have turned more than one casual hangout into a memory worth savoring. The way the colors pop and the soft crumb melts in your mouth makes you pause—like a tiny celebration in every bite.
What Ingredients You Will Need
This recipe relies on straightforward ingredients that come together to create a cookie base perfect for decorating with royal icing. The components are mostly pantry staples, with options for easy swaps if needed.
- For the Sugar Cookie Dough:
- 2 ¾ cups (345 g) all-purpose flour, sifted (for the best texture, I use King Arthur Flour)
- 1 teaspoon baking powder
- ½ teaspoon salt
- 1 cup (227 g) unsalted butter, softened (room temperature, this makes all the difference)
- 1 ½ cups (300 g) granulated sugar
- 1 large egg, room temperature
- 2 teaspoons vanilla extract (pure vanilla extract works best here)
- ½ teaspoon almond extract (optional but adds lovely aroma)
- For the Royal Icing:
- 4 cups (480 g) powdered sugar, sifted (I prefer Domino or C&H for smooth icing)
- 3 tablespoons meringue powder (makes icing stable and easy to handle; you can substitute with 2 egg whites but meringue powder is safer and easier)
- 7-8 tablespoons warm water (adjust for desired consistency)
- 1 teaspoon vanilla extract or clear almond extract (for a pure white finish)
- Gel food coloring in red, blue, yellow, and white (gel colors give vibrant, not runny, hues)
Looking for substitutions? Use gluten-free flour blends if you want a gluten-free batch. For dairy-free, swap the butter with vegan margarine or coconut oil, but note this may slightly affect texture. The almond extract in the dough is optional but really makes the flavor pop, so I recommend trying it at least once.
Equipment Needed
- Mixing bowls (medium and large)
- Electric hand mixer or stand mixer (makes creaming butter and sugar a breeze)
- Measuring cups and spoons (accuracy counts here!)
- Rolling pin (a silicone one works great to prevent sticking)
- Cookie cutters (star shapes or firework-inspired designs work best)
- Baking sheets lined with parchment paper or silicone mats (prevents sticking and browning)
- Wire cooling racks (helps cookies cool evenly)
- Small piping bags or plastic sandwich bags with the corner snipped (for royal icing decorating)
- Toothpicks or scribe tools (for flooding icing and fixing small mistakes)
If you don’t have a stand mixer, an electric hand mixer is perfect. For rolling, I once used a clean wine bottle in a pinch — not ideal, but it worked! For piping, reusable silicone bags are budget-friendly and easy to clean.
Preparation Method
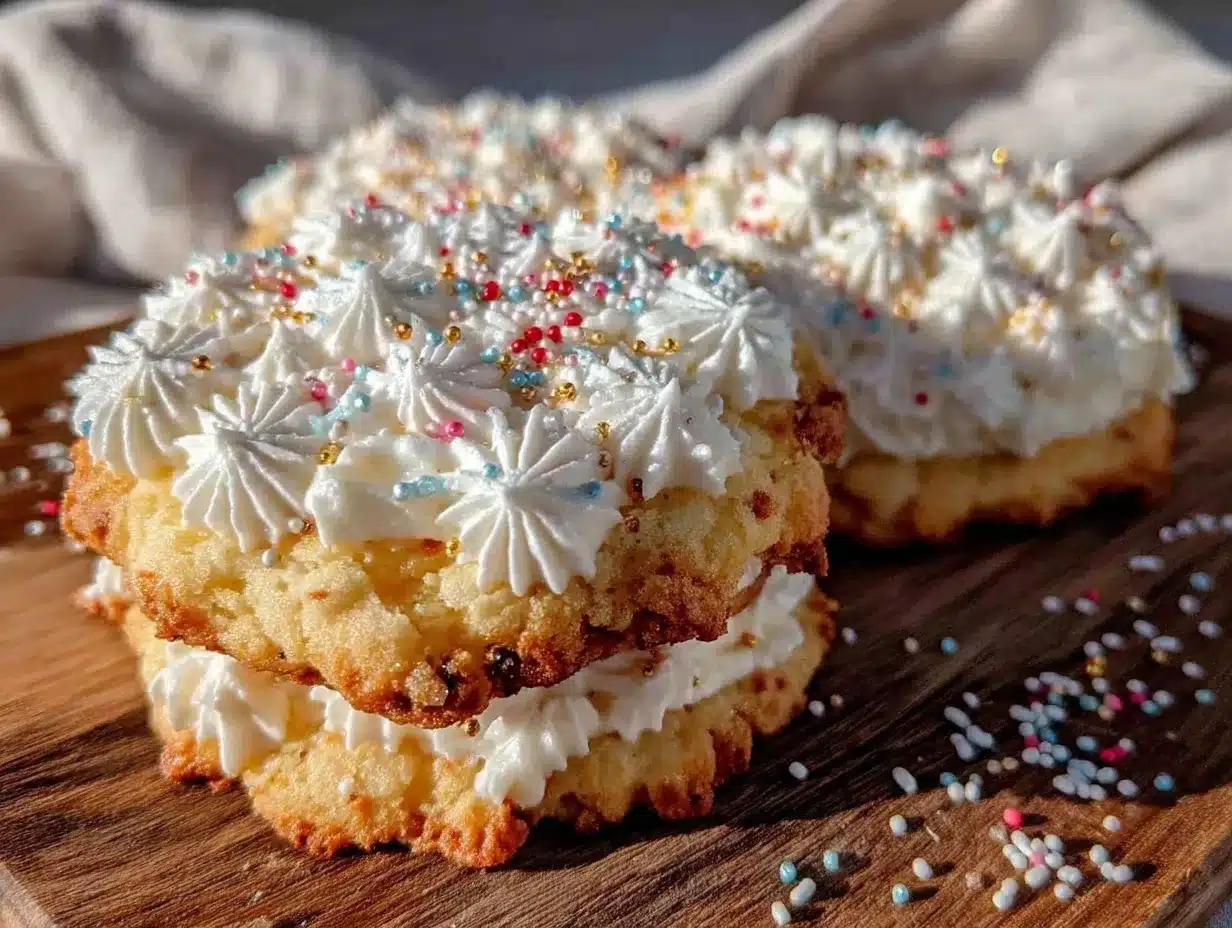
- Mix the Dry Ingredients: In a medium bowl, whisk together the sifted flour, baking powder, and salt. Set aside. This ensures even distribution and no clumps.
Time: 5 minutes - Cream Butter and Sugar: Using a mixer, beat softened butter and granulated sugar on medium speed until light and fluffy—about 3-4 minutes. You’ll notice the mixture lighten in color and become airy, which is key for tender cookies.
Tip: Don’t rush this step; it makes a big difference.
Time: 5 minutes - Add Egg and Extracts: Beat in the egg, vanilla, and almond extract until fully combined. The dough might look a bit wet but that’s okay.
Time: 2 minutes - Combine Dry and Wet: Gradually add the flour mixture to the butter mixture, mixing on low speed just until incorporated. Overmixing here can toughen the dough.
Tip: Scrape down the sides of the bowl to get everything evenly mixed.
Time: 3 minutes - Chill the Dough: Divide dough into two discs, wrap in plastic, and refrigerate for at least 1 hour (or up to overnight). This firms up the dough, making it easier to roll and cut precise shapes.
Tip: Don’t skip this step unless you want cookies that spread too much.
Time: 1 hour+ - Preheat Oven and Prepare Baking Sheets: Set oven to 350°F (175°C). Line baking sheets with parchment paper or silicone mats.
Time: 10 minutes - Roll and Cut: On a floured surface, roll one dough disc to about ¼ inch (6 mm) thickness. Use your firework-shaped cookie cutters or stars to cut out shapes. Transfer carefully to baking sheets, spacing about 1 inch (2.5 cm) apart.
Tip: If dough softens too much, pop it back in the fridge for 10 minutes before cutting.
Time: 15 minutes - Bake: Bake cookies for 8-10 minutes, until edges are just golden. The centers should still look slightly soft.
Tip: Remove early rather than late—cookies continue to firm as they cool.
Time: 8-10 minutes - Cool Completely: Transfer cookies to wire racks to cool fully. Decorating warm cookies will melt the icing.
Time: 30 minutes - Prepare Royal Icing: In a mixing bowl, combine powdered sugar, meringue powder, and vanilla. Add warm water a tablespoon at a time, mixing on low until icing reaches thick but pipeable consistency.
Tip: For flooding, thin icing slightly with more water.
Time: 10 minutes - Color and Decorate: Divide icing into small bowls and tint with gel colors. Use piping bags for outlining cookie edges with thicker icing, then flood the centers with thinned icing using a spoon or piping bag. Use toothpicks to spread and fix edges.
Tip: Work quickly but gently. Let outlines dry a bit before flooding to avoid colors running.
Time: 30-45 minutes (plus drying time) - Let Icing Set: Leave decorated cookies at room temperature for 4-6 hours (overnight is best) to harden the royal icing.
Tip: Store in a single layer to avoid smudging.
Time: 4-6 hours
Cooking Tips & Techniques
Royal icing can be intimidating, but a few tricks make all the difference:
- Consistency is King: For outlines, keep icing thick enough to hold shape but soft enough to pipe smoothly. For flooding, thin icing with water until it flows like syrup but isn’t runny.
- Use Gel Colors: Unlike liquid food coloring, gel won’t thin your icing or fade after drying.
- Don’t Skip Sifting: Powdered sugar clumps can mess with smooth icing. Sift before mixing for velvety texture.
- Practice Piping: If you’re new to decorating, try piping on parchment paper first. It builds confidence and helps avoid mistakes on cookies.
- Work in Layers: Let outlines dry before flooding. This keeps colors crisp and prevents bleeding.
- Store Properly: Keep cookies in a cool, dry place. Humidity softens royal icing.
I learned the hard way that rushing drying times results in smudges and cracked icing. Patience really pays off here. Also, I once forgot the almond extract and felt the flavor was missing something—it’s a subtle but important note.
Variations & Adaptations
Want to switch things up? Here are some ideas I’ve tried or considered:
- Dietary Swaps: Use almond or oat flour for gluten-free cookies. Swap butter for coconut oil or vegan margarine to make dairy-free versions.
- Flavor Twists: Add lemon or orange zest to the dough for a citrus spark. You can also swap vanilla for maple or coconut extract for different notes.
- Seasonal Themes: Instead of fireworks, use cookie cutters for snowflakes or flowers and adjust icing colors accordingly. For Halloween, try spooky shapes with black and orange icing.
- Texture Play: Mix in finely chopped nuts or sprinkles into the dough for a surprise crunch.
- Alternative Decorating: Skip royal icing and use colored sugar sprinkles or a simple glaze made with powdered sugar and lemon juice for a faster option.
One personal favorite is swapping out some of the powdered sugar in the icing for cornstarch to get a matte finish that contrasts nicely with glossy flood areas. It’s subtle but adds dimension.
Serving & Storage Suggestions
These cookies shine best when served at room temperature, allowing the icing’s flavor and texture to fully come through. Arrange them on a festive platter to make a statement at your next gathering.
They pair beautifully with a cold glass of milk, iced tea, or even a sparkling lemonade for a refreshing balance. I’ve often served them alongside savory crowd-pleasers like crispy buffalo chicken tater tot casserole for an all-around satisfying spread.
For storage, keep the cookies in an airtight container at room temperature for up to 5 days. Avoid stacking them while the icing is still wet to prevent smudges. You can also freeze baked, undecorated cookies for up to 3 months; just thaw and decorate when ready.
Reheat cookies gently in a warm oven (about 200°F/95°C for 5 minutes) if you want to refresh the texture before serving. Just don’t use a microwave, or the icing might soften too much.
Flavors deepen subtly if you let cookies rest a day after decorating, so if you have patience, it’s worth the wait for a richer taste and firmer icing.
Nutritional Information & Benefits
Each cookie (based on a 3-inch diameter) packs roughly:
| Calories | 160 |
|---|---|
| Fat | 7 g |
| Carbohydrates | 22 g |
| Sugar | 14 g |
| Protein | 1 g |
The sugar cookies provide quick energy from carbohydrates, and the butter contributes some fat for satiety. The royal icing is mostly sugar but adds a lovely texture and visual appeal. If you want a lighter version, consider reducing sugar slightly or using a sugar substitute in the dough.
Key ingredients like vanilla and almond extract add flavor without calories, and opting for natural flavors over artificial ones improves overall quality. The recipe is naturally gluten-based but can be adapted with gluten-free flour blends, and it contains eggs and dairy, so keep those allergens in mind.
From a wellness perspective, I think of these as an occasional treat to celebrate moments that matter. Baking them at home means you control the ingredients and can avoid preservatives or artificial dyes often found in store-bought decorated cookies.
Conclusion
Making these Perfect Firework Sugar Cookies with Royal Icing has become a little tradition for me whenever celebrations roll around. The bright colors, the soft yet sturdy cookie, and the smooth, glossy icing all come together to create something that feels special but is surprisingly doable. I love how customizable the recipe is, whether you want to tweak flavors or adjust for dietary needs.
Give this recipe a try and make it your own—add your favorite colors, shapes, or even a sprinkle of edible glitter if you’re feeling fancy. It’s a fun way to bring a pop of joy to any gathering and a sweet reminder that sometimes the simplest ingredients can make the biggest impact.
If you try making these cookies, I’d love to hear how you decorated them or what occasion you baked for—sharing those stories makes the whole process even sweeter.
Frequently Asked Questions
Can I make the dough ahead and freeze it?
Yes! Wrap the dough tightly in plastic wrap and freeze for up to 3 months. Thaw in the fridge overnight before rolling and cutting.
How long does royal icing take to dry completely?
Typically, royal icing needs 4-6 hours at room temperature to harden fully. For best results, let it dry overnight.
Can I use liquid food coloring instead of gel?
Gel food coloring is recommended because it provides vibrant colors without thinning the icing. Liquid coloring can make the icing too runny.
What if my cookies spread too much during baking?
This usually means the dough was too warm or not chilled enough. Make sure to chill the dough for at least an hour before baking and avoid overworking it.
Is it okay to use egg whites instead of meringue powder for royal icing?
You can use fresh egg whites, but meringue powder is safer and more stable, especially if cookies are stored for a while or sent as gifts.
Pin This Recipe!

Perfect Firework Sugar Cookies Recipe with Easy Royal Icing for Celebrations

These festive sugar cookies feature a tender crumb and a smooth, glossy royal icing decorated to look like fireworks, perfect for any celebration.
- Prep Time: 15 minutes
- Cook Time: 8-10 minutes
- Total Time: 5 hours 30 minutes to 6 hours 10 minutes (including chilling and drying time)
- Yield: 24 cookies 1x
- Category: Dessert
- Cuisine: American
Ingredients
- 2 ¾ cups (345 g) all-purpose flour, sifted
- 1 teaspoon baking powder
- ½ teaspoon salt
- 1 cup (227 g) unsalted butter, softened (room temperature)
- 1 ½ cups (300 g) granulated sugar
- 1 large egg, room temperature
- 2 teaspoons vanilla extract
- ½ teaspoon almond extract (optional)
- 4 cups (480 g) powdered sugar, sifted
- 3 tablespoons meringue powder
- 7–8 tablespoons warm water
- 1 teaspoon vanilla extract or clear almond extract
- Gel food coloring in red, blue, yellow, and white
Instructions
- Mix the sifted flour, baking powder, and salt in a medium bowl; set aside.
- Cream softened butter and granulated sugar with a mixer on medium speed until light and fluffy, about 3-4 minutes.
- Beat in the egg, vanilla extract, and almond extract until fully combined.
- Gradually add the flour mixture to the butter mixture, mixing on low speed just until incorporated. Scrape down the sides of the bowl as needed.
- Divide dough into two discs, wrap in plastic, and refrigerate for at least 1 hour or up to overnight.
- Preheat oven to 350°F (175°C). Line baking sheets with parchment paper or silicone mats.
- Roll one dough disc on a floured surface to about ¼ inch (6 mm) thickness. Cut out shapes using firework-shaped or star cookie cutters. Transfer to baking sheets, spacing about 1 inch apart.
- Bake cookies for 8-10 minutes until edges are just golden and centers look slightly soft. Remove early rather than late.
- Transfer cookies to wire racks to cool completely before decorating.
- Prepare royal icing by combining powdered sugar, meringue powder, and vanilla in a bowl. Add warm water a tablespoon at a time, mixing on low until icing reaches thick but pipeable consistency. Thin icing slightly with more water for flooding.
- Divide icing into small bowls and tint with gel food coloring. Use piping bags to outline cookie edges with thicker icing, then flood centers with thinned icing using a spoon or piping bag. Use toothpicks to spread and fix edges. Let outlines dry before flooding to avoid colors running.
- Let decorated cookies dry at room temperature for 4-6 hours or overnight to harden the royal icing.
Notes
[‘Chill dough for at least 1 hour to prevent spreading during baking.’, ‘Use gel food coloring for vibrant colors without thinning the icing.’, ‘Practice piping on parchment paper before decorating cookies.’, ‘Let outlines dry before flooding to prevent color bleeding.’, ‘Store cookies in a cool, dry place and avoid stacking while icing is wet.’, ‘Freeze dough wrapped tightly for up to 3 months; thaw overnight before use.’, ‘Royal icing needs 4-6 hours to dry fully; overnight drying is best.’, ‘Reheat cookies gently in a warm oven (200°F/95°C for 5 minutes) if desired; avoid microwaving.’]
Nutrition
- Serving Size: 1 cookie (3-inch dia
- Calories: 160
- Sugar: 14
- Fat: 7
- Carbohydrates: 22
- Protein: 1
Keywords: sugar cookies, royal icing, firework cookies, celebration cookies, festive cookies, easy sugar cookies, holiday cookies, decorated cookies