Homemade Cinnamon Vanilla Pear Preserves: Easy Canning Recipe
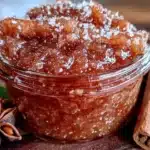
These pear preserves are thick enough to stay on a biscuit without dripping, but soft enough to spread without tearing your toast. The flavor is balanced—the pears bring natural sweetness, cinnamon adds warmth, and vanilla rounds everything into something that tastes like a slow Sunday morning.
- Prep Time: 15 minutes
- Cook Time: 35 minutes
- Total Time: 50 minutes
- Yield: 4 half-pint jars 1x
- Category: Preserves
- Cuisine: American
Ingredients
- 4 pounds pears (Bartlett or Bosc), peeled, cored, and diced into ½-inch cubes
- 2 cups granulated sugar (can reduce to 1½ cups if pears are very sweet)
- ¼ cup fresh lemon juice (from about 2 lemons)
- 1½ teaspoons ground cinnamon (Ceylon preferred, or Cassia)
- 2 teaspoons pure vanilla extract
- 1 vanilla bean (optional, but recommended)
- 1 tablespoon unsalted butter
Instructions
- Prep the pears: Peel, core, and dice 4 pounds of pears into ½-inch cubes. Work quickly to prevent browning, or toss the diced pears in a bowl with the lemon juice as you go.
- Macerate the fruit: In your large pot, combine the diced pears, 2 cups of sugar, and ¼ cup of lemon juice. Stir to coat the pears evenly. Let this sit for 20 to 30 minutes. The sugar draws out the pear’s natural juices, creating a syrup before you even turn on the heat.
- Add the spices: Stir in 1½ teaspoons of cinnamon. If you’re using a vanilla bean, split it lengthwise, scrape the seeds into the pot, and drop the pod in as well. If you’re using extract, hold off until later.
- Cook the preserves: Place the pot over medium-high heat and bring the mixture to a boil, stirring occasionally. Once it’s boiling, reduce the heat to medium-low so it maintains a steady simmer. Cook for 25 to 35 minutes, stirring every few minutes to prevent sticking. The pears will soften and break down, and the liquid will reduce into a thick, syrupy consistency.
- Test for doneness: After about 25 minutes, start checking the preserves. Spoon a small amount onto a cold plate and tilt it. If the preserves move slowly and leave a trail, they’re ready. If they run like water, keep cooking and check again in 5 minutes. You can also use a kitchen thermometer—the mixture should reach 220°F.
- Add the vanilla extract and butter: Once the preserves are thick enough, remove the pot from the heat. If you used a vanilla bean, fish out the pod (rinse and dry it—you can bury it in sugar to make vanilla sugar). Stir in 2 teaspoons of vanilla extract and 1 tablespoon of butter. The butter will melt and help reduce any foaming.
- Mash or blend to desired texture: Use a potato masher for chunky preserves or an immersion blender for a smoother texture. I usually give it 4 or 5 mashes—enough to break down most of the pears but leave a few small pieces for texture.
- Fill the jars: Ladle the hot preserves into sterilized jars, leaving ¼ inch of headspace. Wipe the rims clean with a damp paper towel, then screw on the lids and bands until fingertip-tight.
- Process in a water bath: Place the jars in a boiling water bath, ensuring they’re covered by at least 1 inch of water. Boil for 10 minutes (adjust for altitude if needed). Remove the jars and let them cool completely on a towel-lined counter. You’ll hear the satisfying pops as the lids seal.
Notes
The consistency changes as the preserves cool—what looks thin in the pot will thicken significantly once jarred and chilled. Don’t overcompensate by cooking it too long. Taste your pears before starting; if not very sweet, add an extra ¼ cup of sugar. If intensely sweet, cut back a little. If new to canning, you can skip the water bath and store in the refrigerator for up to 3 weeks. The flavor improves after a few days in the jar.
Nutrition
- Serving Size: 2 tablespoons
- Calories: 60
- Sugar: 12
- Carbohydrates: 15
Keywords: pear preserves, cinnamon vanilla pear preserves, homemade preserves, easy canning recipe, pear jam, vanilla pear preserves, cinnamon pear preserves, small batch preserves