My daughter took a huge bite of one of these homemade freezer-friendly Uncrustables and just paused, eyes wide, then asked for three more before dinner. Honestly, I was half expecting the usual “it’s good” nod, but no—this was the kind of moment where I realized I’d stumbled on something special. The soft, sealed edges, the perfect peanut butter and jelly ratio, and the fact that these were ready to grab straight from the freezer made snack time feel effortless and, well, kind of magical. Watching her munch quietly in that way only kids do when they’re really savoring something made me think, why haven’t I made these before? It’s not that the store-bought versions aren’t convenient, but homemade? Totally different vibe.
The idea actually came from a hectic weekday morning when I noticed my husband eyeing the kids’ lunchbox and wishing he had something just as quick but less processed. I started messing around in the kitchen, trying to create a sandwich that could freeze well without getting soggy or crumbly. After a couple of trial runs (and a few sticky fingers), these freezer-friendly Uncrustables were born. The soft bread, the jam that stays put, and that sealed edge that keeps everything neatly inside—it all worked out better than I thought. It’s funny how a simple snack can turn into a quiet little family win. Plus, they freeze like a dream, meaning mornings aren’t a scramble but a smooth start.
So yeah, these homemade freezer-friendly Uncrustables stuck with me not just because they taste great, but because they changed how we do snacks around here. No more last-minute sandwich panic or crumbly messes in lunchboxes. Just grab, thaw (or eat cold if you prefer), and enjoy. And honestly, if my daughter’s reaction is anything to go by, these will be a staple for a long time to come.
Why You’ll Love This Recipe
Making your own freezer-friendly Uncrustables is honestly a game-changer. I’ve tested this recipe countless times, tweaking the jam-to-peanut butter ratio, trying different breads, and figuring out the best way to seal the edges so nothing leaks in the freezer. The result? A snack that’s easy, reliable, and tastes better than the store-bought kind.
- Quick & Easy: Comes together in about 20 minutes, so it’s perfect for busy mornings or last-minute snacks.
- Simple Ingredients: You probably already have everything in your pantry—no fancy trips required.
- Perfect for Lunchboxes & On-the-Go: These sandwiches are portable, mess-free, and kid-approved.
- Crowd-Pleaser: From toddlers to adults, everyone seems to love the classic peanut butter and jelly combo in this neat package.
- Unbelievably Delicious: The sealed edges lock in the flavors and keep the bread soft, so every bite feels fresh and homemade.
This isn’t just another peanut butter and jelly sandwich slapped together to freeze. The trick is in the sealing—pressing the edges tight creates a little pocket that holds the filling without leaking or drying out. Plus, using a spreadable jelly instead of chunky jam helps keep things smooth and consistent. I even like to use a slightly thicker bread (nothing too dense) so the sandwich holds up well but still tastes soft and fresh. It’s almost like a little surprise when you bite in.
Honestly, making these myself has been a nice little reminder that sometimes the simplest recipes bring the biggest joy, especially when they save you time and stress. They’re a lifesaver for busy days and a little hug of comfort when you need it. Plus, if you’re a fan of easy breakfast casseroles or hearty snacks, these Uncrustables fit right in with those kind of crowd-pleasing recipes like the easy cheesy tater tot breakfast casserole or the crispy buffalo chicken tater tot casserole. Snack time just got a whole lot simpler.
What Ingredients You Will Need
This recipe uses simple, wholesome ingredients to deliver bold flavor and satisfying texture without the fuss. Most of these are pantry staples, and the best part is you can customize the fillings easily if you want to switch things up.
- Bread: Soft white sandwich bread (preferably slightly thicker slices, but standard works fine). Avoid super crusty or very thin bread.
- Peanut Butter: Creamy peanut butter works best for easy spreading and sealing. I like to use natural peanut butter without added sugar or oils.
- Jelly or Jam: Smooth grape jelly or strawberry jam is classic. Avoid chunky jams to prevent tearing the bread. You can also go for sugar-free or homemade jam if you want to keep it healthier.
- Optional Butter or Margarine: A thin layer on the bread before spreading the peanut butter can help prevent sogginess (especially if you plan to freeze for a while).
Substitution tips:
- Gluten-Free Option: Use gluten-free sandwich bread with a soft texture.
- Nut-Free: Try sunflower seed butter or soy nut butter instead of peanut butter.
- Vegan/Dairy-Free: Most peanut butters and jams are naturally vegan, but check labels just in case.
- Flavor Variations: Swap jelly for Nutella, honey, or even cream cheese for a different twist.
For best results, pick a bread brand that stays soft after freezing—my go-to is a good-quality sandwich loaf from the bakery section or a trusted store brand. For peanut butter, I prefer a spread that’s smooth but not runny, which helps keep the edges sealed tight. When it comes to jelly, spreading it evenly and thinly is key to avoiding leaks or soggy spots.
Equipment Needed
- Round Sandwich Cutter: A 3-inch or 3.5-inch round cutter or cookie cutter is ideal for shaping the sandwiches and sealing the edges. If you don’t have one, a wide-mouth glass or cup can work in a pinch.
- Baking Sheet or Tray: For laying out the sandwiches before freezing. Lining it with parchment paper helps prevent sticking.
- Spoon or Small Spreader: For evenly spreading peanut butter and jelly.
- Plastic Wrap or Freezer Bags: For wrapping individual sandwiches or storing multiple together.
Personally, I’ve found that a good-quality sandwich cutter makes the process way faster and tidier, especially when making a batch. If you’re on a budget, use a sturdy glass and a butter knife to trim the edges carefully. For storage, resealable freezer bags with a zip closure keep these fresh and easy to grab. Also, if you want to get fancy, you can use a small rolling pin to press and seal the edges extra tight before cutting.
Preparation Method
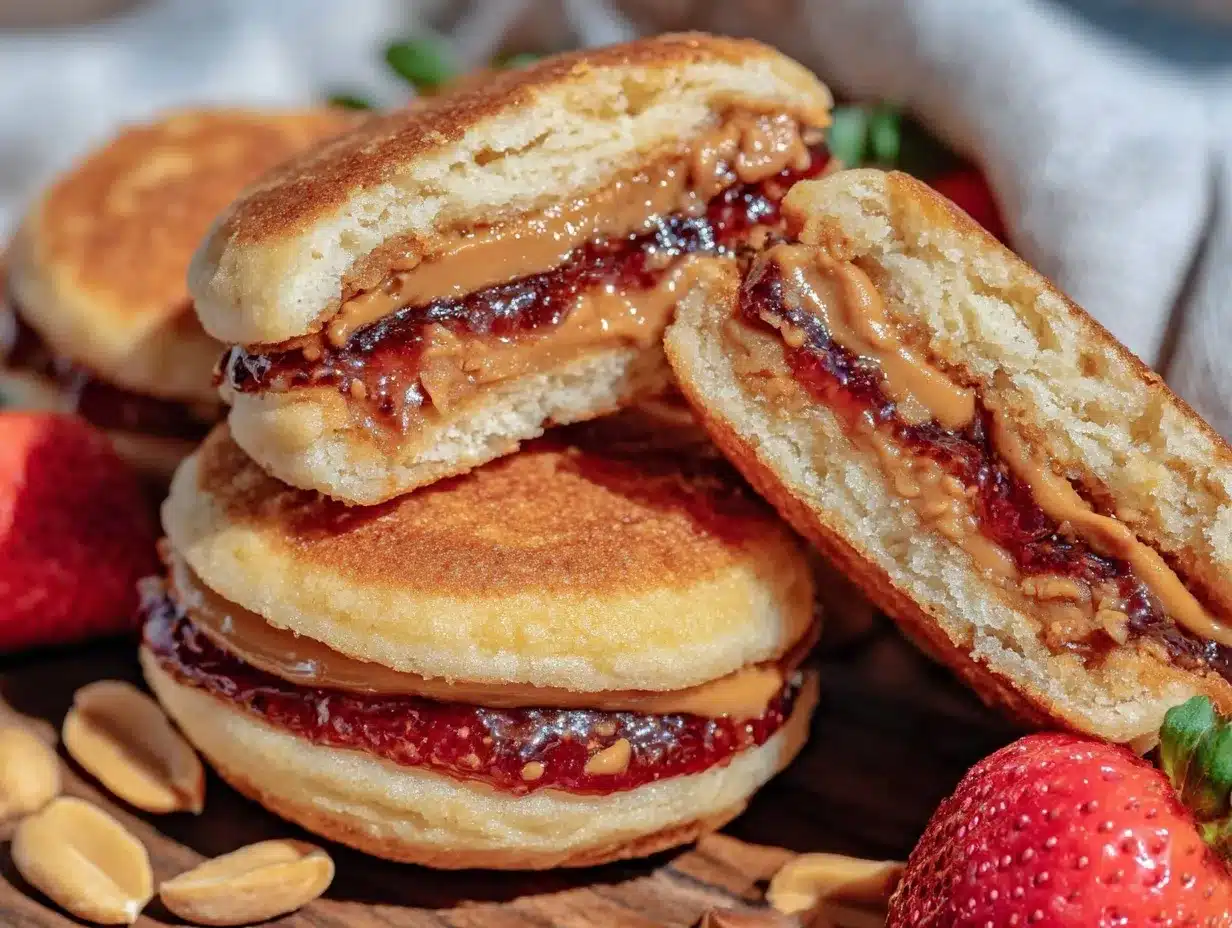
- Prep Your Workspace (5 minutes): Lay out all ingredients and tools. Line a baking sheet with parchment paper for freezing sandwiches later.
- Trim the Bread Crusts (optional, 5 minutes): Using a sharp knife or sandwich cutter, remove the crusts from your bread slices. This step helps create that classic uncrustable look and makes sealing easier.
- Apply Butter Layer (optional, 2 minutes): Lightly spread a thin layer of softened butter or margarine on one side of each bread slice. This helps prevent the jelly from soaking through and keeps the bread soft.
- Spread Peanut Butter (5 minutes): On half of the bread slices, spread a smooth, even layer of creamy peanut butter. About 1 tablespoon (15 g) per slice works well—not too thick, not too thin.
- Add Jelly or Jam (5 minutes): On the other half of the bread slices, spread about 1 tablespoon (15 g) of jelly or jam evenly. Avoid chunky jams to keep the bread intact.
- Assemble the Sandwiches (3 minutes): Place the peanut butter slice on top of the jelly slice, butter side down if using butter. Press gently to stick.
- Seal the Edges (10 minutes): Use your sandwich cutter to press down firmly around the edges, sealing the sandwich and cutting it into a neat shape. If using a glass or cup, press down firmly and then trim edges with a knife to seal.
- Freeze the Sandwiches (at least 1 hour): Arrange the sealed sandwiches on the parchment-lined baking sheet in a single layer. Freeze for at least 1 hour to firm up.
- Store for Later (2 minutes): Wrap each sandwich individually in plastic wrap or place in a resealable freezer bag. Store in the freezer for up to 2 months.
- Thaw & Enjoy: When ready to eat, thaw in the fridge or at room temperature for 30-60 minutes. They’re also fine to eat slightly frozen for a cool snack.
Tip: If you find the bread tearing while sealing, try chilling it in the fridge for 10 minutes beforehand to make it a bit firmer. Also, don’t overfill with jelly; a thinner layer keeps the sandwiches intact after freezing.
Cooking Tips & Techniques
Even though these sandwiches don’t require cooking, there are a few handy tips I’ve picked up to get them just right.
- Seal Like a Pro: Press firmly with your cutter or glass to create a tight edge. This prevents leakage and keeps the sandwich soft inside after freezing.
- Choose the Right Bread: A slightly thicker white bread with a soft crumb works best. Thin or stale bread can tear or get brittle during freezing.
- Consistent Spread: Spread peanut butter and jelly evenly to avoid soggy spots or bursting edges.
- Freeze Flat: Lay sandwiches flat on a tray before bagging to prevent squishing and keep their shape.
- Wrap Well: Use plastic wrap or airtight bags to avoid freezer burn and keep flavors fresh.
- Thawing Tips: Thaw in the fridge overnight or at room temperature for about 30 minutes. Eating slightly frozen is also refreshing, especially in summer.
I once tried freezing a batch without sealing the edges properly—let’s just say it was a sticky mess the next day. Lesson learned: sealing is the secret weapon here. Also, if you’re prepping these for school lunches or snacks, making them a day ahead frees up your mornings and keeps the kids happy.
Variations & Adaptations
While the classic peanut butter and jelly combo is a winner, there are plenty of ways to mix things up with these freezer-friendly Uncrustables.
- Nut-Free Version: Use sunflower seed butter or soy nut butter with honey or fruit spread for a safe alternative.
- Chocolate Lover’s Twist: Swap jelly for Nutella or mix peanut butter with a bit of melted chocolate.
- Fruit & Cream Cheese: Spread cream cheese with your favorite jam for a tangy, creamy bite.
- Gluten-Free: Use certified gluten-free sandwich bread to keep this recipe inclusive.
- Breakfast Style: Add a thin layer of honey and banana slices (freeze immediately) for a quick morning snack.
Personally, I tried a batch with a mix of peanut butter and a thin layer of honey plus sliced strawberries. It was a bit more delicate but totally worth it for a special treat. Just keep in mind that extra wet fillings may require extra sealing care.
Serving & Storage Suggestions
These homemade freezer-friendly Uncrustables are best served at room temperature or slightly chilled. They make an excellent grab-and-go snack, lunchbox addition, or quick breakfast for busy mornings.
- Serving: Thaw sandwiches in the fridge overnight or leave them on the counter for 30-60 minutes. Eating them slightly frozen can be a fun, cooling snack, especially during warmer months.
- Pairings: Serve with fresh fruit, yogurt, or a glass of milk for a balanced snack or light meal.
- Storage: Keep sandwiches wrapped tightly in plastic wrap or in airtight bags. Store in the freezer for up to 2 months for best quality.
- Reheating: These sandwiches don’t require reheating but can be warmed gently in a toaster oven wrapped in foil if you prefer warm peanut butter.
- Flavor Development: The flavors meld nicely after a day or two frozen, making them even tastier as the peanut butter and jelly get cozy inside the bread.
For easy snack prep and meal planning, I sometimes make a big batch of these alongside other freezer-friendly hits like the crispy cheesy tater tot ranch bake. It’s a small step that saves me from the usual afternoon rush and keeps everyone happy.
Nutritional Information & Benefits
Each homemade freezer-friendly Uncrustable contains approximately:
| Calories | 250-280 kcal |
|---|---|
| Protein | 7-9 g |
| Fat | 12-14 g (mostly from peanut butter) |
| Carbohydrates | 28-32 g |
| Fiber | 3-4 g |
Peanut butter provides protein and healthy fats, which help keep you full and energized. The jelly adds a touch of sweetness and some fruit flavor, although it’s best to choose lower-sugar varieties if you’re watching sugar intake. Using whole grain bread will boost fiber content and add extra nutrients.
This recipe is naturally gluten-free if you swap in gluten-free bread, and you can make it nut-free with seed butters, making it adaptable for different dietary needs. It’s a wholesome, convenient snack that feels like a treat while keeping things simple.
Conclusion
These easy homemade freezer-friendly Uncrustables have become a quiet hero in my kitchen. They make snack time stress-free, taste better than anything store-bought, and adapt easily to different tastes and dietary needs. Whether you’re packing school lunches, prepping snacks for busy days, or just craving a classic peanut butter and jelly sandwich that’s ready whenever you are, this recipe ticks all the boxes.
I love how flexible this recipe is—you can customize fillings, breads, and even the shape if you want to get creative. Plus, knowing these are waiting in the freezer makes me feel a little more prepared for whatever the day throws at us.
If you give this recipe a try, I’d love to hear how you make it your own or what flavor combos you discover. And if you want to keep your snack game strong, you might find inspiration in the creamy buffalo chicken 7-layer dip or the flavorful BBQ 7-layer dip with pulled pork for your next party or game day spread. Here’s to simple, satisfying snacks that make life easier.
Frequently Asked Questions
Can I use any type of bread for these Uncrustables?
Soft sandwich bread works best, preferably white or whole wheat with a slightly thick slice. Avoid very thin or crusty bread, as it can tear when sealing or freeze poorly.
How long can I store homemade Uncrustables in the freezer?
They stay best for up to 2 months when properly wrapped and stored in airtight freezer bags.
Do I have to thaw the sandwiches before eating?
Nope! You can eat them cold, slightly frozen, or thaw them at room temperature or in the fridge for 30-60 minutes depending on your preference.
What’s the best way to seal the sandwiches?
Use a round sandwich cutter or a glass to firmly press and seal the edges. This traps the filling and keeps the bread soft and intact after freezing.
Can I make these nut-free?
Definitely. Substitute peanut butter with sunflower seed butter or soy nut butter and use a compatible jelly or jam.
Pin This Recipe!
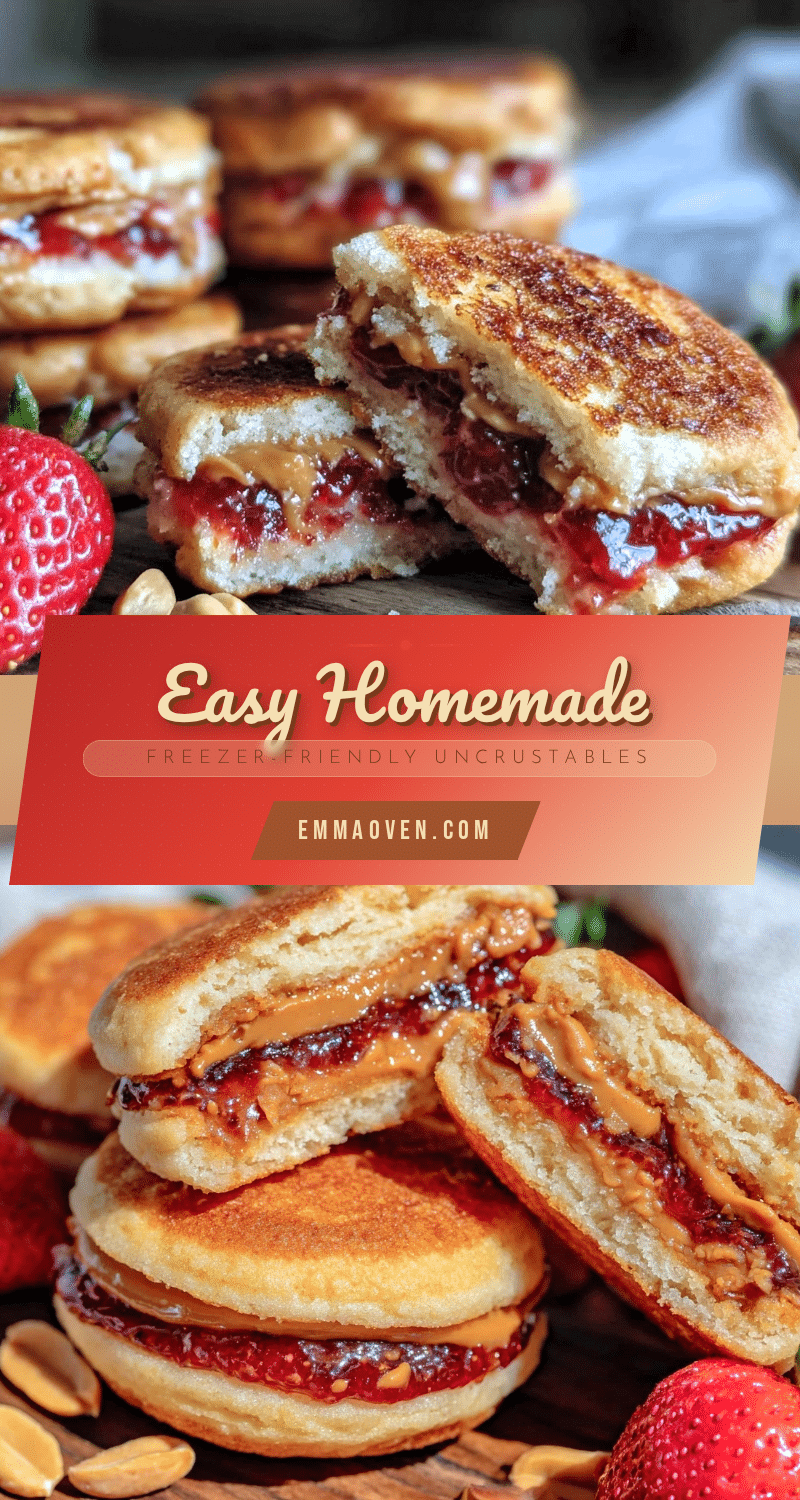
Easy Homemade Freezer-Friendly Uncrustables Recipe for Perfect Snacks
These homemade freezer-friendly Uncrustables are soft, sealed peanut butter and jelly sandwiches that freeze well and make snack time effortless and delicious. Perfect for busy mornings, lunchboxes, or on-the-go snacks.
- Prep Time: 20 minutes
- Cook Time: 0 minutes
- Total Time: 1 hour 20 minutes
- Yield: 6 sandwiches
- Category: Snack
- Cuisine: American
Ingredients
- Soft white sandwich bread (preferably slightly thicker slices)
- Creamy peanut butter (natural, without added sugar or oils)
- Smooth grape jelly or strawberry jam (avoid chunky jams)
- Optional: thin layer of softened butter or margarine
Instructions
- Prep your workspace by laying out all ingredients and tools. Line a baking sheet with parchment paper for freezing sandwiches later.
- Trim the bread crusts using a sharp knife or sandwich cutter (optional).
- Lightly spread a thin layer of softened butter or margarine on one side of each bread slice (optional).
- Spread about 1 tablespoon of creamy peanut butter evenly on half of the bread slices.
- Spread about 1 tablespoon of jelly or jam evenly on the other half of the bread slices.
- Place the peanut butter slice on top of the jelly slice, butter side down if using butter. Press gently to stick.
- Use a round sandwich cutter or a glass to press down firmly around the edges, sealing the sandwich and cutting it into a neat shape. If using a glass, trim edges with a knife to seal.
- Arrange the sealed sandwiches on the parchment-lined baking sheet in a single layer and freeze for at least 1 hour to firm up.
- Wrap each sandwich individually in plastic wrap or place in a resealable freezer bag. Store in the freezer for up to 2 months.
- When ready to eat, thaw in the fridge or at room temperature for 30-60 minutes. They can also be eaten slightly frozen.
Notes
Chill bread in the fridge for 10 minutes if it tears while sealing. Use a thin layer of jelly to avoid sogginess. Freeze sandwiches flat to maintain shape. Wrap tightly to prevent freezer burn. Thaw in fridge or at room temperature before eating. Can be eaten slightly frozen for a cool snack.
Nutrition
- Serving Size: 1 sandwich
- Calories: 265
- Sugar: 8
- Sodium: 150
- Fat: 13
- Saturated Fat: 2
- Carbohydrates: 30
- Fiber: 3.5
- Protein: 8
Keywords: Uncrustables, peanut butter and jelly, freezer-friendly snacks, homemade sandwiches, kid-friendly snacks, easy snacks, lunchbox ideas