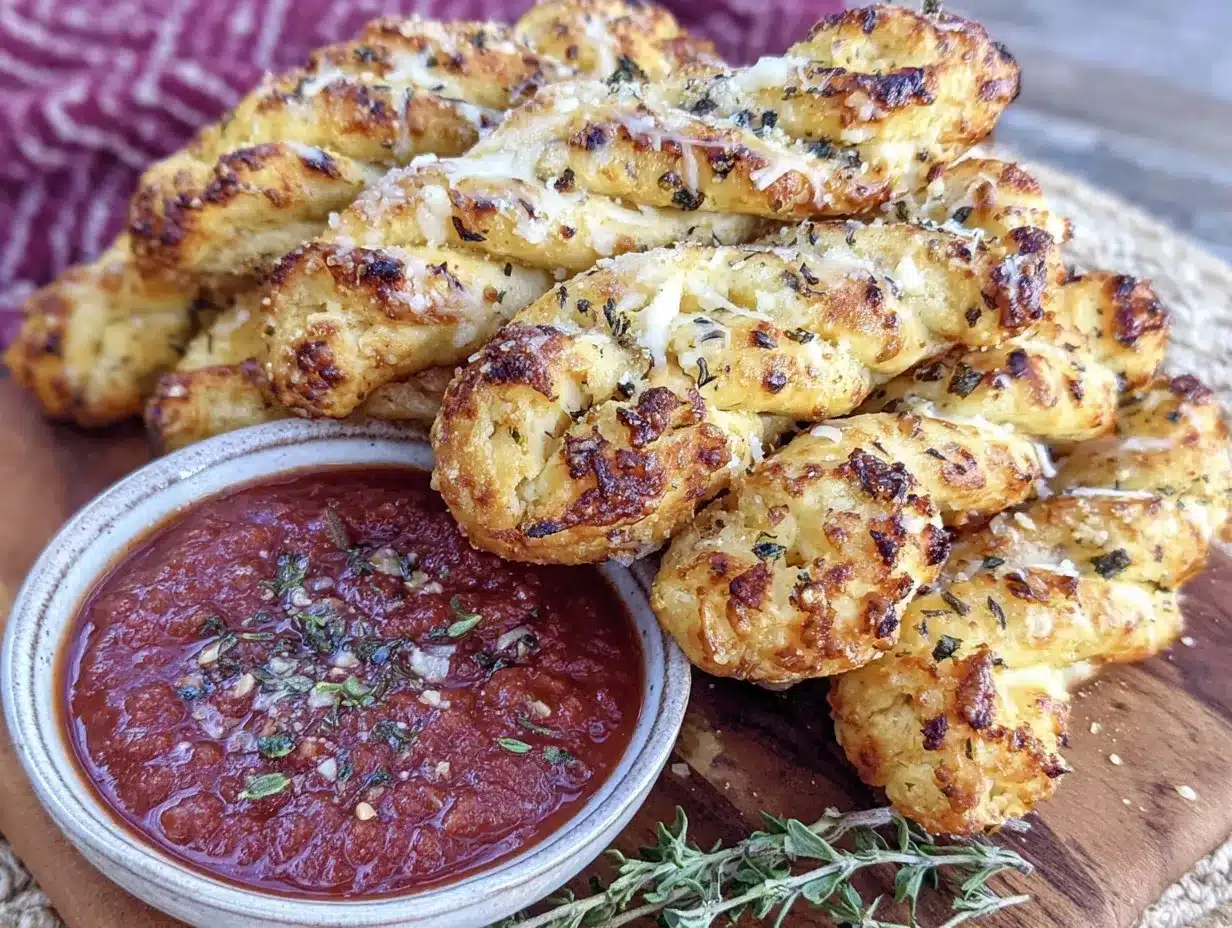
Knobbly, slightly cracked, and a little eerie—the texture of these witch finger breadsticks is what made me obsessed with this recipe. The way the dough cracks around the “knuckles,” revealing a glimpse of the soft, pillowy bread beneath that crispy exterior, is what this recipe is all about. You can almost imagine the fingers twitching just before you bite into them. It’s tactile, unsettling in the best way, and honestly, I find myself staring at the breadsticks longer than I probably should before diving in.
There’s a moment when you press a knuckle-shaped ridge and feel that crisp snap, then the bread pulls apart with a satisfying stretch, showing off its tender crumb. Making these breadsticks from scratch has become a little ritual for me during spooky season. I remember the first time I shaped them and thought, “Okay, this is weirdly fun.” The bits of sliced almond nails stuck on top, painted with a dab of ketchup for that bloody effect, add to the hands-on, slightly creepy vibe. It’s the kind of recipe that’s as much about the texture and look as it is the flavor.
And, let’s be real, the bloody marinara sauce that accompanies them is a perfect contrast—thick, rich, and just a little tangy. It clings to the breadsticks, seeping into the cracks and crevices. My kitchen smells like a witch’s lair, and I’m all for it. This recipe stuck with me because it’s playful, tactile, and just a little bit spooky without being complicated. It’s a Halloween snack you’ll want to touch, pull apart, and eat again and again. Trust me, the crispy witch finger breadsticks with bloody marinara sauce will become your go-to for every eerie gathering.
Why You’ll Love This Recipe
This recipe isn’t just another Halloween gimmick. After testing countless versions and tweaking the dough to get that perfect crispy yet tender texture, I can say it’s a winner. Here’s why these crispy witch finger breadsticks are worth your time:
- Quick & Easy: From mixing the dough to the final bake, it takes about an hour—perfect for last-minute spooky snacks.
- Simple Ingredients: No need to hunt down anything exotic. You likely have flour, yeast, and some basic pantry staples already.
- Perfect for Halloween Parties: They’re a showstopper finger food that’s fun for kids and adults alike.
- Crowd-Pleaser: The crispy crust with the soft inside wins over even the pickiest eaters.
- Unbelievably Delicious: The combination of savory bread and the tangy, “bloody” marinara sauce makes every bite memorable.
What sets this recipe apart? The little details: I brush the dough with olive oil and sprinkle a bit of garlic salt before baking to get that irresistible golden crust. The sliced almonds for nails? It’s a small touch that makes all the difference visually and texturally. Plus, the marinara sauce isn’t just jarred stuff—you’ll whip up a quick homemade version with just a few ingredients, giving it that authentic, slightly smoky flavor.
Honestly, this recipe isn’t just about feeding people—it’s about creating an experience. The texture obsession, the creepy presentation, and the satisfying flavors come together in a way that feels special and a little bit magical for fall nights. If you’re looking for a fun, tactile, and tasty Halloween snack that’s easy to make but unforgettable, this is it.
What Ingredients You Will Need
This recipe uses simple, wholesome ingredients to deliver bold flavor and that satisfying texture without fuss. Most are pantry staples, and the few extras can be swapped based on what you have on hand.
- For the Breadsticks Dough:
- All-purpose flour – 3 ½ cups (440g), for that perfect stretch and crisp
- Active dry yeast – 2 ¼ tsp (one packet), for a light, airy rise
- Sugar – 1 tbsp (to feed the yeast and add slight sweetness)
- Warm water – 1 ¼ cups (300 ml), around 110°F (43°C) for activating yeast
- Olive oil – 2 tbsp, plus extra for brushing (adds richness and crispness)
- Salt – 1 tsp, for balanced flavor
- Garlic powder – 1 tsp, to sprinkle on top for that savory kick
- For the Finger Details:
- Sliced almonds – about 24 (for “fingernails,” use thin, small slices)
- Ketchup or tomato paste – a small dab for “bloody” nail effect
- For the Bloody Marinara Sauce:
- Canned crushed tomatoes – 1 cup (240 ml), preferably San Marzano if you want that rich flavor
- Olive oil – 1 tbsp
- Garlic cloves – 2, minced
- Dried oregano – 1 tsp
- Red pepper flakes – ¼ tsp (optional, for a slight heat)
- Salt and black pepper – to taste
- Fresh basil leaves – a few, chopped, for freshness
Ingredient tips: Use a good-quality olive oil for brushing the breadsticks — it really makes a difference in texture and flavor. For a gluten-free twist, you could try swapping the all-purpose flour with a 1:1 gluten-free blend, but note the texture will change. The sliced almonds should be thin and pointy to mimic nails well; you can find them in most grocery stores. For the marinara, if you don’t have fresh basil, dried basil works fine, but add it earlier during cooking to bring out the flavor.
Equipment Needed
- Large mixing bowl – for combining and proofing dough
- Measuring cups and spoons – accuracy is key for dough texture
- Whisk or fork – to mix yeast with water and sugar
- Baking sheet – preferably rimmed to catch any drips from marinara
- Parchment paper or silicone baking mat – prevents sticking and helps with crisping
- Pastry brush – for oil brushing, you can use a clean paintbrush if you don’t have one
- Sharp knife or kitchen scissors – to shape the fingers and create knuckle lines
- Small bowl – for the marinara sauce preparation
If you don’t have a pastry brush, using your fingers to spread olive oil works fine (though messier). A rimmed baking sheet is best so the sauce doesn’t drip all over your oven. For proofing the dough, a warm spot in your kitchen or even your oven (turned off, with just the light on) helps get a good rise. I’ve tried this recipe in both a conventional and convection oven—the convection gives a slightly crispier crust, but either works beautifully.
Preparation Method
- Activate the yeast (10 minutes): In a small bowl, whisk together warm water (110°F / 43°C), sugar, and active dry yeast. Let it sit until it gets frothy and bubbly on top—this means your yeast is alive and kicking.
- Make the dough (10 minutes): In a large mixing bowl, combine the flour and salt. Pour in the yeast mixture and 2 tablespoons olive oil. Stir with a wooden spoon or your hands until a shaggy dough forms.
- Knead the dough (8-10 minutes): Turn the dough onto a floured surface and knead until smooth and elastic. It should feel slightly tacky but not sticky. If too sticky, add a bit more flour, a tablespoon at a time.
- First rise (45-60 minutes): Place the dough in a lightly oiled bowl, cover it with a damp towel or plastic wrap, and let it rise in a warm spot until it doubles in size. This is where the magic happens, and the dough develops flavor and texture.
- Preheat the oven (to 400°F / 200°C): Once the dough is ready, preheat your oven so it’s hot and ready for that crispy crust.
- Shape the fingers (15 minutes): Punch down the risen dough and divide it into 12 equal pieces (about 2 oz / 55g each). Roll each piece into a thin finger shape, about 6 inches (15 cm) long. Use the back of a knife or a butter knife to make three small indents along each finger to mimic knuckles.
- Add the nails: Press a sliced almond gently onto the tip of each finger to form the nail. Brush the dough lightly with olive oil and sprinkle garlic powder and a little salt on top for flavor and texture.
- Bake (15-18 minutes): Arrange the breadsticks on a parchment-lined baking sheet, leaving some space between them. Bake until they’re golden brown and crispy on the outside. You’ll hear that satisfying crack when you tap them.
- Prepare the bloody nails: As soon as the breadsticks come out of the oven, dab a tiny bit of ketchup or tomato paste onto each almond nail to give that bloody, creepy look.
- Make the Bloody Marinara Sauce (10 minutes): While the breadsticks bake, heat olive oil in a small saucepan over medium heat. Add minced garlic and sauté until fragrant (about 1 minute). Pour in crushed tomatoes, oregano, red pepper flakes, salt, and pepper. Let it simmer gently for 8 minutes, stirring occasionally. Just before serving, stir in fresh basil for a burst of herbal freshness.
- Serve: Arrange the witch finger breadsticks on a platter with a bowl of the bloody marinara sauce in the center for dipping. Watch your guests squirm (in a good way) as they enjoy this tactile, tasty treat!
Pro tip: If you want extra crispy fingers, finish them under the broiler for 1-2 minutes but keep a close eye to prevent burning. The garlic powder sprinkled on top adds a subtle punch that makes the flavor pop.
Cooking Tips & Techniques
Getting that crispy witch finger breadstick texture just right can feel a little tricky at first, but a few tricks from my experience make it foolproof.
- Don’t skip the yeast activation: If your yeast doesn’t foam, your dough won’t rise well. Use water that’s warm but not hot (about 110°F / 43°C) to avoid killing the yeast.
- Kneading matters: Knead the dough long enough to develop gluten, which gives the bread its structure and chew. If it’s under-kneaded, the breadsticks will be dense and won’t crisp as well.
- Shape with intention: Use a butter knife’s blunt back to press knuckles gently—too hard and you’ll tear the dough; too light and it won’t be visible after baking.
- Brush with olive oil: This helps create that crispy, golden crust and also helps the garlic powder stick. Don’t skimp on this step!
- Timing is everything: Bake until golden and crispy. Underbaked breadsticks are doughy and limp; overbaked will be too hard. The perfect breadstick gives a crisp snap with a soft inside.
- Cool briefly before adding ketchup: Adding the “bloody” nail effect right out of the oven lets the ketchup meld slightly but keeps the vivid red color.
One time, I forgot the garlic powder and the breadsticks felt… well, a little boring. Lesson learned: seasoning on top is non-negotiable. Also, I like to prep my marinara sauce while the dough rises or bakes to save time. Multitasking in the kitchen is key, especially when hosting parties.
Variations & Adaptations
Want to mix things up? Here are some ways to customize your crispy witch finger breadsticks:
- Cheesy Fingers: Add shredded mozzarella or parmesan into the dough or sprinkle on top before baking for a cheesy twist. It melts into the cracks and adds gooey goodness.
- Spicy Bloody Marinara: Amp up the red pepper flakes or add a splash of hot sauce to the marinara for a fiery dip that wakes up your taste buds.
- Herb-Infused Dough: Toss in fresh chopped rosemary or thyme into the dough for an earthy flavor variation that pairs beautifully with the garlic.
- Gluten-Free Option: Use a 1:1 gluten-free flour blend designed for bread baking. The texture will be slightly different—less chewy—but still delicious with crispy edges.
- Vegan Adaptation: Swap olive oil for vegan butter and use a marinara sauce that contains no animal products. The recipe is naturally egg-free, so it’s easy to adapt.
One variation I tried recently was adding finely chopped black olives into the dough for a “witches’ secret ingredient” effect. It gave a salty punch and made the breadsticks even more addictive. I’ve also paired these creepy breadsticks with a crispy BBQ bacon tater tot casserole for a spooky game day spread that vanished in minutes.
Serving & Storage Suggestions
These witch finger breadsticks are best served warm, straight from the oven, with plenty of bloody marinara sauce on the side for dipping. The contrast between hot, crispy bread and tangy sauce is what makes the experience so satisfying.
Plate them on a long platter or a rustic wooden board to really show off the creepy finger shapes. For a full Halloween party vibe, add a few plastic spiders or fake cobwebs around the serving dish—just for fun.
Leftovers keep well in an airtight container at room temperature for up to 2 days. Reheat them in a hot oven (350°F / 175°C) for 5-7 minutes to bring back the crispiness. Avoid microwaving, which can make the breadsticks soggy and sad.
If you want to store longer, freeze the baked breadsticks in a sealed bag for up to 1 month. Reheat from frozen in the oven for best texture. The marinara sauce keeps well refrigerated for about 4 days.
Over time, the flavors meld nicely, and the garlic notes in the crust mature, so leftovers can be a nice snack the next day (if you’re lucky enough to have any!).
Nutritional Information & Benefits
Each crispy witch finger breadstick (without sauce) contains approximately:
| Calories | 120 kcal |
|---|---|
| Carbohydrates | 22 g |
| Protein | 3 g |
| Fat | 3.5 g (mostly from olive oil) |
| Fiber | 1 g |
The key ingredients like olive oil and garlic offer heart-healthy fats and antioxidants. The simple, homemade marinara sauce is rich in lycopene from tomatoes, which has anti-inflammatory benefits.
This recipe is naturally free from eggs and dairy, so it works well for many dietary needs. For gluten-free eaters, the substitution mentioned earlier makes it accessible too. Just watch the marinara ingredient labels if you’re avoiding added sugars or preservatives.
From a wellness perspective, this recipe balances indulgence with basic wholesome ingredients, making it a fun snack that’s not overly processed or loaded with artificial stuff. It’s a little treat you can feel good about sharing.
Conclusion
These crispy witch finger breadsticks with bloody marinara sauce are more than just a snack—they’re a tactile, playful experience that brings a little spooky fun to your table. The crackly crust, the soft interior, and the eerie almond nails dipped in ketchup all come together for a recipe that’s as satisfying to touch as it is to eat.
Feel free to customize the seasoning, try different dips, or add cheesy or herbal twists to make it your own. I love this recipe because it’s simple, hands-on, and perfect for creating a memorable moment—whether it’s a Halloween party or just a fun family night.
Let me know how your witch fingers turn out, and if you have any spooky variations! And if you’re looking for more crispy, crowd-pleasing snacks, you might enjoy the crispy buffalo chicken tater tot casserole or the crispy cream cheese stuffed jalapeños wrapped in bacon that I’ve shared.
Happy baking—and may your fingers always snap with deliciousness!
FAQs
Can I make these witch finger breadsticks ahead of time?
Yes, you can prepare the dough and shape the fingers a day in advance. Store them covered in the fridge overnight and bake fresh the next day for best texture.
What can I use instead of sliced almonds for the fingernails?
Peppercorns, small pieces of bell pepper, or even small bits of cheese can work as alternative “nails.” Just make sure they can withstand baking.
Is the marinara sauce necessary?
While the marinara adds a perfect tangy “bloody” dip, you could also serve these with ranch, garlic butter, or a spicy cheese sauce depending on your preference.
Can I freeze the breadsticks before baking?
Yes! Shape the fingers, freeze them on a tray until solid, then transfer to a freezer bag. Bake straight from frozen, adding a few extra minutes to the baking time.
How do I get the breadsticks extra crispy?
Use a hot oven (400°F / 200°C), brush generously with olive oil, and consider finishing under the broiler for 1-2 minutes while watching closely to avoid burning.
Pin This Recipe!
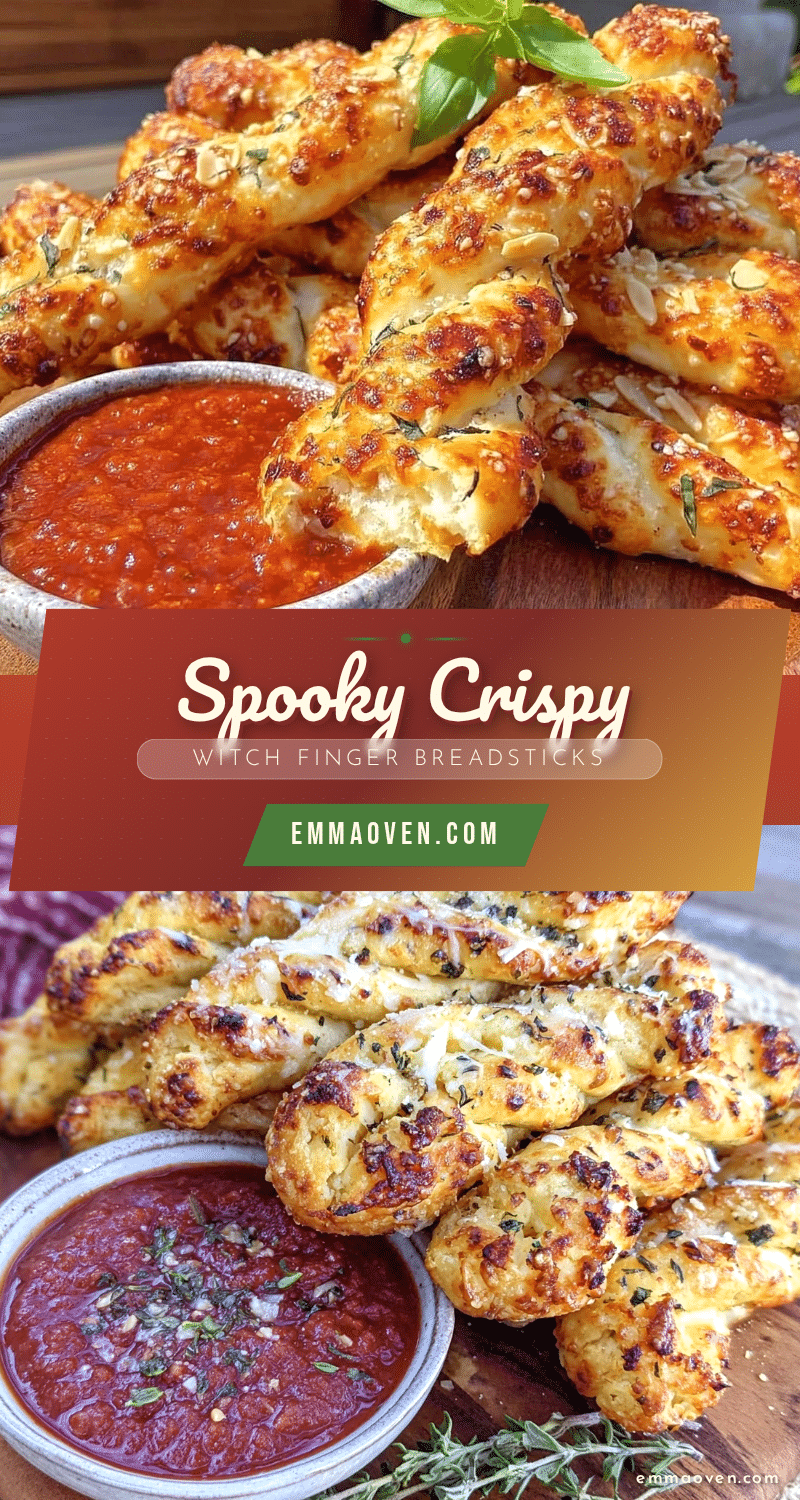
Crispy Witch Finger Breadsticks Recipe Easy Homemade Halloween Snack Ideas

Knobbly, slightly cracked, and a little eerie, these witch finger breadsticks feature a crispy exterior with a soft, pillowy inside, perfect for Halloween parties. Served with a tangy homemade bloody marinara sauce, they are a fun and tactile snack that delights both kids and adults.
- Prep Time: 25 minutes
- Cook Time: 15-18 minutes
- Total Time: 1 hour 10 minutes
- Yield: 12 breadsticks 1x
- Category: Snack
- Cuisine: American
Ingredients
- 3 ½ cups (440g) all-purpose flour
- 2 ¼ tsp active dry yeast (one packet)
- 1 tbsp sugar
- 1 ¼ cups (300 ml) warm water (around 110°F / 43°C)
- 2 tbsp olive oil, plus extra for brushing
- 1 tsp salt
- 1 tsp garlic powder
- About 24 sliced almonds (thin, small slices for fingernails)
- Ketchup or tomato paste (a small dab for bloody nail effect)
- 1 cup (240 ml) canned crushed tomatoes
- 1 tbsp olive oil (for marinara)
- 2 garlic cloves, minced
- 1 tsp dried oregano
- ¼ tsp red pepper flakes (optional)
- Salt and black pepper to taste
- Fresh basil leaves, a few chopped
Instructions
- Activate the yeast: In a small bowl, whisk together warm water (110°F / 43°C), sugar, and active dry yeast. Let it sit until frothy and bubbly, about 10 minutes.
- Make the dough: In a large mixing bowl, combine flour and salt. Pour in the yeast mixture and 2 tablespoons olive oil. Stir until a shaggy dough forms, about 10 minutes.
- Knead the dough: Turn dough onto a floured surface and knead until smooth and elastic, about 8-10 minutes. Add flour if too sticky.
- First rise: Place dough in a lightly oiled bowl, cover with damp towel or plastic wrap, and let rise in a warm spot until doubled in size, 45-60 minutes.
- Preheat oven to 400°F (200°C).
- Shape the fingers: Punch down dough and divide into 12 equal pieces (~2 oz / 55g each). Roll each into a 6-inch (15 cm) finger shape. Use back of a knife to make three small indents for knuckles.
- Add nails: Press a sliced almond onto the tip of each finger. Brush dough lightly with olive oil and sprinkle garlic powder and a little salt on top.
- Bake: Arrange breadsticks on parchment-lined baking sheet, leaving space between. Bake 15-18 minutes until golden brown and crispy.
- Add bloody nails: Dab a tiny bit of ketchup or tomato paste onto each almond nail immediately after baking.
- Make bloody marinara sauce: While baking, heat 1 tbsp olive oil in a small saucepan over medium heat. Sauté minced garlic until fragrant (~1 minute). Add crushed tomatoes, oregano, red pepper flakes, salt, and pepper. Simmer gently for 8 minutes, stirring occasionally. Stir in fresh basil just before serving.
- Serve: Arrange breadsticks on a platter with a bowl of marinara sauce for dipping.
Notes
Use good-quality olive oil for brushing to enhance flavor and texture. For extra crispy breadsticks, finish under the broiler for 1-2 minutes watching closely. If you want to prepare ahead, shape fingers and refrigerate overnight before baking. Leftovers keep well at room temperature for 2 days or frozen for up to 1 month. Avoid microwaving to maintain crispiness.
Nutrition
- Serving Size: 1 breadstick
- Calories: 120
- Fat: 3.5
- Carbohydrates: 22
- Fiber: 1
- Protein: 3
Keywords: Halloween snack, breadsticks, witch fingers, crispy breadsticks, homemade marinara, spooky food, party appetizer