There used to be this tiny Italian place on the corner of 7th and Main in my old neighborhood called Rosario’s. It wasn’t fancy — mismatched chairs, a handwritten menu on a chalkboard, and the kind of garlic smell that hit you half a block away. They made these chicken thighs that I still dream about. The skin was shatteringly crisp, coated in this nutty, salty Parm situation, and the garlic — oh, the garlic — it was everywhere but never overwhelming. When they closed abruptly in 2019, I actually mourned. I mean, I stood outside the locked door like a weirdo, peeking through the window at the empty tables.
After maybe twelve tries — honestly, some were straight-up disasters, including one where I set off the smoke detector at 11 PM — I finally cracked the code. And let me tell you, the secret weapon was sitting in my kitchen the whole time: the air fryer. Who knew, right? The first time I pulled these crispy garlic parmesan chicken thighs out of that machine, I actually teared up a little. It wasn’t exactly Rosario’s, but it was close. Close enough that I texted my friend Maria a photo with the caption “WE’RE BACK.”
This recipe isn’t complicated. It’s the kind of thing you throw together on a Tuesday when you need something that feels like a hug but doesn’t take all evening. The air fryer does the heavy lifting, giving you that deep golden crust without a vat of oil. Maybe you’ve been there — chasing a ghost recipe from a place that’s gone, tweaking and testing until it clicks. If so, this one’s for you. Let’s make some chicken that’ll make you forget that little corner spot ever closed.
Why You’ll Love This Recipe
Let’s be real for a second. We all want dinner that tastes like we spent hours in the kitchen, but nobody has time for that on a weeknight. These crispy garlic parmesan chicken thighs deliver exactly that energy. They’re the kind of meal that makes you look like a hero with minimal effort.
- Quick & Easy: From fridge to table in under 30 minutes. Seriously. The air fryer works its magic in about 20 minutes, giving you crispy, juicy chicken with almost no hands-on time.
- Simple Ingredients: You probably have most of this stuff already. Garlic powder, Parmesan, breadcrumbs, a few spices. No weird specialty items that’ll sit in your pantry for years.
- Perfect for Busy Weeknights: This is the definition of a Tuesday night win. Pair it with a quick salad or some roasted veggies, and dinner’s done before you’ve even unloaded the dishwasher.
- Crowd-Pleaser: I’ve served these to picky kids, skeptical in-laws, and my neighbor who “doesn’t really like chicken thighs.” Every single person went back for seconds. The crispy coating is just that good.
- Unbelievably Delicious: The texture is next-level. The outside gets this golden, crunchy crust that shatters when you bite into it, while the inside stays tender and juicy. The garlic and Parmesan combo is pure comfort food magic.
What makes this version different from every other crispy chicken recipe out there? It’s the method. Instead of drowning the chicken in oil, we use a light coating of mayonnaise (trust me on this one) to help the breading stick and keep the meat incredibly moist. The air fryer then crisps everything up with a fraction of the fat. It’s not just another recipe — it’s the one I’ve tweaked and tested until it was absolutely perfect.
What Ingredients You Will Need
This recipe keeps things simple with ingredients that work together to create serious flavor. No complicated shopping lists here — just honest, good-quality stuff that does the job right.
- Boneless, skinless chicken thighs (about 1.5 lbs or 680g) — I prefer thighs over breasts here because they stay juicier in the air fryer. Look for thighs that are similar in size so they cook evenly. If you can only find bone-in, just add a few extra minutes to the cooking time.
- Mayonnaise (3 tablespoons) — I know, I know. But hear me out. Mayo is basically just oil and eggs, and it creates the perfect sticky surface for the breading. Plus, it keeps the chicken incredibly moist. Use full-fat for best results. I like Hellmann’s or Duke’s.
- Grated Parmesan cheese (1/2 cup, about 50g) — Get the good stuff from the refrigerated section, not the green can. The pre-grated stuff has anti-caking agents that don’t melt as well. Freshly grated Parm makes a real difference here.
- Panko breadcrumbs (1/2 cup, about 60g) — Panko gives you that extra-crispy texture that regular breadcrumbs just can’t match. They stay crunchier in the air fryer. If you only have regular breadcrumbs, they’ll work, but the texture won’t be quite as dramatic.
- Garlic powder (1 teaspoon) — Not garlic salt! Garlic powder gives you that pure garlic flavor without extra sodium. If you’re out, use 2 teaspoons of fresh minced garlic mixed into the mayo instead.
- Onion powder (1/2 teaspoon) — Adds a subtle savory depth that rounds everything out. Don’t skip it — it’s a small amount but it makes a difference.
- Paprika (1/2 teaspoon) — I use sweet paprika here for color and a gentle warmth. Smoked paprika would also be amazing if you want a deeper, smokier flavor.
- Dried Italian seasoning (1/2 teaspoon) — A little herbaceous note that pairs beautifully with the Parmesan. Oregano, basil, thyme — it’s all in there.
- Salt (1/2 teaspoon) — Adjust based on your Parmesan. Some Parm is saltier than others, so taste your breading mixture before coating the chicken.
- Black pepper (1/4 teaspoon) — Freshly ground if you can. It makes a difference.
- Olive oil spray — For spritzing the chicken before air frying. This helps the breading get that golden, crispy finish. Avocado oil spray works great too.
- Fresh parsley (optional, for garnish) — A sprinkle of green makes everything look prettier. Plus, it adds a fresh pop of flavor.
Equipment Needed
You don’t need a ton of fancy gadgets for this one. Here’s what you’ll want to have on hand:
- Air fryer — Obviously. I use a 6-quart basket-style model, and it works perfectly for 4-6 thighs without overcrowding. If yours is smaller, you might need to cook in batches. I’ve had my Cosori for three years now, and it’s still going strong.
- Mixing bowls — One medium bowl for the mayo mixture, one shallow dish for the breading. Nothing fancy needed.
- Tongs — For handling the chicken without getting your fingers all messy. Silicone-tipped ones won’t scratch your air fryer basket.
- Measuring spoons — For the spices. Eyeballing it works if you’re confident, but measuring ensures consistency.
- Kitchen shears or a sharp knife — For trimming any excess fat from the thighs. Kitchen shears are honestly easier for this job.
- Paper towels — For patting the chicken dry. This step is crucial for the breading to stick.
- Instant-read thermometer (optional but recommended) — Chicken is done at 165°F. If you’re new to air frying, a thermometer takes the guesswork out. Mine cost like $12 on Amazon and has saved me from dry chicken more times than I can count.
If you don’t have an air fryer yet, I get it — it’s an investment. But honestly, I use mine almost every day. It’s replaced my oven for most things, and it’s a game-changer for getting crispy results with way less oil. Budget-friendly options from brands like Ninja or Gourmia work just as well as the expensive ones.
Preparation Method
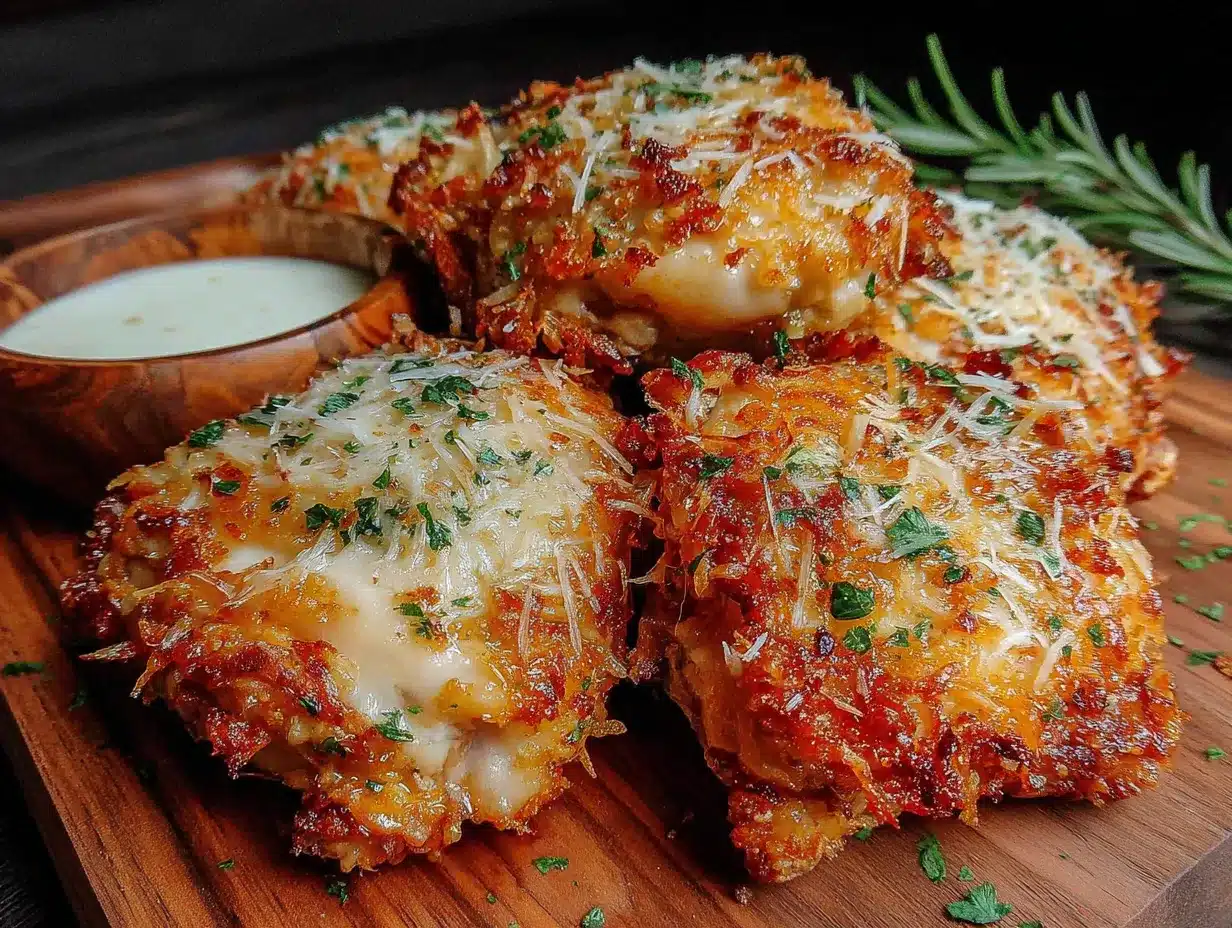
Alright, let’s get cooking. This whole process takes about 25 minutes from start to finish, and most of that is hands-off air fryer time.
- Prep the chicken. Pat your chicken thighs dry with paper towels. This is non-negotiable — wet chicken won’t hold the breading. Trim off any excess fat or weird bits with kitchen shears. Season the thighs lightly with a pinch of salt and pepper on both sides. Let them sit while you prep the other ingredients.
- Make the mayo binder. In a medium bowl, mix together 3 tablespoons of mayonnaise, 1 teaspoon garlic powder, 1/2 teaspoon onion powder, 1/2 teaspoon paprika, and 1/2 teaspoon Italian seasoning. Stir until it’s smooth and well combined. This mixture is going to be the glue that holds all that crispy goodness to the chicken.
- Prepare the breading. In a shallow dish (a pie plate works great), combine 1/2 cup grated Parmesan cheese, 1/2 cup panko breadcrumbs, and a pinch of salt and pepper. Use a fork to mix everything together evenly. The Parmesan and panko should be well distributed — you don’t want clumps of just cheese or just breadcrumbs.
- Coat the chicken. Take each chicken thigh and coat it completely with the mayo mixture. Use your hands or a brush — I just use my fingers, honestly. Make sure every surface is covered, including the edges. Then, place the coated thigh into the breading mixture and press down firmly. Flip and press again, making sure the entire piece is coated. Shake off any excess. Place the breaded thighs on a plate or cutting board while you finish the rest.
- Preheat the air fryer. Set your air fryer to 375°F (190°C) and let it preheat for 3 minutes. I know some people skip this step, but preheating gives you that immediate blast of heat that helps the breading start crisping right away.
- Arrange in the basket. Lightly spray the air fryer basket with olive oil spray. Place the breaded chicken thighs in a single layer, making sure they’re not touching. You want air to circulate around each piece for maximum crispiness. If your air fryer is small, cook in batches. Crowding the basket leads to soggy spots — trust me, I learned this the hard way.
- Spray and cook. Give the tops of the chicken thighs a light spritz of olive oil spray. This is what gives you that golden, crispy finish. Air fry at 375°F for 10 minutes. Then, carefully flip each thigh using tongs, spray the other side lightly, and cook for another 8-10 minutes. The total cooking time should be around 18-20 minutes, depending on the thickness of your thighs.
- Check for doneness. The chicken is done when the internal temperature reaches 165°F (74°C) at the thickest part. If you don’t have a thermometer, cut into the thickest thigh — the juices should run clear, and there should be no pink in the center. The coating should be deep golden brown and crispy to the touch.
- Rest before serving. Let the chicken rest in the air fryer basket (turned off) for 2-3 minutes. This lets the juices redistribute and keeps the meat extra juicy. Transfer to a serving plate and garnish with fresh chopped parsley if you’re feeling fancy.
A quick note: If your chicken thighs are on the thicker side, they might need an extra 2-3 minutes. If they’re thinner, check them at the 16-minute mark. Air fryers can vary quite a bit, so get to know yours. My first batch with a friend’s air fryer came out overdone because hers runs hot — lesson learned.
Cooking Tips & Techniques
After making these crispy garlic parmesan chicken thighs more times than I can count, I’ve picked up a few tricks that make a real difference. Let me share the ones that saved me from some pretty sad dinners.
Don’t skip the mayo. I know it sounds weird. I had a friend literally refuse to try this method because she thought it would taste like a sandwich. But here’s the thing — the mayo flavor completely disappears during cooking. What you’re left with is incredibly moist chicken with a perfectly adhered crust. Oil alone doesn’t work as well because it doesn’t have the same sticky texture.
Patience with the breading. When you’re pressing the panko-Parm mixture onto the chicken, really press it in. Don’t just gently place the chicken in the dish — push down firmly, flip, and repeat. I use the palm of my hand and apply steady pressure. This ensures the coating stays put during cooking instead of falling off in sad little clumps.
Watch the temperature. Air fryers are powerful little machines, and every model runs a bit differently. I burned my first batch because I trusted the timer without checking. Start checking for doneness a few minutes early, especially the first time you make this. It’s better to pull them out a minute early and check than to end up with dry, overcooked chicken.
Spray, don’t drench. A light spritz of oil is all you need. If you drench the chicken in oil, the breading gets heavy and greasy instead of light and crispy. I use a spray bottle filled with olive oil — it gives me better control than the aerosol cans.
Flip halfway through. This is crucial for even cooking. The bottom of the chicken sits against the basket and doesn’t get the same direct heat as the top. Flipping ensures both sides get that beautiful golden crust. I set a timer on my phone so I don’t forget.
One mistake I made early on? Not patting the chicken dry enough. I was in a rush and skipped this step, and the breading basically slid right off in the air fryer. It was a sad, soggy mess. Take the extra 30 seconds — it’s worth it.
Variations & Adaptations
One of the best things about this recipe is how flexible it is. Here are some ways to switch things up based on what you have on hand or what you’re craving.
Spicy version: Add 1/2 teaspoon of cayenne pepper or red pepper flakes to the breading mixture. You can also mix a teaspoon of hot sauce into the mayo for an extra kick. My husband loves this version — he says it reminds him of buffalo chicken but with Parmesan instead of blue cheese.
Gluten-free option: Swap the panko breadcrumbs for gluten-free panko or crushed pork rinds for a low-carb twist. Almond flour also works in a pinch, though the texture is a bit different — it’s more delicate, so handle the chicken gently. I’ve tested this with gluten-free panko from Aleia’s, and it worked beautifully.
Herb-crusted variation: Add 2 tablespoons of fresh chopped herbs to the breading mixture. Rosemary, thyme, and parsley all work great. I did this last summer when my herb garden was overflowing, and it was incredible. The fresh herbs add a brightness that dried herbs just can’t match.
Lemon garlic twist: Add the zest of one lemon to the breading mixture, and squeeze a little fresh lemon juice over the cooked chicken before serving. The acidity cuts through the richness of the Parmesan perfectly. This is my go-to for spring dinners.
Cheese swap: Try using Pecorino Romano instead of Parmesan for a saltier, more intense flavor. Or mix in a tablespoon of nutritional yeast for a dairy-free option that still gives you that cheesy, umami hit. I’ve done the nutritional yeast version for a friend with dairy issues, and she was shocked at how good it was.
Oven method: If you don’t have an air fryer, bake these at 400°F (200°C) on a wire rack set over a baking sheet for 25-30 minutes, flipping halfway through. The wire rack is key — it lets air circulate underneath so the bottom gets crispy too. No wire rack? Just flip the chicken halfway through and expect the bottom to be a bit softer.
Serving & Storage Suggestions
These crispy garlic parmesan chicken thighs are pretty versatile when it comes to serving. Here’s how I like to enjoy them.
Serving temperature: Serve these hot, straight from the air fryer. The coating is at its crispiest right after cooking. If they sit too long, the steam from the chicken can soften the breading. That said, they’re still delicious at room temperature — I’ve been known to eat leftovers cold over a salad.
What to serve with them: I love these with a simple side salad dressed with lemon vinaigrette — the acidity cuts through the richness. Roasted asparagus or green beans are also great choices. For something more substantial, try them with garlic mashed potatoes or a side of buttered pasta. Honestly, they pair well with just about anything. My go-to weeknight meal is these chicken thighs with a quick arugula salad and some crusty bread.
Storage: Store leftover chicken in an airtight container in the refrigerator for up to 4 days. The coating will soften as it sits, but don’t worry — you can bring some of the crunch back. To reheat, place the chicken back in the air fryer at 350°F (175°C) for 3-4 minutes. The microwave will make them soggy, so avoid it if you can.
Freezing: You can freeze the cooked chicken for up to 3 months. Let it cool completely, then wrap each piece individually in plastic wrap and place in a freezer bag. To reheat from frozen, air fry at 350°F for 8-10 minutes, flipping halfway through. The texture won’t be quite as good as fresh, but it’s still pretty darn satisfying.
Meal prep tip: I sometimes double the recipe and keep the extra cooked chicken in the fridge for quick lunches. Sliced over a salad or stuffed into a wrap with some greens and dressing — it’s a lifesaver on busy days.
One thing I’ve noticed — the flavors actually meld together even more after a day in the fridge. The garlic and Parmesan get deeper and more pronounced. So don’t be sad if you have leftovers. They’re almost a different (but equally delicious) experience the next day.
Nutritional Information & Benefits
Let’s talk numbers. Per serving (about 2 thighs), here’s what you’re looking at:
| Nutrient | Amount |
|---|---|
| Calories | 380 |
| Protein | 35g |
| Fat | 22g |
| Saturated Fat | 6g |
| Carbohydrates | 8g |
| Fiber | 1g |
| Sugar | 1g |
| Sodium | 580mg |
Chicken thighs are a great source of lean protein, iron, and B vitamins, especially B6 and B12, which support energy metabolism. The Parmesan adds calcium and a little extra protein. And because we’re using the air fryer instead of deep frying, you’re saving a significant amount of fat and calories compared to traditional fried chicken.
This recipe fits well into a balanced diet. It’s relatively low in carbs, making it suitable for low-carb or keto lifestyles if you use the pork rind or almond flour variation. The protein content keeps you full and satisfied. Just be mindful of the sodium if you’re watching your salt intake — the Parmesan and seasoning add up. You can reduce the salt in the breading to compensate.
As someone who tries to eat well without feeling deprived, I love that this recipe gives me that indulgent, crispy chicken experience without the guilt. It’s the kind of meal that makes eating healthy feel like a treat.
Conclusion
These crispy garlic parmesan chicken thighs are more than just a recipe — they’re a little piece of kitchen magic. They’ve got that perfect balance of crunchy, savory, garlicky goodness that makes you close your eyes after the first bite. And the best part? They come together in under 30 minutes with ingredients you probably already have.
I’ve made this recipe for dinner parties, lazy Sundays, and frantic weeknights when I needed something comforting in a hurry. Every single time, it delivers. It’s become one of those recipes I don’t even need to look up anymore — it’s just in my bones.
I’d love to hear how yours turn out. Did you try a variation? Discover a new favorite side dish? Drop a comment below and let me know. And if you loved this recipe, share it with a friend who needs a little crispy chicken magic in their life. Happy cooking, friends — go make some memories in your kitchen.
Frequently Asked Questions
Can I use chicken breasts instead of thighs?
Absolutely! Chicken breasts will work, but they cook faster and can dry out more easily. If you’re using boneless, skinless breasts, pound them to an even thickness (about 1/2 inch) and reduce the cooking time to 12-15 minutes total. Check for doneness at 165°F.
Why is my breading falling off in the air fryer?
This usually happens for one of three reasons: the chicken wasn’t patted dry enough, the mayo binder wasn’t applied evenly, or you’re not pressing the breading firmly enough. Also, make sure you’re not overcrowding the basket — the air needs to circulate. Try patting the chicken extra dry next time and really pressing that breading in.
Can I make this dairy-free?
Yes! Use a dairy-free Parmesan alternative (many brands make them now) or nutritional yeast for that cheesy flavor. For the mayo, any vegan mayo works great. I’ve used both Follow Your Heart Parmesan and nutritional yeast with good results.
How do I get the coating extra crispy?
Two things: make sure you’re using panko breadcrumbs (not regular ones) and don’t skip the olive oil spray. The spray helps the breading brown and crisp up. Also, let the chicken rest for 2-3 minutes after cooking — this helps the coating set without steaming.
Can I prep these ahead of time?
You can bread the chicken up to 4 hours ahead and keep it in the refrigerator on a plate. Just don’t let it sit too long or the breading can get soggy. If you’re meal prepping, cook the chicken fully, then reheat in the air fryer for best results. The texture won’t be quite as good as fresh, but it’s still delicious.
Pin This Recipe!
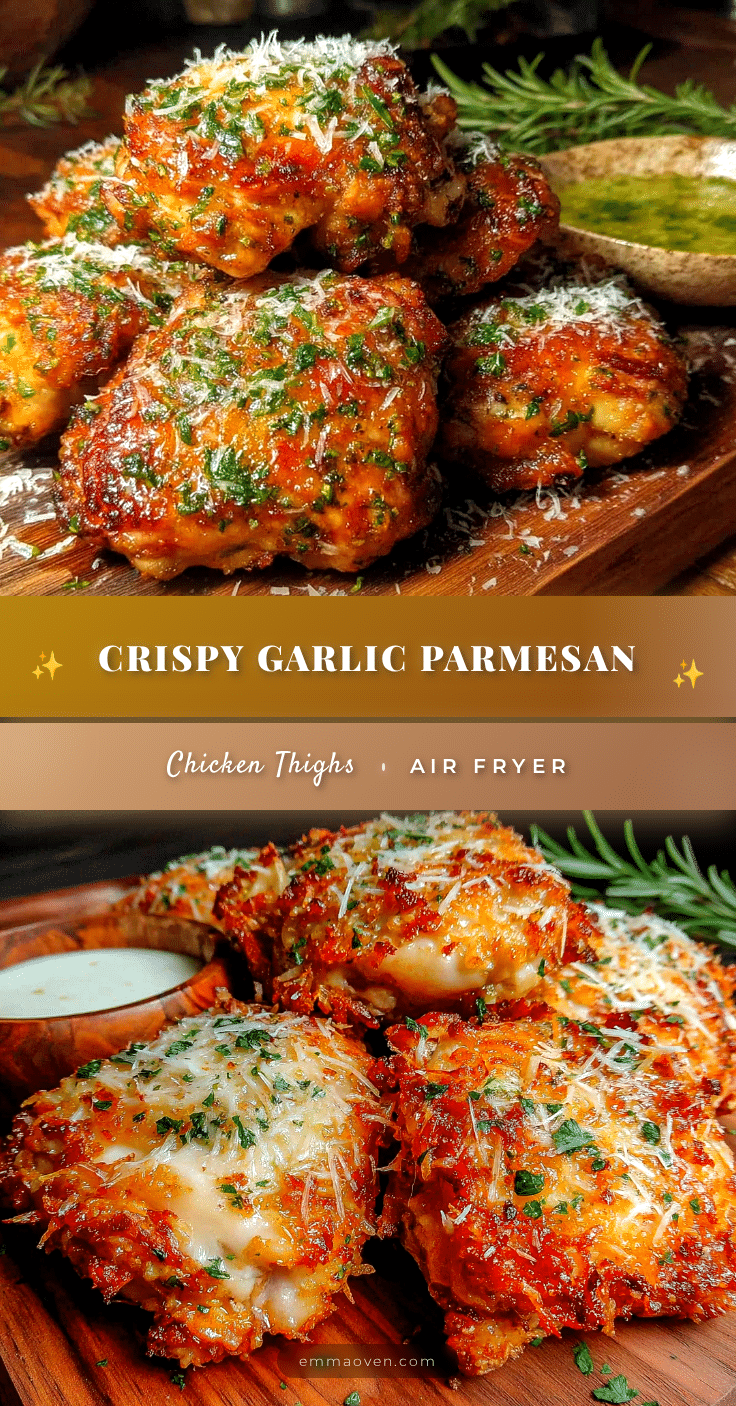
Crispy Garlic Parmesan Chicken Thighs in Air Fryer (Easy!)

These crispy garlic parmesan chicken thighs are a quick and easy weeknight dinner, ready in under 30 minutes. The air fryer creates a shatteringly crisp, golden crust while keeping the meat incredibly juicy, all with minimal oil.
- Prep Time: 10 minutes
- Cook Time: 20 minutes
- Total Time: 30 minutes
- Yield: 4 servings 1x
- Category: Main Course
- Cuisine: Italian-American
Ingredients
- 1.5 lbs (680g) boneless, skinless chicken thighs
- 3 tablespoons mayonnaise
- 1/2 cup (50g) grated Parmesan cheese
- 1/2 cup (60g) panko breadcrumbs
- 1 teaspoon garlic powder
- 1/2 teaspoon onion powder
- 1/2 teaspoon paprika
- 1/2 teaspoon dried Italian seasoning
- 1/2 teaspoon salt
- 1/4 teaspoon black pepper
- Olive oil spray
- Fresh parsley (optional, for garnish)
Instructions
- Pat chicken thighs dry with paper towels. Trim excess fat. Season lightly with salt and pepper.
- In a medium bowl, mix mayonnaise, garlic powder, onion powder, paprika, and Italian seasoning until smooth.
- In a shallow dish, combine Parmesan cheese, panko breadcrumbs, salt, and pepper. Mix well.
- Coat each chicken thigh completely with the mayo mixture. Press into the breading mixture, coating all sides. Shake off excess.
- Preheat air fryer to 375°F (190°C) for 3 minutes.
- Lightly spray the air fryer basket with olive oil spray. Place breaded thighs in a single layer without touching.
- Spray tops of chicken with olive oil spray. Air fry at 375°F for 10 minutes.
- Flip thighs, spray the other side, and cook for another 8-10 minutes, until internal temperature reaches 165°F (74°C).
- Let chicken rest in the air fryer (turned off) for 2-3 minutes. Garnish with parsley if desired.
Notes
Don’t skip patting the chicken dry—it helps the breading stick. Use full-fat mayonnaise for best results. If chicken thighs are thick, add 2-3 minutes cooking time; if thin, check at 16 minutes. For gluten-free, use gluten-free panko or crushed pork rinds. For dairy-free, use dairy-free Parmesan or nutritional yeast.
Nutrition
- Serving Size: 2 thighs
- Calories: 380
- Sugar: 1
- Sodium: 580
- Fat: 22
- Saturated Fat: 6
- Carbohydrates: 8
- Fiber: 1
- Protein: 35
Keywords: air fryer chicken thighs, crispy chicken, garlic parmesan chicken, easy weeknight dinner, air fryer recipe