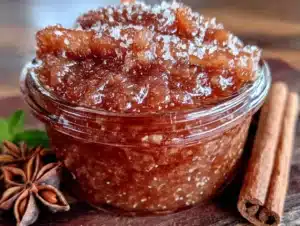
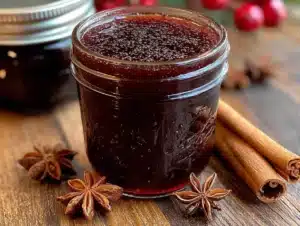
My grandmother handed me a jar of her pear preserves last September, and I nodded politely while thinking, “I don’t really need another jar of fruit in my pantry.” She’d been making preserves since before I was born, and honestly, I always found them a little too sweet, a little too runny. I thanked her, tucked the jar into my bag, and forgot about it for two weeks. Then one Tuesday morning, I ran out of jam for my toast and cracked it open, expecting the same old thing. The first spoonful stopped me mid-bite. The pears had softened into this velvety, golden texture, and the cinnamon had mellowed into something warm and quiet, not punchy. The vanilla was the real surprise—it smoothed everything out, like a good backup singer who makes the lead sound better without stealing the show.
I called her that afternoon and asked for the recipe. She laughed and told me she’d been tweaking it for thirty years, adding a little more vanilla one season, less sugar the next. She said I could have it, but only if I promised to make it my own. So I did. I spent three weekends testing batches, burning a few, making the kitchen smell like a holiday market that never quite opened. I scaled back the sugar, doubled the vanilla, and figured out the exact moment the pears need to come off the heat—when they’ve softened but still hold a little shape, like they’re not quite ready to give up.
This Homemade Cinnamon Vanilla Pear Preserves recipe is the result of those messy, sticky, wonderful experiments. It’s not my grandmother’s recipe anymore—it’s ours. And honestly, I think that’s exactly what she wanted.
Why You’ll Love This Recipe
I’ve tested a lot of preserves over the years, and most of them fall into two camps: too sweet or too runny. These preserves land somewhere better. They’re thick enough to stay on a biscuit without dripping down your wrist, but soft enough to spread without tearing your toast into shreds. The flavor is balanced—the pears bring a natural sweetness that means you can use less sugar, the cinnamon adds warmth without being bossy, and the vanilla rounds everything into something that tastes like a slow Sunday morning.
- Simple Ingredients: You don’t need pectin or any fancy canning gear to get a good set. Just pears, sugar, lemon, cinnamon, and vanilla.
- Beginner-Friendly: If you’ve never made preserves before, this is a forgiving recipe. The pears break down naturally, so you don’t have to stress about achieving the perfect gel.
- Perfect for Gifting: Tie a ribbon around a jar and you’ve got a homemade gift that feels thoughtful without breaking the bank. I’ve brought these to holiday parties and watched people hoard the last jar.
- Customizable: Swap the cinnamon for cardamom, add a star anise during cooking, or use honey instead of some of the sugar. The base is solid enough to play with.
- Better Than Store-Bought: Once you taste preserves made with real vanilla and fresh pears, it’s hard to go back to the jarred stuff. The texture alone is worth the effort.
I remember the first time I brought a jar to a friend’s brunch. I set it next to a basket of croissants, not saying much. By the time I got my coffee, the jar was half-empty, and someone was asking if I’d sell them a case. That’s the thing about this recipe—it doesn’t need a big introduction. It lets the flavor do the talking.
What Ingredients You Will Need
This recipe relies on a short list of ingredients that work together to create something bigger than the sum of their parts. The pears do the heavy lifting, but the cinnamon and vanilla are what make people ask, “What’s in this?” Here’s what you’ll need:
- Pears (about 4 pounds, peeled, cored, and diced into ½-inch cubes): Bartlett or Bosc pears work best. Bartletts break down more for a softer texture, while Boscs hold their shape a bit better. I usually use a mix of both. Look for pears that are ripe but still firm—mushy pears turn into mush.
- Granulated Sugar (2 cups): You can reduce this to 1½ cups if your pears are very sweet, but don’t go lower or the preserves won’t set properly. I’ve tried using coconut sugar, and it works, but the flavor is noticeably different—darker, almost caramel-like. That’s not bad, just different.
- Fresh Lemon Juice (¼ cup, from about 2 lemons): The acidity balances the sweetness and helps the preserves thicken. Don’t skip this. Bottled lemon juice works in a pinch, but fresh tastes brighter.
- Ground Cinnamon (1½ teaspoons): I prefer Ceylon cinnamon for its milder, more floral flavor. Cassia cinnamon is stronger and a little spicier. Both work, but taste before adding the full amount if you’re using Cassia.
- Vanilla Extract (2 teaspoons, pure): Imitation vanilla will taste flat here. The real stuff makes a noticeable difference. I like Nielsen-Massey, but any pure vanilla extract works.
- One Vanilla Bean (optional, but recommended): Split it lengthwise and scrape the seeds into the pot, then toss the pod in too. It infuses the preserves with tiny black specks and a deeper vanilla flavor. I skip this when I’m in a hurry, but I always regret it.
- Butter (1 tablespoon, unsalted): This is my secret trick. A pat of butter stirred in at the end reduces foaming and gives the preserves a slightly silkier texture. My grandmother thought I was crazy until she tried it.
I like to set everything out before I start because once the pears hit the heat, the process moves quickly. There’s nothing worse than hunting for the vanilla while your fruit is scorching.
Equipment Needed
You don’t need a professional canning setup for this recipe, but a few specific tools make the process smoother. Here’s what I use:
- Large Heavy-Bottomed Pot (6 to 8 quarts): A Dutch oven works perfectly. The heavy bottom distributes heat evenly and prevents scorching. I learned this the hard way after ruining a batch in a thin stainless steel pot.
- Wooden Spoon or Silicone Spatula: Metal spoons can react with the acidity of the lemons and leave a metallic taste. Wood or silicone is safer.
- Canning Jars (4 half-pint jars with lids and bands): You can use pint jars if you prefer, but half-pints are better for gifting. Make sure the jars are sterilized—I run them through the dishwasher on the sanitize cycle or boil them for 10 minutes.
- Wide-Mouth Funnel: This makes filling the jars much less messy. I fought with a regular funnel for years before someone finally told me to buy a wide-mouth one. Game changer.
- Potato Masher or Immersion Blender: For breaking down the pears to your desired consistency. I like a few chunks left, so I use a potato masher. If you want smooth preserves, use an immersion blender for a few quick pulses.
- Kitchen Thermometer: Optional, but helpful for checking if the preserves have reached the gel stage (220°F at sea level). I use it less now that I can judge by look and feel, but it’s great for beginners.
If you don’t have a canning rack, a folded kitchen towel in the bottom of your water bath pot works just as well. I’ve been using the same towel for years—it’s stained pink from a strawberry jam incident, but it still does the job.
Preparation Method
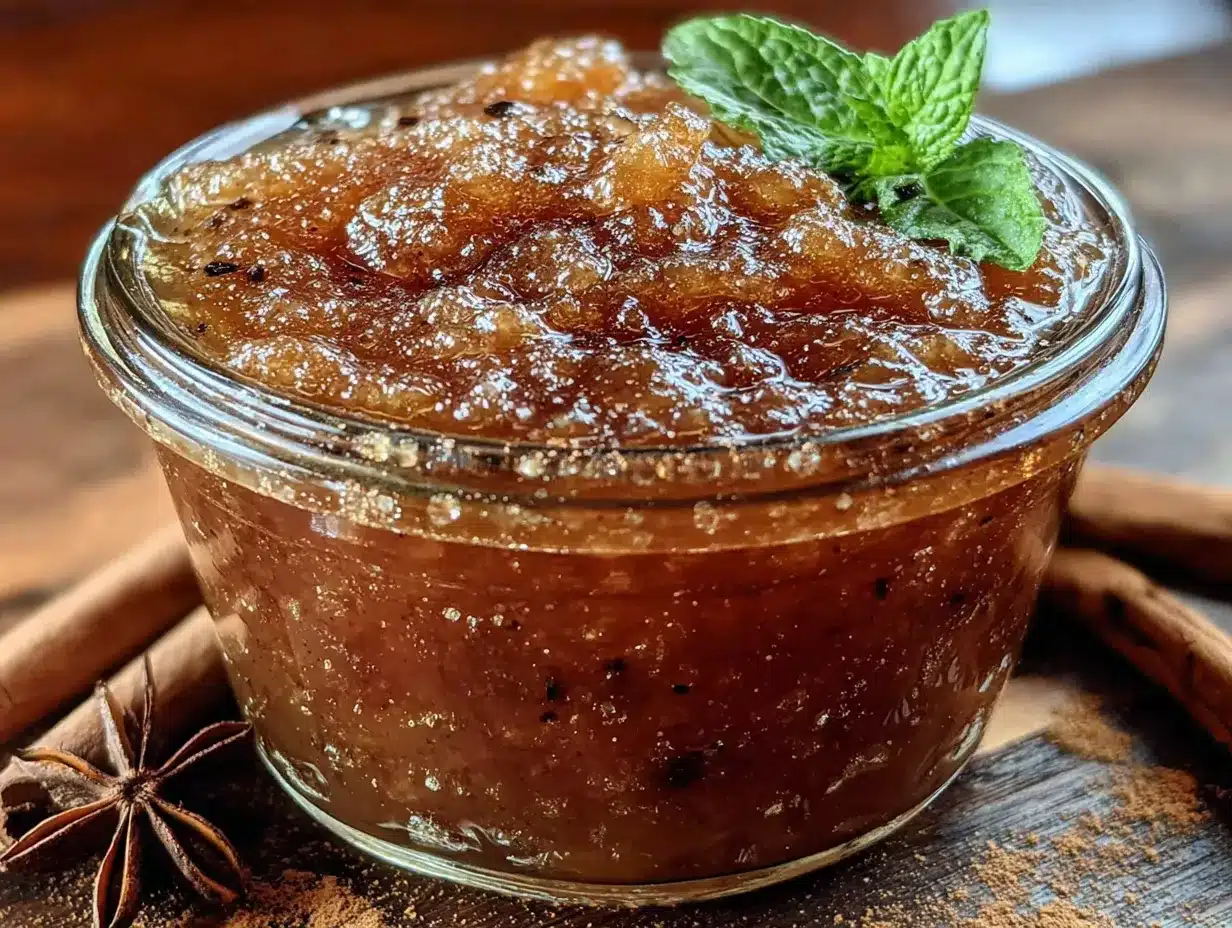
- Prep the pears: Peel, core, and dice 4 pounds of pears into ½-inch cubes. This takes about 15 minutes. Work quickly to prevent browning, or toss the diced pears in a bowl with the lemon juice as you go. I like to put on a podcast for this part—it’s repetitive but satisfying.
- Macerate the fruit: In your large pot, combine the diced pears, 2 cups of sugar, and ¼ cup of lemon juice. Stir to coat the pears evenly. Let this sit for 20 to 30 minutes. The sugar draws out the pear’s natural juices, creating a syrup before you even turn on the heat. Don’t rush this step—it builds the foundation of the flavor.
- Add the spices: Stir in 1½ teaspoons of cinnamon. If you’re using a vanilla bean, split it lengthwise, scrape the seeds into the pot, and drop the pod in as well. If you’re using extract, hold off until later.
- Cook the preserves: Place the pot over medium-high heat and bring the mixture to a boil, stirring occasionally. Once it’s boiling, reduce the heat to medium-low so it maintains a steady simmer. Cook for 25 to 35 minutes, stirring every few minutes to prevent sticking. The pears will soften and break down, and the liquid will reduce into a thick, syrupy consistency.
- Test for doneness: After about 25 minutes, start checking the preserves. Spoon a small amount onto a cold plate and tilt it. If the preserves move slowly and leave a trail, they’re ready. If they run like water, keep cooking and check again in 5 minutes. You can also use a kitchen thermometer—the mixture should reach 220°F.
- Add the vanilla extract and butter: Once the preserves are thick enough, remove the pot from the heat. If you used a vanilla bean, fish out the pod (rinse and dry it—you can bury it in sugar to make vanilla sugar). Stir in 2 teaspoons of vanilla extract and 1 tablespoon of butter. The butter will melt and help reduce any foaming.
- Mash or blend to desired texture: Use a potato masher for chunky preserves or an immersion blender for a smoother texture. I usually give it 4 or 5 mashes—enough to break down most of the pears but leave a few small pieces for texture.
- Fill the jars: Ladle the hot preserves into sterilized jars, leaving ¼ inch of headspace. Wipe the rims clean with a damp paper towel, then screw on the lids and bands until fingertip-tight.
- Process in a water bath: Place the jars in a boiling water bath, ensuring they’re covered by at least 1 inch of water. Boil for 10 minutes (adjust for altitude if needed). Remove the jars and let them cool completely on a towel-lined counter. You’ll hear the satisfying pops as the lids seal.
The first time I made these, I forgot to stir often enough and ended up with a few scorched bits at the bottom. The preserves still tasted good, but there was a faint burnt sugar note that threw off the balance. Now I set a timer for every 3 minutes during the simmering phase—it keeps me honest.
Cooking Tips & Techniques
After several batches (and a few failures), I’ve learned a few things that make this recipe more reliable. The biggest lesson: patience. Preserves take time, and rushing the simmering stage leads to runny results. I’ve also learned that the consistency changes as the preserves cool—what looks thin in the pot will thicken significantly once it’s jarred and chilled. Don’t overcompensate by cooking it too long.
Another tip: taste your pears before you start. If they’re not very sweet, consider adding an extra ¼ cup of sugar. If they’re intensely sweet, cut back a little. I once used a batch of incredibly sweet Bartletts and ended up with preserves that were cloying. A squeeze of extra lemon juice saved them, but it was a close call.
If you’re new to canning, don’t stress about the water bath. You can skip it and store the preserves in the refrigerator for up to 3 weeks. The water bath just extends the shelf life to about a year. I’ve done both, and the flavor is identical either way.
I also recommend using a timer for the stirring. It’s easy to get distracted—I once answered the phone and came back to a pot that looked like a science experiment gone wrong. Set a timer, stir, reset the timer. It’s boring but effective.
If you enjoy making homemade condiments, you might also like this creamy bacon cheddar ranch dip—it’s another recipe that relies on balancing flavors without overcomplicating things.
Variations & Adaptations
This recipe is a great base for experimentation. Here are a few variations I’ve tried and loved:
- Spiced Pear Preserves: Add ½ teaspoon of ground ginger, ¼ teaspoon of nutmeg, and a pinch of cloves along with the cinnamon. This version tastes like autumn in a jar. I made a batch last October and gave them as Thanksgiving hostess gifts—they disappeared fast.
- Honey-Sweetened Pear Preserves: Replace the granulated sugar with 1½ cups of honey. The flavor is more floral, and the texture is slightly softer. Reduce the lemon juice to 3 tablespoons since honey is already acidic. This version doesn’t set as firmly, so it’s better for spooning over yogurt or ice cream than for spreading on toast.
- Vanilla-Orange Pear Preserves: Add the zest of one orange and replace 2 tablespoons of the lemon juice with fresh orange juice. The citrus brightens the pears beautifully. I made this for a brunch once and a guest asked if I’d put champagne in it—that’s how fresh it tastes.
- Low-Sugar Version: Use 1 cup of sugar and 1 tablespoon of Pomona’s pectin (follow the package instructions for calcium water). The texture is less syrupy, but the pear flavor shines through more. This is my go-to when I’m using really good, perfectly ripe pears.
If you’re looking for a savory counterpart to these sweet preserves, try serving them alongside savory bacon jam sliders with cheddar—the sweet and salty combination is incredible.
Serving & Storage Suggestions
These preserves are incredibly versatile. I serve them most often on warm buttermilk biscuits or toasted sourdough with a thick layer of salted butter. They’re also fantastic spooned over Greek yogurt, stirred into oatmeal, or used as a filling for thumbprint cookies. For a quick dessert, warm a few spoonfuls and pour them over vanilla ice cream with a sprinkle of granola.
For storage, keep unopened jars in a cool, dark place for up to 12 months. Once opened, refrigerate and use within 3 weeks. I’ve pushed that to 4 weeks without any issues, but the color starts to darken after week three. If you skip the water bath, refrigerate immediately and use within 3 weeks.
The flavor actually improves after a few days in the jar. The vanilla and cinnamon meld together, and the pears absorb the spices more deeply. I always try to save one jar for at least a week before opening it—the patience pays off. That said, I usually crack one open within 24 hours because I can’t help myself.
For reheating, microwave a small bowl of preserves for 15 seconds or warm them gently on the stovetop. They loosen up quickly and return to a spreadable consistency.
Nutritional Information & Benefits
Per 2-tablespoon serving (approximate): 60 calories, 15g carbohydrates, 0g fat, 0g protein, 12g sugar. These values vary based on the sweetness of your pears and the exact amount of sugar used.
Pears are a good source of dietary fiber and vitamin C. They also contain copper, which supports immune function and red blood cell production. The cinnamon in this recipe has anti-inflammatory properties, and the vanilla adds a small amount of antioxidants. While this is still a sweet preserve, using ripe pears allows you to reduce the sugar compared to many traditional recipes.
This recipe is naturally gluten-free, dairy-free (if you skip the butter), and vegan (if you use a plant-based butter or omit it entirely). I’ve made it for friends with various dietary restrictions, and it’s always a hit. Just make sure your vanilla extract is certified gluten-free if that’s a concern.
Conclusion
This Homemade Cinnamon Vanilla Pear Preserves recipe has become a staple in my kitchen for good reason. It’s forgiving enough for beginners, flexible enough for experimentation, and delicious enough to win over people who think they don’t like preserves. The combination of warm cinnamon, real vanilla, and sweet pears creates something that feels both familiar and special—like a recipe that’s been in your family for generations, even if you just made it up last fall.
I love that this recipe slows me down. Peeling pears, stirring the pot, watching the syrup thicken—it’s a quiet, meditative process in a world that’s always rushing. And the reward is a pantry full of golden jars that make every breakfast feel like a small celebration.
If you make this recipe, I’d love to hear how it turns out. Did you add your own twist? Did you give jars as gifts? Drop a comment below or tag me in your photos—I’m always inspired by how people make recipes their own. And if you’re looking for another homemade gift idea, try making a batch of these alongside creamy French onion dip for a savory-sweet pairing that covers all your bases.
Frequently Asked Questions
Can I use frozen pears for this recipe?
Yes, but thaw them first and drain off any excess liquid. Frozen pears release more water during cooking, which means you’ll need to simmer the preserves longer to reach the right consistency. I’ve done it in a pinch, and it works, but fresh pears give a better texture.
Why didn’t my preserves thicken?
This usually happens for one of three reasons: you didn’t cook them long enough, your pears were too ripe and released too much water, or you reduced the sugar too much. Next time, cook the preserves until they reach 220°F on a thermometer, or test them on a cold plate. If they run, keep cooking.
Do I really need to use a water bath for canning?
If you plan to store the preserves at room temperature for more than a few weeks, yes. The water bath creates a vacuum seal that prevents spoilage. If you’re going to eat them within a few weeks, just refrigerate them. I’ve done both, and the refrigerated version tastes the same.
Can I reduce the sugar without using pectin?
You can, but the preserves will be thinner and won’t keep as long at room temperature. Sugar acts as a preservative and helps with gelling. If you want to reduce sugar, I recommend using Pomona’s pectin, which is designed for low-sugar recipes. The texture won’t be exactly the same, but it’s still delicious.
What’s the best pear variety for preserves?
Bartlett pears are my top choice because they break down nicely and have a classic pear flavor. Bosc pears hold their shape better and add texture. A mix of both gives you the best of both worlds. Avoid very soft or mealy pears—they turn into a watery paste.
If you enjoyed this recipe, you might also like flavorful Mexican street corn dip for another crowd-pleasing homemade option.
Pin This Recipe!
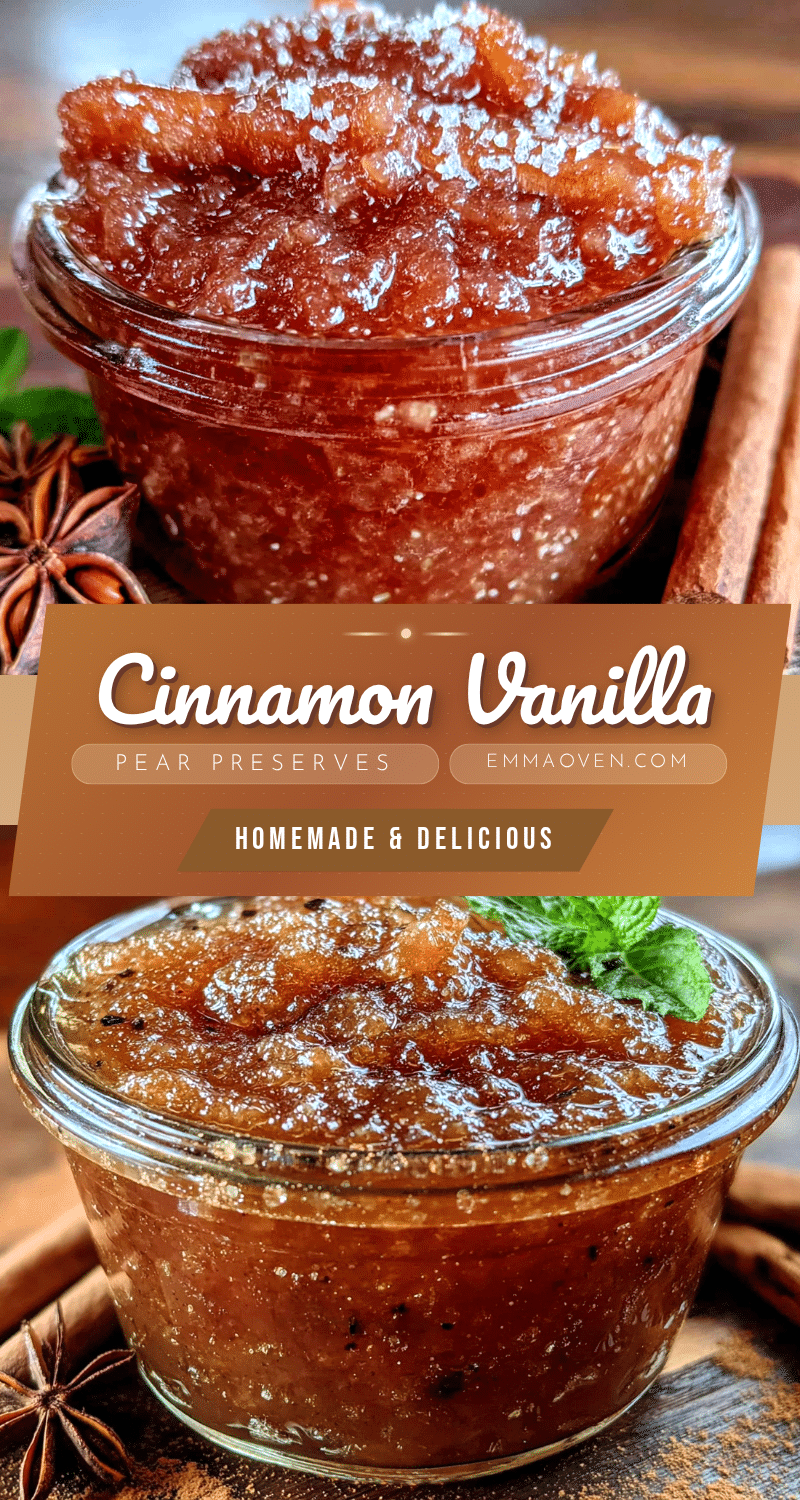
Homemade Cinnamon Vanilla Pear Preserves: Easy Canning Recipe
These pear preserves are thick enough to stay on a biscuit without dripping, but soft enough to spread without tearing your toast. The flavor is balanced—the pears bring natural sweetness, cinnamon adds warmth, and vanilla rounds everything into something that tastes like a slow Sunday morning.
- Prep Time: 15 minutes
- Cook Time: 35 minutes
- Total Time: 50 minutes
- Yield: 4 half-pint jars 1x
- Category: Preserves
- Cuisine: American
Ingredients
- 4 pounds pears (Bartlett or Bosc), peeled, cored, and diced into ½-inch cubes
- 2 cups granulated sugar (can reduce to 1½ cups if pears are very sweet)
- ¼ cup fresh lemon juice (from about 2 lemons)
- 1½ teaspoons ground cinnamon (Ceylon preferred, or Cassia)
- 2 teaspoons pure vanilla extract
- 1 vanilla bean (optional, but recommended)
- 1 tablespoon unsalted butter
Instructions
- Prep the pears: Peel, core, and dice 4 pounds of pears into ½-inch cubes. Work quickly to prevent browning, or toss the diced pears in a bowl with the lemon juice as you go.
- Macerate the fruit: In your large pot, combine the diced pears, 2 cups of sugar, and ¼ cup of lemon juice. Stir to coat the pears evenly. Let this sit for 20 to 30 minutes. The sugar draws out the pear’s natural juices, creating a syrup before you even turn on the heat.
- Add the spices: Stir in 1½ teaspoons of cinnamon. If you’re using a vanilla bean, split it lengthwise, scrape the seeds into the pot, and drop the pod in as well. If you’re using extract, hold off until later.
- Cook the preserves: Place the pot over medium-high heat and bring the mixture to a boil, stirring occasionally. Once it’s boiling, reduce the heat to medium-low so it maintains a steady simmer. Cook for 25 to 35 minutes, stirring every few minutes to prevent sticking. The pears will soften and break down, and the liquid will reduce into a thick, syrupy consistency.
- Test for doneness: After about 25 minutes, start checking the preserves. Spoon a small amount onto a cold plate and tilt it. If the preserves move slowly and leave a trail, they’re ready. If they run like water, keep cooking and check again in 5 minutes. You can also use a kitchen thermometer—the mixture should reach 220°F.
- Add the vanilla extract and butter: Once the preserves are thick enough, remove the pot from the heat. If you used a vanilla bean, fish out the pod (rinse and dry it—you can bury it in sugar to make vanilla sugar). Stir in 2 teaspoons of vanilla extract and 1 tablespoon of butter. The butter will melt and help reduce any foaming.
- Mash or blend to desired texture: Use a potato masher for chunky preserves or an immersion blender for a smoother texture. I usually give it 4 or 5 mashes—enough to break down most of the pears but leave a few small pieces for texture.
- Fill the jars: Ladle the hot preserves into sterilized jars, leaving ¼ inch of headspace. Wipe the rims clean with a damp paper towel, then screw on the lids and bands until fingertip-tight.
- Process in a water bath: Place the jars in a boiling water bath, ensuring they’re covered by at least 1 inch of water. Boil for 10 minutes (adjust for altitude if needed). Remove the jars and let them cool completely on a towel-lined counter. You’ll hear the satisfying pops as the lids seal.
Notes
The consistency changes as the preserves cool—what looks thin in the pot will thicken significantly once jarred and chilled. Don’t overcompensate by cooking it too long. Taste your pears before starting; if not very sweet, add an extra ¼ cup of sugar. If intensely sweet, cut back a little. If new to canning, you can skip the water bath and store in the refrigerator for up to 3 weeks. The flavor improves after a few days in the jar.
Nutrition
- Serving Size: 2 tablespoons
- Calories: 60
- Sugar: 12
- Carbohydrates: 15
Keywords: pear preserves, cinnamon vanilla pear preserves, homemade preserves, easy canning recipe, pear jam, vanilla pear preserves, cinnamon pear preserves, small batch preserves