That deep, dark purple stain on my thumb—the one that looks like I’ve been handling evidence from a crime scene—still takes me straight to my grandmother’s tiny kitchen every single time. She’d be standing over a pot of bubbling, fragrant liquid, the windows completely fogged up, while the whole house smelled like a strange, wonderful cross between a forest floor and a Christmas market. I never asked her what she was making back then. I just knew that when the coughing started in our house, she’d show up with a jar of something that looked like magic and tasted like tart, sweet berries.
It wasn’t until I was much older, standing in my own kitchen with a sick toddler and a desperate need for something that actually worked, that I finally asked for the recipe. She laughed. “There’s no recipe,” she said. “It’s just… elderberries. And honey. And a little bit of faith.” That wasn’t helpful. So I spent a whole season experimenting, ruining a few batches (too much ginger will burn your throat, trust me), and eventually landing on the version I now make every single fall. It’s the one I reach for when the first sniffle hits, and honestly, it’s the one that makes me feel like I’ve got a little bit of her protection bottled up on my shelf.
This homemade elderberry syrup for cold season isn’t just a recipe. It’s a ritual now. It’s the thing I do for my family that feels ancient and modern all at once. And once you taste it—once you feel that warmth spread through your chest—you’ll understand why I never buy the store-bought stuff anymore.
Why You’ll Love This Recipe
Let me be real with you. I’ve tested a lot of versions of homemade elderberry syrup for cold season, and most of them fall into one of two camps: they taste terrible but work, or they taste amazing and do absolutely nothing. This one sits right in the sweet spot. It’s effective, it’s delicious, and it’s so simple you’ll wonder why you ever spent money on those little glass bottles at the health food store.
- Quick & Easy: This comes together in about 45 minutes, most of which is hands-off simmering time. You don’t need to be a herbalist or a chef to pull this off.
- Simple Ingredients: Dried elderberries, honey, and a few pantry spices. That’s it. No weird extracts or expensive powders.
- Perfect for Cold Season: Whether you’re trying to prevent something or you’re already deep in the tissues-and-tea phase, this syrup is your best friend.
- Crowd-Pleaser: Even the kids take it without a fight. It tastes like a fancy berry syrup you’d pour on pancakes, not like medicine.
- Unbelievably Effective: I’m not making medical claims here—I’m just saying that in my house, the jars empty faster when everyone’s healthy, and they sit full when we’re not.
What makes this recipe different from the rest? It’s the balance. The cinnamon and clove give it a warmth that feels like a hug, while the ginger adds just enough zing to clear your head. And the honey? It’s not just for sweetness—it’s a natural soother for sore throats. This isn’t just another syrup recipe. It’s the one I’ve tweaked over five years of cold seasons, and it’s the only one I trust.
What Ingredients You Will Need
This recipe calls for a handful of ingredients that are easy to find and work together to create a powerful, delicious homemade elderberry syrup for cold season. Most of these are probably already in your spice cabinet, which is half the battle.
- Dried elderberries (1 cup): These are the star of the show. You can find them online or at health food stores. I personally like the ones from Mountain Rose Herbs—they’re consistently high quality. Don’t use fresh elderberries unless you know what you’re doing; they need to be cooked to be safe.
- Water (4 cups): Filtered water is best, but tap works fine. The water pulls all the goodness out of the berries and spices.
- Raw honey (1 cup): This is non-negotiable for me. Raw honey has natural antibacterial properties and adds a depth of flavor that processed honey just can’t match. If you’re vegan, you can use maple syrup, but it will change the taste and thickness.
- Fresh ginger (1-inch piece, sliced): Ginger adds warmth and a little heat. It’s also great for settling an upset stomach, which sometimes comes with colds. Don’t bother peeling it—just slice it into coins.
- Cinnamon sticks (2): These add a sweet, woody flavor that makes the syrup taste like a cozy winter drink. I prefer Ceylon cinnamon for its milder taste, but Cassia works too.
- Whole cloves (1 teaspoon): A little goes a long way. Cloves add a spicy, almost numbing quality that’s really soothing for a sore throat.
- Optional: Star anise (1 pod): I add this sometimes for a licorice-like undertone. It’s not traditional, but my grandmother would approve of the experimentation.
That’s it. Seven ingredients, and you’re on your way to a jar of liquid gold. The key is using the best quality you can afford, especially the honey. Your syrup will only be as good as what you put into it.
Equipment Needed
You don’t need a fancy kitchen to make this homemade elderberry syrup for cold season. Here’s what you’ll need:
- A medium saucepan: Nothing fancy. A 2-quart pot works perfectly. I use my old stainless steel one that’s seen better days.
- A fine-mesh strainer or cheesecloth: You need something to strain out the berries and spices. A strainer is easier, but cheesecloth gives you a clearer syrup.
- A glass jar or bottle for storage: A 16-ounce mason jar is perfect. Make sure it’s clean and dry before you pour in the syrup.
- A wooden spoon: For stirring. Metal is fine too, but wood feels nicer.
- A funnel (optional but helpful): Makes pouring into the jar way less messy. Trust me on this one.
If you don’t have a fine-mesh strainer, you can use a regular colander lined with a clean kitchen towel. It works just as well, though you might lose a little more liquid. I’ve done it that way when I was traveling, and it turned out fine.
Preparation Method
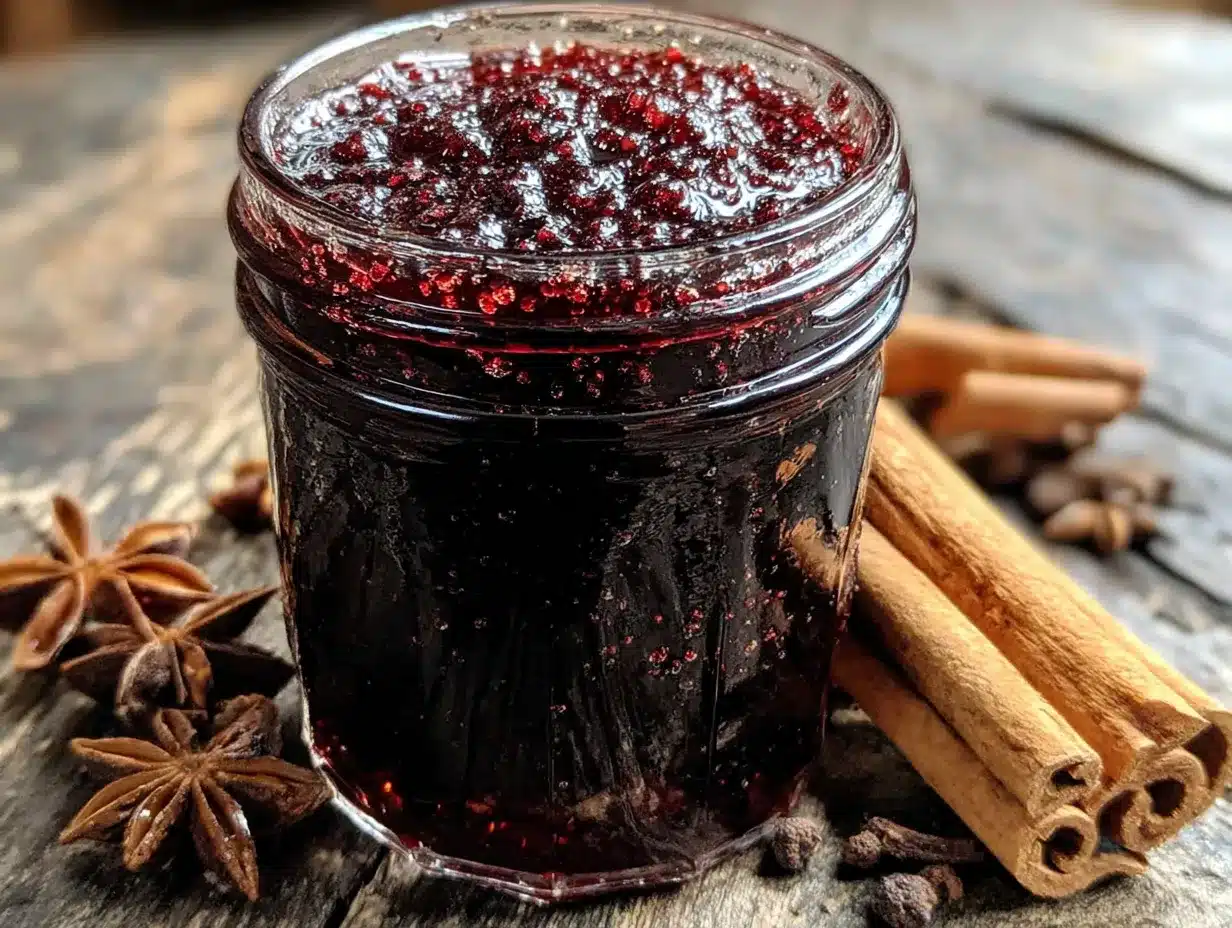
Making this homemade elderberry syrup for cold season is almost meditative. There’s something about watching the water turn that deep, gorgeous purple that feels like alchemy. Here’s how to do it.
- Combine the berries, water, and spices: In your saucepan, add the dried elderberries, water, sliced ginger, cinnamon sticks, and cloves. If you’re using star anise, throw it in now. Give it a quick stir with your wooden spoon.
- Bring to a boil, then simmer: Turn the heat to high and bring the mixture to a rolling boil. Once it’s boiling, reduce the heat to low and let it simmer, uncovered, for about 30-40 minutes. You’ll see the liquid reduce by about half, and the berries will look plump and faded. The kitchen will smell incredible at this point—like a cozy apothecary.
- Mash the berries (optional): After it’s simmered, I like to take my spoon and gently mash the berries against the side of the pot. This releases a little more of their goodness. You don’t have to do this, but I swear it makes the syrup richer.
- Strain the liquid: Place your fine-mesh strainer over a large bowl or a heatproof measuring cup. Carefully pour the mixture through the strainer. Let it sit for a few minutes to drain completely. Don’t press on the berries too hard, or you’ll get cloudy syrup—though that’s not the end of the world.
- Let it cool slightly: Let the strained liquid cool for about 10-15 minutes. You want it warm, not hot, when you add the honey. If it’s too hot, it can damage the beneficial properties of the raw honey.
- Add the honey: Pour the honey into the warm liquid and stir gently until it’s fully dissolved. Taste it here—if you want it sweeter, add a little more honey. If you want it more tart, you’re good as is.
- Bottle it up: Use your funnel to pour the syrup into your clean glass jar. Screw the lid on tightly and let it cool completely to room temperature before refrigerating.
That’s it. Six steps, and you’ve got yourself a jar of homemade elderberry syrup for cold season that’s ready to use. The whole process takes about 45 minutes, but most of that is just waiting for the berries to do their thing.
Cooking Tips & Techniques
I’ve made this recipe more times than I can count, and I’ve learned a few things the hard way. Here are my best tips for making sure your homemade elderberry syrup for cold season turns out perfect every time.
- Don’t boil the honey: This is the biggest mistake I made the first time. I added the honey while the liquid was still boiling, and it turned into a grainy mess. Raw honey is delicate—add it when the liquid is warm, not hot.
- Watch the simmer: A gentle simmer is all you need. If you boil it too hard, the liquid will reduce too much, and you’ll end up with a thick, jelly-like syrup instead of a pourable one. It’s still usable, but it’s harder to measure out.
- Use a timer: It’s easy to get distracted and let it simmer for an hour. Set a timer for 30 minutes, check it, and go from there. You want it reduced by about half, but every stove is different.
- Strain twice for clarity: If you want a crystal-clear syrup, strain it once through the fine-mesh strainer and then again through a coffee filter or cheesecloth. I don’t bother with this step, but if you’re gifting it, it looks nicer.
- Label your jar: I know this sounds silly, but I once grabbed my elderberry syrup instead of my maple syrup and poured it on my pancakes. It was… memorable. Write the date on the jar so you know when you made it.
One time, I forgot to add the honey entirely and only realized it when I went to use the syrup the next day. I had to dump it back into the pot, warm it up, and add the honey then. It still worked, but it was a hassle. Learn from my mistakes!
Variations & Adaptations
This homemade elderberry syrup for cold season is incredibly flexible. Here are a few ways to change it up based on what you have or what you need.
- Spice it up: Add a pinch of cayenne pepper or a dried chili pepper to the simmering liquid for an extra kick. It’s great for clearing sinuses, but it’s not for the faint of heart.
- Make it alcohol-based (tincture-style): If you want a shelf-stable version, you can skip the honey and use vodka or brandy instead. Simmer the berries and spices in water, strain, let it cool, and then mix equal parts of the concentrate with alcohol. This version lasts for months without refrigeration.
- Add other immune-boosting herbs: I’ve added dried echinacea root or astragalus root to the simmering liquid before. It adds a slightly earthy flavor but boosts the immune-supporting properties. Just strain it out with the berries.
- Make it kid-friendly: Reduce the ginger by half and skip the cloves if your kids are sensitive to strong flavors. You can also use a milder honey like clover honey instead of a robust wildflower honey.
- Try a different sweetener: If you’re out of honey or avoiding sugar, you can use maple syrup or agave nectar. The texture will be thinner, and the flavor will be different, but it still works.
My personal favorite variation is adding a splash of fresh lemon juice right before bottling. It brightens up the flavor and adds a little extra vitamin C. I’ve been doing that for the last two years, and it’s become my go-to.
Serving & Storage Suggestions
This homemade elderberry syrup for cold season is best served at room temperature, straight from a spoon. But there are a few other ways to use it.
- Dosage: For adults, I take 1 tablespoon daily for maintenance and 1 tablespoon every 3-4 hours when I feel something coming on. For kids over 1 year old, 1 teaspoon daily is a good starting point. Always check with your pediatrician first.
- In tea: Stir a tablespoon into a cup of hot water with a squeeze of lemon for a soothing drink. It’s like a fancy tea without the tea bag.
- On pancakes or yogurt: Honestly, it’s delicious on breakfast foods. My kids ask for it on their oatmeal all the time.
- Storage: Keep your syrup in the refrigerator at all times. Because it’s made with fresh ingredients and no preservatives, it will spoil if left out. It should last for about 2-3 months in the fridge, but mine never lasts that long.
- Freezing: You can freeze the syrup in ice cube trays for single-serving portions. Pop out a cube and thaw it in the fridge overnight. This is great if you make a big batch.
The flavors actually deepen after a day or two in the fridge. The spices meld together, and the honey settles in. It’s even better on day two than it is fresh.
Nutritional Information & Benefits
While I’m not a doctor, I can tell you what the ingredients in this homemade elderberry syrup for cold season are known for. Elderberries are packed with antioxidants and vitamins, particularly vitamin C. They’re also known for their potential to support the immune system, especially when taken at the first sign of a cold.
- Estimated per tablespoon serving: Calories: 35-40, Carbs: 10g, Sugars: 9g (mostly from honey). This is not a low-sugar recipe, but the benefits outweigh the sugar content for short-term use.
- Honey: Raw honey has natural antibacterial and antiviral properties. It’s also a natural cough suppressant and soothes sore throats.
- Ginger: Known for its anti-inflammatory effects and its ability to ease nausea. It also adds a nice warmth to the syrup.
- Cinnamon and cloves: Both are rich in antioxidants and have antimicrobial properties. They also make the syrup taste amazing.
- Dietary considerations: This recipe is gluten-free and dairy-free. It’s not suitable for vegans if you use honey, but you can substitute maple syrup. It’s also not safe for infants under 1 year old due to the honey.
I personally love that I know exactly what’s going into my family’s bodies. No weird additives, no high-fructose corn syrup, just real food that tastes good and makes us feel better. It’s a small act of care that goes a long way.
Conclusion
Making your own homemade elderberry syrup for cold season is one of those things that feels deeply satisfying. It’s a simple act of preparation that says, “I’ve got this.” You’re not just making a syrup—you’re building a little bit of resilience into your family’s routine. And honestly, it’s a lot cheaper than buying those tiny bottles at the store.
I’d love to hear how yours turns out. Did you add any extra spices? Did your kids actually take it without a fight? Drop a comment below and let me know. And if you’re looking for more comforting recipes to get you through the season, you might enjoy this easy cheesy tater tot breakfast casserole for a cozy morning meal, or these savory pulled chicken sliders for a game day snack that’ll warm you up. Don’t forget to pin this recipe for later—you’ll thank yourself when cold season rolls around.
Stay healthy, friends. And keep a jar of this syrup handy. You never know when you’ll need a little bit of that deep purple magic.
Frequently Asked Questions
Can I use fresh elderberries instead of dried?
You can, but you need to be careful. Fresh elderberries must be cooked before eating, as they can cause stomach upset when raw. If you use fresh, double the amount (2 cups) and add a little extra water since they contain more moisture.
How long does homemade elderberry syrup last?
In the refrigerator, it will keep for about 2-3 months. If you freeze it in ice cube trays, it can last up to 6 months. Always check for signs of mold or an off smell before using.
Can I give this syrup to my toddler?
Yes, but only if they are over 1 year old due to the honey. For children aged 1-3, start with 1/2 teaspoon daily. Always consult your pediatrician before introducing any new supplement to your child’s routine.
Why did my syrup turn out too thick?
You probably simmered it for too long, reducing the liquid too much. Next time, set a timer for 30 minutes and check the consistency. You can also add a tablespoon of warm water to thin it out after it’s made.
Can I skip the spices?
You can, but the flavor will be much more one-dimensional. The spices aren’t just for taste—they also add their own health benefits. If you’re not a fan of cloves, try using just cinnamon and ginger instead.
Pin This Recipe!
Homemade Elderberry Syrup: The Best Natural Cold Remedy
This homemade elderberry syrup for cold season is a simple, effective, and delicious natural remedy made with dried elderberries, honey, and warming spices. It’s a comforting ritual that helps support the immune system during cold season.
- Prep Time: 10 minutes
- Cook Time: 35 minutes
- Total Time: 45 minutes
- Yield: 16 servings 1x
- Category: Remedy
- Cuisine: American
Ingredients
- 1 cup dried elderberries
- 4 cups water
- 1 cup raw honey
- 1-inch piece fresh ginger, sliced
- 2 cinnamon sticks
- 1 teaspoon whole cloves
- 1 pod star anise (optional)
Instructions
- Combine the dried elderberries, water, sliced ginger, cinnamon sticks, cloves, and star anise (if using) in a medium saucepan. Stir briefly.
- Bring to a rolling boil over high heat, then reduce heat to low and simmer uncovered for 30-40 minutes, until the liquid is reduced by about half and the berries are plump and faded.
- Optional: Gently mash the berries against the side of the pot with a wooden spoon to release more flavor.
- Strain the liquid through a fine-mesh strainer or cheesecloth into a large bowl or heatproof measuring cup. Let it drain completely without pressing too hard on the berries.
- Let the strained liquid cool for 10-15 minutes until warm, not hot.
- Pour the honey into the warm liquid and stir gently until fully dissolved. Taste and adjust sweetness if desired.
- Pour the syrup into a clean glass jar using a funnel. Screw the lid on tightly and let cool completely to room temperature before refrigerating.
Notes
Do not add honey while the liquid is boiling; it can damage the beneficial properties of raw honey. For a clearer syrup, strain twice. Store in the refrigerator for up to 2-3 months. Freeze in ice cube trays for longer storage. Not suitable for infants under 1 year old due to honey.
Nutrition
- Serving Size: 1 tablespoon
- Calories: 3540
- Sugar: 9
- Carbohydrates: 10
Keywords: homemade elderberry syrup, elderberry syrup recipe, natural cold remedy, immune support syrup, elderberry honey syrup