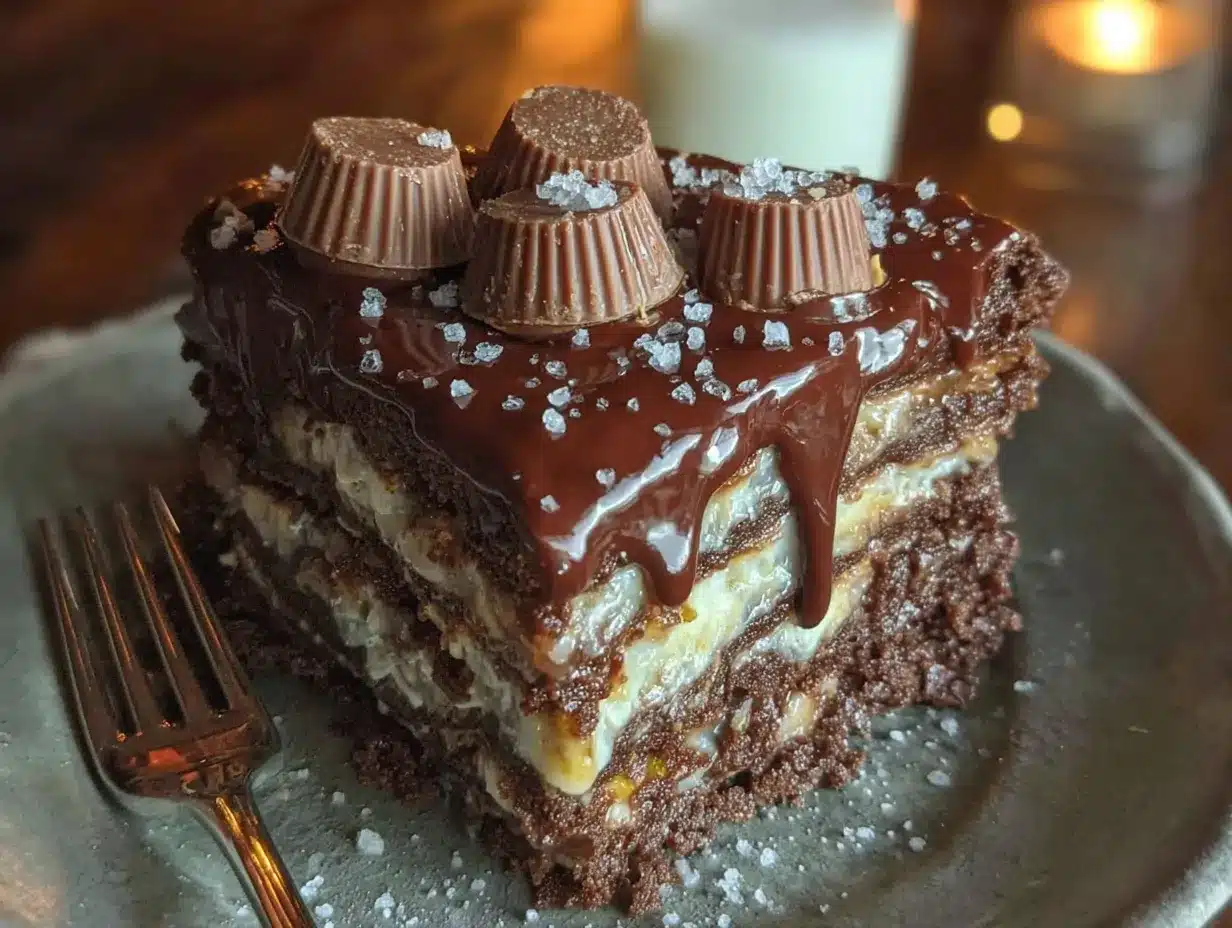
The way the layers sink just slightly under the weight of the next one, that soft give before everything sets firm—that’s the moment I wait for every time. It’s not the first bite, not even the second. It’s the quiet hour in the fridge when the cookies start softening into something almost cake-like, and the filling gets thick enough to hold its shape without being stiff. This Easy No-Bake Reese’s Peanut Butter Cup Icebox Cake is basically a love letter to that texture.
I made it for the first time on a Tuesday that felt like a Monday, when I needed something that delivered big without asking for much in return. No oven, no mixer, no complicated steps. Just layers of chocolate wafer cookies, a ridiculously creamy peanut butter filling, and enough chopped Reese’s cups to make you forget your own name. It’s the kind of dessert that looks like you spent hours on it, but honestly? You could make it in your pajamas.
There’s something about icebox cakes that feels almost like a cheat code. You stack, you spread, you chill, and somehow the fridge does all the hard work. This one stuck with me because it doesn’t try to be anything it’s not. It’s rich, it’s peanut buttery, it’s chocolatey in that nostalgic Reese’s way, and it’s exactly what you want when you’re craving something indulgent but don’t have the energy to pull out a mixer. Trust me on this one—you’re going to want this in your back pocket.
Why You’ll Love This Recipe
I’ve tested this Easy No-Bake Reese’s Peanut Butter Cup Icebox Cake more times than I care to admit, and every single batch confirmed what I already suspected: this is the dessert that wins. It’s not just good—it’s the kind of good that makes people hover around the kitchen waiting for the first slice.
- No Oven Required: Summer heat, broken oven, or just pure laziness—this recipe doesn’t care. The fridge does all the work.
- Simple Ingredients: You probably already have most of this in your pantry. No weird extracts or hard-to-find anything.
- Crowd-Pleaser: I’ve brought this to potlucks, birthday dinners, and casual hangouts. It disappears every single time.
- Make-Ahead Friendly: This actually gets better after a day in the fridge. Perfect for stress-free hosting.
- Unbelievably Creamy: The combination of cream cheese, peanut butter, and whipped topping creates a filling that’s silky, rich, and completely addictive.
What makes this different from other peanut butter desserts is the texture. The cookies soften just enough to create a cake-like structure, but they don’t turn into complete mush. You still get that slight bite, that gentle resistance, before everything melts together. I spent weeks tweaking the ratios—too much cream cheese and it gets dense, too little and it won’t hold. This version hits that sweet spot where every slice stays neat but still feels decadent.
This is the dessert you make when you want to impress without the stress. It’s comfort food at its finest—rich, nostalgic, and completely satisfying.
What Ingredients You Will Need
This recipe uses simple, pantry-friendly ingredients to create something that tastes way more complicated than it actually is. Each component plays a specific role in building that perfect creamy, crunchy, chocolatey bite.
- Chocolate Wafer Cookies: These are the backbone of the cake. I recommend Nabisco Famous Chocolate Wafers for their deep cocoa flavor and sturdy texture. They soften perfectly without turning into a paste. You’ll need about one full box.
- Cream Cheese: Full-fat, softened to room temperature. This gives the filling structure and a slight tang that balances the sweetness. I’ve tried low-fat versions, and the texture just isn’t the same—it gets grainy.
- Creamy Peanut Butter: Go with a standard brand like Jif or Skippy for the smoothest result. Natural peanut butter that separates tends to make the filling oily and less stable. You want that classic, sweet peanut butter flavor here.
- Powdered Sugar: This sweetens the filling without adding grit. Sift it if you’re feeling fancy, but honestly, I’ve skipped that step plenty of times and it still turns out fine.
- Vanilla Extract: A splash rounds out the flavors. Pure vanilla is best, but imitation works in a pinch.
- Whipped Topping: Thawed Cool Whip or a stabilized homemade whipped cream. This lightens the filling and gives it that airy, mousse-like texture. Don’t skip it—it’s what makes the cake feel light instead of heavy.
- Reese’s Peanut Butter Cups: Chopped, both for layering and topping. I use the miniature ones because they’re easier to chop evenly, but full-size cups work too. You’ll need about 10-12 ounces total.
- Chocolate Syrup or Ganache: For drizzling over the top. A simple melted chocolate and cream ganache is my preference, but a good-quality store-bought syrup works when you’re short on time.
For the best results, make sure your cream cheese is truly at room temperature. Cold cream cheese creates lumps that won’t smooth out, and nobody wants a lumpy peanut butter filling. Also, don’t overmix the whipped topping into the filling—fold it gently to keep all that air in.
Equipment Needed
- 9-Inch Springform Pan: This is ideal for easy removal, but a deep pie dish or a loaf pan works too. I’ve even made this in a square baking dish for a more casual look.
- Hand Mixer or Stand Mixer: You’ll need this to get the cream cheese and peanut butter perfectly smooth. A whisk and some serious arm strength could work, but I wouldn’t recommend it.
- Spatula: A good rubber spatula for folding and spreading. Offset spatulas are great for getting clean, even layers.
- Cutting Board and Knife: For chopping the peanut butter cups. A serrated knife works best to get clean cuts without smashing the chocolate.
- Plastic Wrap or Foil: For covering the pan while it chills. You want a tight seal so the cake doesn’t pick up any fridge odors.
Preparation Method
- Make the Peanut Butter Filling: In a large mixing bowl, beat 8 ounces of softened cream cheese with a hand mixer until it’s completely smooth—about 2 minutes. Add 1 cup of creamy peanut butter and beat until fully combined. Scrape down the sides of the bowl. Add 1 cup of powdered sugar and 1 teaspoon of vanilla extract, then beat on low until the sugar is incorporated. Increase speed and beat for another minute until the mixture is light and fluffy.
- Fold in the Whipped Topping: Gently fold in 8 ounces of thawed whipped topping using a rubber spatula. Don’t overmix—you want the filling to stay airy. Stop as soon as you don’t see any white streaks. Set the bowl aside.
- Prepare the Pan: Line the bottom of your 9-inch springform pan with a round of parchment paper. This isn’t strictly necessary, but it makes sliding the first slice out so much easier.
- Layer the Cookies: Arrange a single layer of chocolate wafer cookies on the bottom of the pan. Break a few cookies to fill in the gaps—you want as much surface covered as possible. Don’t stress about perfection; the filling will hold everything together.
- Add the First Filling Layer: Spread about one-third of the peanut butter filling evenly over the cookies. Use an offset spatula or the back of a spoon to get it smooth. Sprinkle a generous handful of chopped Reese’s cups over the filling.
- Repeat the Layers: Add another layer of cookies, another third of the filling, and more chopped peanut butter cups. Repeat one more time, ending with the last of the filling on top. You should have three layers of cookies and three layers of filling.
- Top with Ganache and Cups: Drizzle about ¼ cup of chocolate ganache or syrup over the top layer. Sprinkle the remaining chopped Reese’s cups over the top. If you want it extra fancy, add a few whole mini cups in the center.
- Chill: Cover the pan tightly with plastic wrap and refrigerate for at least 6 hours, but overnight is better. The cookies need time to soften, and the flavors need time to meld. I’ve made the mistake of rushing this step—the cake won’t slice cleanly if you skip the full chill time.
- Serve: Run a thin knife around the edge of the pan before releasing the springform. Slice with a sharp knife, wiping the blade clean between cuts for neat slices. Serve cold.
You’ll know the cake is ready when the cookies have softened completely and the filling feels firm to the touch. The first slice might still be a little messy, but by the second or third slice, you’ll have perfect, clean layers.
Cooking Tips & Techniques
I’ve learned a few things the hard way with this Easy No-Bake Reese’s Peanut Butter Cup Icebox Cake, so let me save you the trouble.
Don’t skip the full chill time. I know it’s tempting to dig in after four hours, but the cookies won’t be fully softened yet. You’ll end up with a crunchy, crumbly mess instead of that perfect cake-like texture. Overnight is truly the sweet spot.
Soften your cream cheese properly. Leave it on the counter for at least 30 minutes before you start. If you’re in a hurry, cut it into small cubes and let them sit for 15 minutes. Microwaving cream cheese can work, but go in 10-second bursts on low power—otherwise, you’ll end up with melted spots that won’t mix evenly.
Chop the peanut butter cups while they’re cold. Room temperature Reese’s are soft and sticky, and they’ll smear all over your knife. Pop them in the fridge for 10 minutes before chopping, and you’ll get clean, neat pieces.
Use a springform pan. I tried making this in a regular cake pan once, and getting the first slice out was a disaster. The springform pan lets you release the sides cleanly, and the cake stays intact. If you don’t have one, line your pan with parchment paper strips that hang over the edges so you can lift the whole cake out.
Layer with intention. Don’t just dump the cookies in randomly. Take the time to arrange them in a single layer, breaking pieces to fill gaps. This ensures every slice has an even distribution of cookies and filling.
Let the cake sit at room temperature for 5 minutes before slicing. Straight out of the fridge, the filling is very firm. A few minutes on the counter softens it just enough for clean slices without making it runny.
Variations & Adaptations
This recipe is surprisingly flexible, and I’ve tried several variations depending on what I have on hand or who I’m serving.
Gluten-Free Version: Swap the chocolate wafer cookies for gluten-free chocolate cookies. I’ve used gluten-free Oreos with great results—just scrape out the cream filling if you want to keep the sweetness balanced.
Dairy-Free Adaptation: Use dairy-free cream cheese (like Kite Hill or Tofutti), a dairy-free peanut butter (most are naturally dairy-free), and a coconut-based whipped topping. The texture will be slightly softer, so chill it for a full 24 hours for best results.
Extra Chocolate: If you’re a chocolate lover, add a layer of chocolate pudding or chocolate mousse between the cookie layers. I’ve done this for birthdays, and it turns the cake into an absolute showstopper.
Peanut Butter Cup Swirl: Melt a few extra peanut butter cups with a splash of cream and swirl the mixture into the top layer before chilling. It creates a beautiful marbled effect and adds even more peanut butter flavor.
Different Cookie Options: Graham crackers, shortbread cookies, or even vanilla wafers can replace the chocolate wafers. The flavor profile changes, but the texture stays similar. I actually made a version with Nilla Wafers once, and it tasted like a peanut butter banana cream pie—accidentally amazing.
Add a Banana Layer: Slice fresh bananas and layer them over the filling for a Reese’s-banana combo. Just make sure to eat it within 24 hours, or the bananas will brown and get mushy.
Serving & Storage Suggestions
This Easy No-Bake Reese’s Peanut Butter Cup Icebox Cake is best served cold, straight from the fridge. I like to let it sit on the counter for about 5 minutes before slicing—it softens the filling just enough for clean, neat slices without making it runny.
For presentation, I drizzle extra chocolate syrup over each slice and add a small dollop of whipped cream. A sprinkle of sea salt on top really brings out the chocolate and peanut butter flavors. If you’re serving this at a party, arrange the slices on a platter with extra chopped Reese’s cups scattered around.
This cake pairs beautifully with a cold glass of milk, a hot cup of coffee, or even a scoop of vanilla ice cream on the side. The richness of the cake balances perfectly with something light and cold.
Storage: Cover the pan tightly with plastic wrap or transfer slices to an airtight container. The cake will keep in the refrigerator for up to 5 days. The texture actually improves after the first day as the cookies continue to soften and the flavors meld together.
Freezing: This cake freezes beautifully. Wrap the entire cake (or individual slices) tightly in plastic wrap, then in a layer of foil. Freeze for up to 3 months. To serve, thaw in the refrigerator overnight. The texture remains creamy and the cookies stay perfectly soft.
Reheating: This is a no-bake dessert, so there’s no reheating involved. But if you prefer a slightly softer texture, let a slice sit at room temperature for 10-15 minutes before eating.
Nutritional Information & Benefits
Let’s be real—this is an indulgent dessert, and I’m not here to pretend otherwise. But knowing what’s in it helps you enjoy it mindfully.
Per slice (based on 12 servings):
- Calories: ~420
- Fat: 28g
- Saturated Fat: 12g
- Carbohydrates: 38g
- Sugar: 24g
- Protein: 10g
- Fiber: 3g
The peanut butter provides a good amount of protein and healthy fats, along with vitamin E and magnesium. The cream cheese adds calcium, and the dark chocolate in the wafers contains antioxidants. Is it a health food? No. But it’s a dessert made with real ingredients, and that counts for something.
If you’re watching your sugar intake, you can reduce the powdered sugar to ¾ cup and use a sugar-free chocolate syrup. The filling will be slightly less sweet, but the peanut butter flavor will still shine through.
Conclusion
This Easy No-Bake Reese’s Peanut Butter Cup Icebox Cake is the kind of dessert that makes you look like a hero with almost zero effort. It’s rich, creamy, and packed with that nostalgic peanut butter and chocolate combo that everyone loves. No oven, no fuss, no stress—just layers of pure comfort.
I love this recipe because it’s forgiving. You can tweak it, adapt it, and make it your own without worrying about ruining it. Swap the cookies, add bananas, go extra heavy on the peanut butter cups—it all works. And every single time, you end up with something that tastes like you spent hours on it.
I’d love to hear how yours turns out. Did you add a twist? Use a different cookie? Drop a comment below and let me know—I’m always looking for new ideas to try. And if you loved this, share it with a friend who needs a no-bake win in their life. Happy layering!
Frequently Asked Questions
Can I use natural peanut butter for this recipe?
I don’t recommend it. Natural peanut butter that separates tends to make the filling oily and less stable. Stick with a standard creamy peanut butter like Jif or Skippy for the best texture.
How long does this cake need to chill?
At least 6 hours, but overnight is best. The cookies need time to soften, and the flavors need time to meld. Rushing this step will result in a crumbly, less cohesive cake.
Can I make this cake ahead of time?
Absolutely. This cake actually gets better after a day in the fridge. You can make it up to 2 days in advance and keep it covered in the refrigerator.
Can I freeze this icebox cake?
Yes, it freezes beautifully. Wrap the entire cake or individual slices tightly in plastic wrap and foil. Freeze for up to 3 months. Thaw in the refrigerator overnight before serving.
What can I use instead of chocolate wafer cookies?
Graham crackers, Oreos (cream removed), shortbread cookies, or vanilla wafers all work well. Each will give the cake a slightly different flavor, but the texture will be similar.
Pin This Recipe!
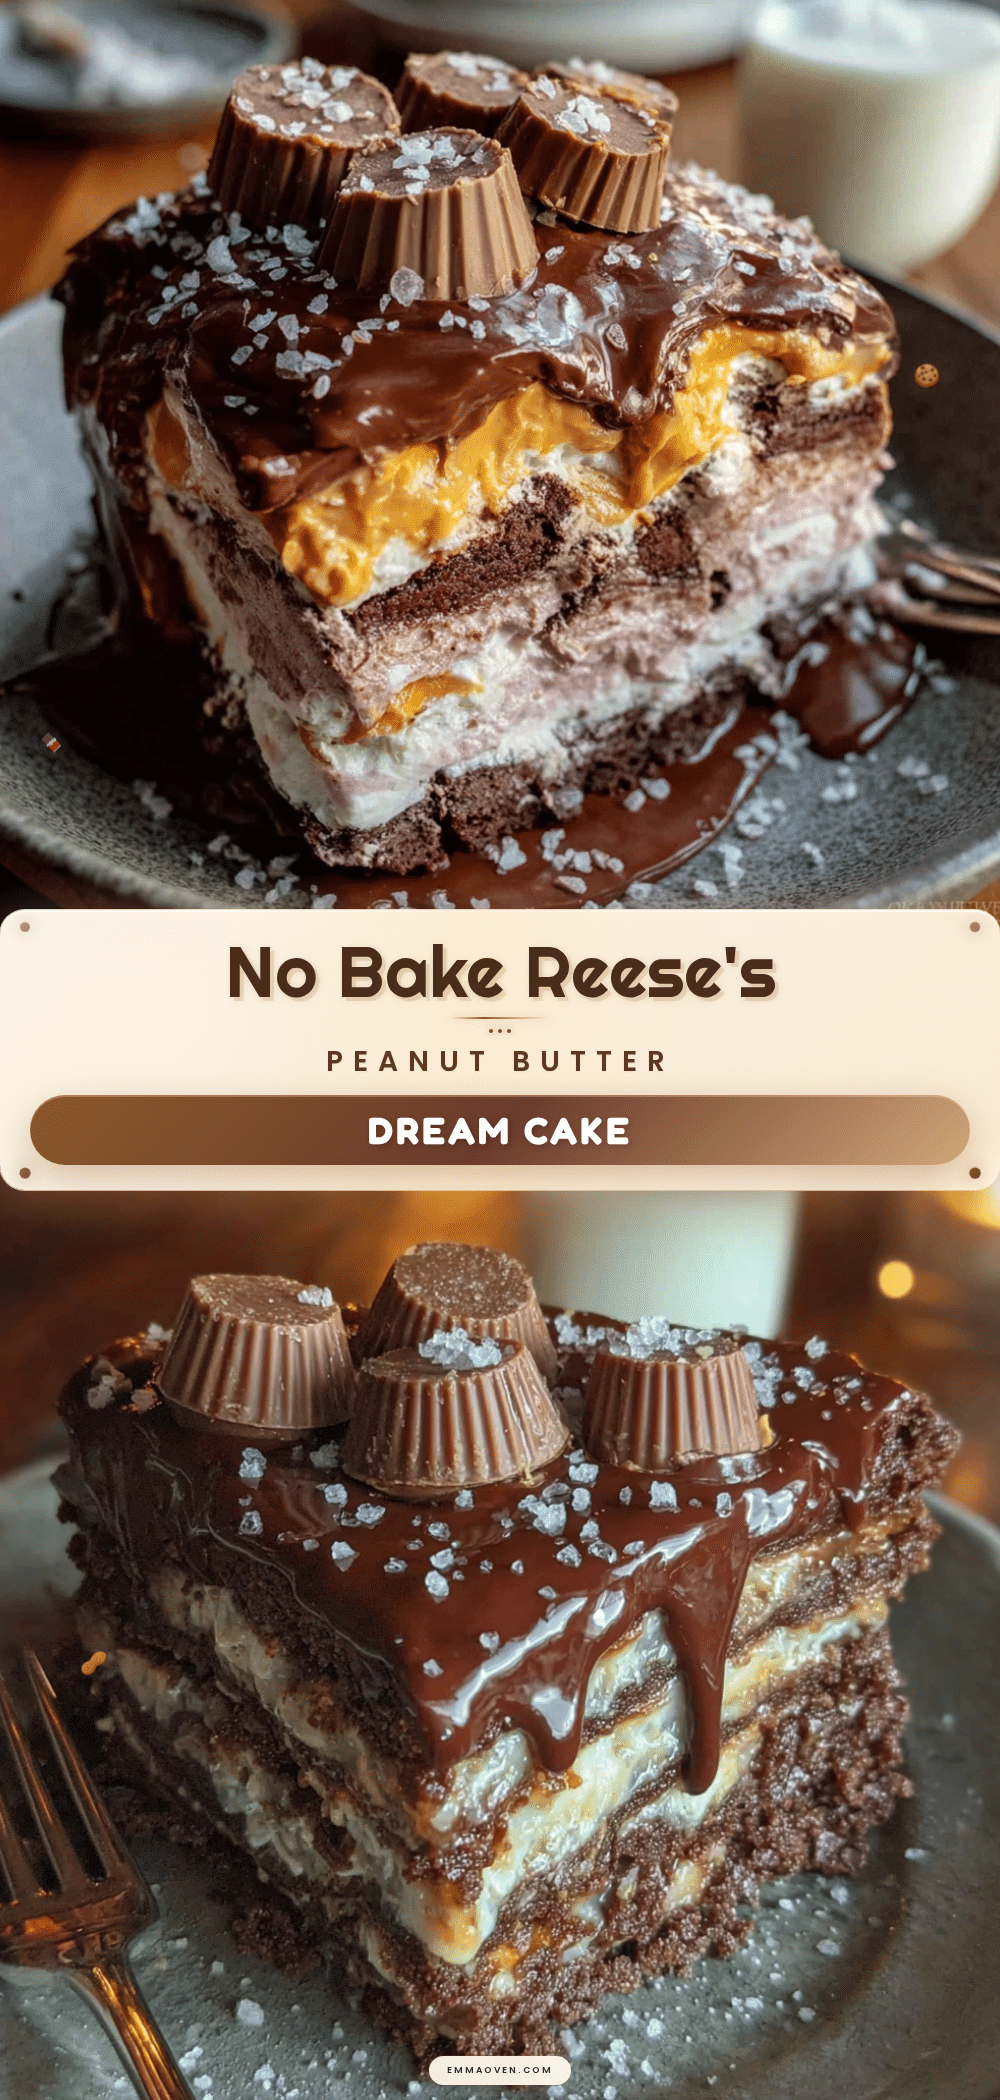
Easy No-Bake Reese’s Peanut Butter Cup Icebox Cake Recipe

This Easy No-Bake Reese’s Peanut Butter Cup Icebox Cake is a rich, creamy, and indulgent dessert made with layers of chocolate wafer cookies, a silky peanut butter filling, and plenty of chopped Reese’s cups. No oven required, and the fridge does all the work for a stress-free, crowd-pleasing treat.
- Prep Time: 20 minutes
- Cook Time: 0 minutes
- Total Time: 6 hours 20 minutes (includes chilling)
- Yield: 12 servings 1x
- Category: Dessert
- Cuisine: American
Ingredients
- 1 box (about 9 oz) Nabisco Famous Chocolate Wafers
- 8 oz cream cheese, softened to room temperature
- 1 cup creamy peanut butter (e.g., Jif or Skippy)
- 1 cup powdered sugar
- 1 teaspoon vanilla extract
- 8 oz thawed whipped topping (e.g., Cool Whip)
- 10–12 oz Reese’s Peanut Butter Cups, chopped (miniature or full-size)
- ¼ cup chocolate ganache or syrup (for drizzling)
Instructions
- Make the Peanut Butter Filling: In a large mixing bowl, beat 8 ounces of softened cream cheese with a hand mixer until completely smooth, about 2 minutes. Add 1 cup of creamy peanut butter and beat until fully combined. Scrape down the sides of the bowl. Add 1 cup of powdered sugar and 1 teaspoon of vanilla extract, then beat on low until the sugar is incorporated. Increase speed and beat for another minute until the mixture is light and fluffy.
- Fold in the Whipped Topping: Gently fold in 8 ounces of thawed whipped topping using a rubber spatula. Don’t overmix—you want the filling to stay airy. Stop as soon as you don’t see any white streaks. Set the bowl aside.
- Prepare the Pan: Line the bottom of your 9-inch springform pan with a round of parchment paper. This isn’t strictly necessary, but it makes sliding the first slice out so much easier.
- Layer the Cookies: Arrange a single layer of chocolate wafer cookies on the bottom of the pan. Break a few cookies to fill in the gaps—you want as much surface covered as possible. Don’t stress about perfection; the filling will hold everything together.
- Add the First Filling Layer: Spread about one-third of the peanut butter filling evenly over the cookies. Use an offset spatula or the back of a spoon to get it smooth. Sprinkle a generous handful of chopped Reese’s cups over the filling.
- Repeat the Layers: Add another layer of cookies, another third of the filling, and more chopped peanut butter cups. Repeat one more time, ending with the last of the filling on top. You should have three layers of cookies and three layers of filling.
- Top with Ganache and Cups: Drizzle about ¼ cup of chocolate ganache or syrup over the top layer. Sprinkle the remaining chopped Reese’s cups over the top. If you want it extra fancy, add a few whole mini cups in the center.
- Chill: Cover the pan tightly with plastic wrap and refrigerate for at least 6 hours, but overnight is better. The cookies need time to soften, and the flavors need time to meld. I’ve made the mistake of rushing this step—the cake won’t slice cleanly if you skip the full chill time.
- Serve: Run a thin knife around the edge of the pan before releasing the springform. Slice with a sharp knife, wiping the blade clean between cuts for neat slices. Serve cold.
Notes
For best results, chill overnight. Let the cake sit at room temperature for 5 minutes before slicing for cleaner cuts. Chop peanut butter cups while cold for neat pieces. Soften cream cheese properly to avoid lumps.
Nutrition
- Serving Size: 1 slice
- Calories: 420
- Sugar: 24
- Fat: 28
- Saturated Fat: 12
- Carbohydrates: 38
- Fiber: 3
- Protein: 10
Keywords: no-bake dessert, icebox cake, peanut butter, Reese's, chocolate, easy dessert, summer dessert, make-ahead dessert