My partner popped open the jar and took one bite, then nodded with that slow, appreciative smile that means business. “These pickles? They’re actually great,” he said, which honestly caught me off guard because he’s usually a bit skeptical about homemade stuff that claims to be “fast.” Watching him crunch into those crispy garlic dill refrigerator pickles was a quiet but vivid moment—like I’d just stumbled upon a secret shortcut to serious snack satisfaction.
The cucumbers stayed perfectly crunchy, the garlic hit you just right without being overpowering, and the dill brought a fresh punch that felt like summer trapped in a jar. Honestly, I hadn’t expected them to be ready in just 24 hours, which made me rethink all the fuss about traditional pickling times. It turns out you don’t need to wait weeks to get that satisfying tang and crunch.
That afternoon, with the jar open on the counter, I realized this recipe wasn’t just about pickles. It was about quick wins in the kitchen—something that fits right in with those moments when you want something homemade but can’t wait forever. It’s a simple, approachable recipe that somehow nails the balance between tangy, savory, and crisp. That’s why these crispy garlic dill refrigerator pickles stuck with me—they’re a little burst of homemade goodness you can enjoy almost immediately.
Why You’ll Love This Recipe
After testing a handful of quick pickle recipes, I can confidently say this one stands out for a few big reasons—ones I think you’ll appreciate no matter your pickle experience:
- Quick & Easy: These pickles come together in about 10 minutes of prep, then you just wait 24 hours. Perfect for last-minute cravings or when you want that fresh homemade vibe without spending days.
- Simple Ingredients: No oddball spices or hard-to-find items here. You probably already have garlic, dill, cucumbers, and a few pantry basics on hand.
- Perfect for Snacking or Serving: Whether you’re making sandwiches, hosting a casual get-together, or just craving a crunchy snack, these pickles fit right in.
- Crowd-Pleaser: From kids who love the mild tang to adults appreciating the classic dill garlic combo, this recipe tends to get unanimous thumbs up.
- Unbelievably Delicious & Crispy: That satisfying crunch is no accident—it’s all about the right cucumber choice and salt treatment that keeps them firm.
What makes this version different from your average quick pickle? It’s the layering of flavors and texture care. For example, I recommend using Kirby cucumbers for that perfect bite, and the garlic is sliced thinly to infuse flavor without overwhelming the fresh dill’s brightness. Plus, the vinegar ratio is spot-on to keep things tangy without turning the pickles mushy.
This recipe isn’t just about making pickles fast; it’s about getting that homemade taste that feels like you took your time, even when you didn’t. It’s the kind of pickle that makes your mouth do a little happy dance after the first crunch—comfort food with a crisp twist.
What Ingredients You Will Need
This recipe uses simple, wholesome ingredients to deliver bold flavor and satisfying texture without the fuss. Most of these are pantry staples or fresh basics, and you can tweak a few depending on what you have on hand.
- Kirby cucumbers (about 1 pound / 450 g) – These small, firm cucumbers are the best for pickling because they stay crisp. If you can’t find Kirby, pick small, firm cucumbers without soft spots.
- Fresh dill sprigs (4-6 sprigs) – Dill is the star herb here, lending that classic pickly flavor. Feel free to use more if you love the aroma.
- Garlic cloves (3-4 large, thinly sliced) – Adds a punch of savory depth. I like to slice them thin so the flavor infuses evenly without being too sharp.
- White vinegar (1 cup / 240 ml) – The acid that tangifies and preserves. You can swap apple cider vinegar for a slightly sweeter flavor.
- Water (1 cup / 240 ml) – Balances the vinegar for the perfect bite.
- Pickling salt or kosher salt (1 tablespoon) – Essential for crispness and seasoning. Avoid iodized salt as it can cloud the brine.
- Granulated sugar (1 teaspoon) – Just a touch to round out the acidity.
- Black peppercorns (1 teaspoon) – Adds a subtle spice note.
- Mustard seeds (1 teaspoon, optional) – For a little extra aromatic pop, but you can leave these out if you prefer a simpler profile.
Pro tip: I prefer Diamond Crystal kosher salt for pickling because it dissolves easily and doesn’t add bitterness. Also, if you want to try a low-sodium version, cut the salt to half but keep in mind it might affect texture.
Equipment Needed
- Quart-sized glass jar with lid – Wide mouth makes packing the cucumbers and herbs easier. Mason jars work perfectly.
- Sharp knife – For slicing cucumbers and garlic thinly and evenly.
- Measuring cups and spoons – For precise vinegar, water, salt, and sugar measurements.
- Small saucepan – To warm the brine and help dissolve salt and sugar quickly.
- Tongs or fork – Handy for pressing down cucumbers to keep them submerged in the brine.
If you don’t have a small saucepan, you can heat the brine in a microwave-safe bowl in short bursts, stirring in between until everything dissolves. Also, using a glass jar keeps the pickles tasting fresh and avoids any metallic flavors you might get from metal containers.
Preparation Method
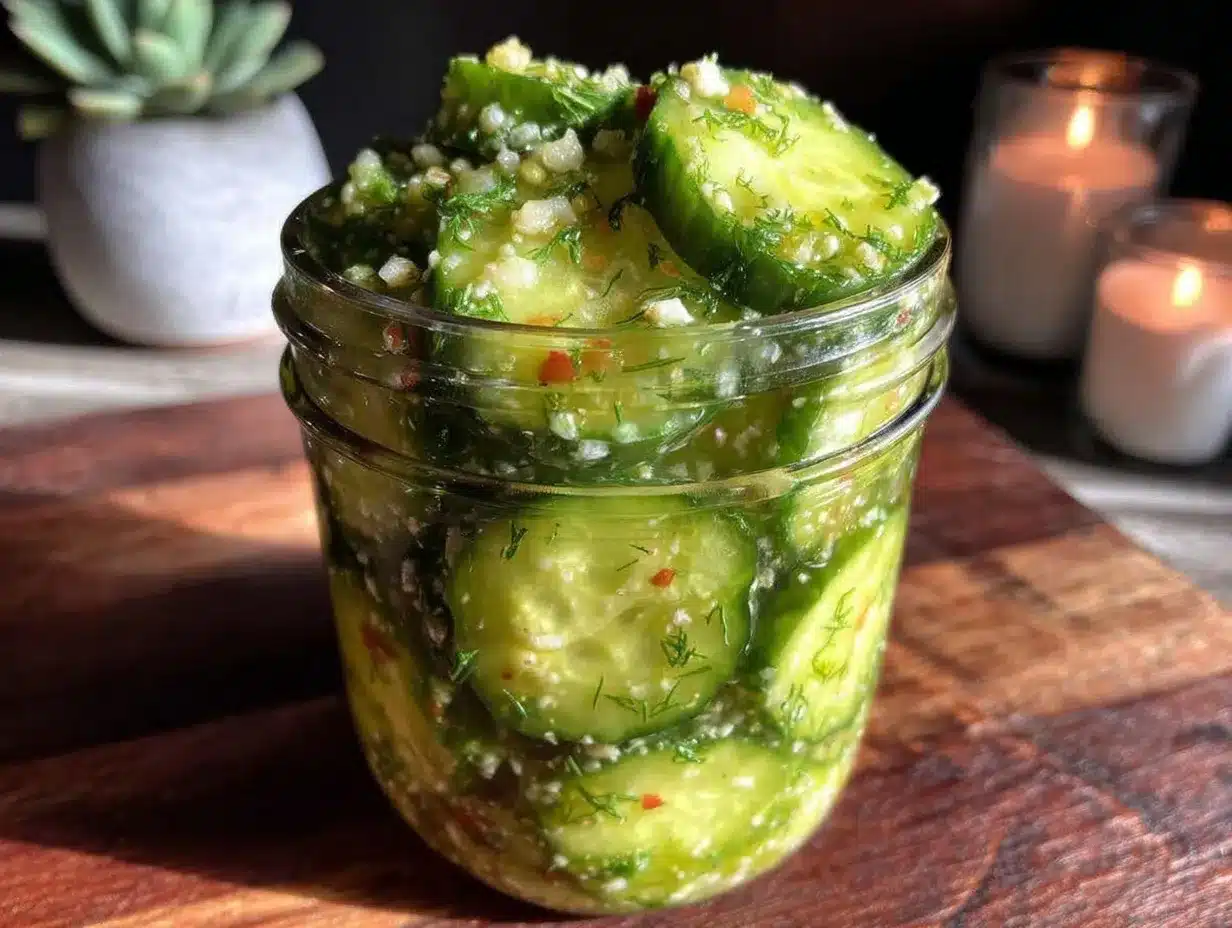
- Wash and slice the cucumbers. Rinse about 1 pound (450 g) of Kirby cucumbers under cold water. Trim off the ends (especially the blossom end) because it can make pickles soft. Slice them into 1/4-inch (6 mm) thick rounds or spears—whatever you prefer. This usually takes about 10 minutes.
- Prepare the brine. In a small saucepan, combine 1 cup (240 ml) white vinegar, 1 cup (240 ml) water, 1 tablespoon pickling salt, and 1 teaspoon granulated sugar. Warm over medium heat, stirring occasionally until the salt and sugar fully dissolve. This should take about 4-5 minutes. Avoid boiling; just warm enough to dissolve ingredients.
- Pack the jar. Place 4-6 fresh dill sprigs, 3-4 thinly sliced garlic cloves, 1 teaspoon black peppercorns, and optional 1 teaspoon mustard seeds into the bottom of a clean quart-sized glass jar. Then, tightly pack the sliced cucumbers on top, leaving about 1/2 inch (1.5 cm) of space at the top.
- Pour the brine. Carefully pour the warm brine over the cucumbers until they’re completely submerged. Use tongs or a fork to press the cucumbers down if needed, making sure no slices float above the liquid. Seal the jar tightly.
- Refrigerate and wait. Place the jar in the refrigerator. Let the pickles sit for at least 24 hours before tasting. The flavor intensifies if you wait 48 hours, but 24 hours is enough for a crisp, tangy bite.
- Check and enjoy! After 24 hours, open the jar and try a pickle. They should be crunchy with a lively garlic dill flavor. Store the jar in the fridge and consume within 2-3 weeks for best freshness.
Tip: If you notice any floating pieces, just press them back down to keep them submerged—this keeps the pickles tasting fresh and prevents spoilage. Also, removing the blossom end of the cucumber is a little trick I learned from trial and error; it really helps keep pickles crisp!
Cooking Tips & Techniques
Making perfectly crispy garlic dill refrigerator pickles isn’t magic, but it does require a few insider tricks I picked up through experimenting:
- Choosing cucumbers: Always pick firm, small cucumbers like Kirbys. Larger slicing cucumbers tend to be watery and less crunchy.
- Remove the blossom end: This tiny step prevents enzymes that soften pickles from spoiling your crunch.
- Salt matters: Use pickling or kosher salt. I once tried iodized table salt, and the brine turned cloudy with a bitter aftertaste.
- Warm brine: Dissolving salt and sugar in warm vinegar/water mixture helps flavors meld better. Just don’t boil.
- Submerge fully: Cucumbers must stay under the brine to pickle evenly and avoid spoilage.
- Patience with refrigeration: While you can technically eat them sooner, 24 hours gives the ideal balance of tang and texture.
I’ve had batches that turned out a bit soggy when I skipped removing the cucumber ends or used too much vinegar. Those mistakes taught me that a little attention to detail goes a long way. Also, if you’re making a larger batch, spreading the cucumbers over multiple jars helps ensure even pickling.
Variations & Adaptations
This recipe is a great base you can easily tweak to suit your taste or diet:
- Spicy pickles: Add a sliced jalapeño or a pinch of red pepper flakes to the jar for a subtle kick that pairs well with the garlic and dill.
- Low sodium option: Cut the salt in half but expect slightly softer pickles. You can also rinse the cucumbers before pickling to reduce saltiness.
- Herb swap: Try fresh tarragon or basil instead of dill for a different herbaceous note. I once used fresh thyme and loved the earthiness it brought.
- Different vinegar: Apple cider vinegar adds a sweeter, fruitier tang. Just swap it 1:1 with white vinegar.
- Quick ferment version: Leave the jar at room temperature for 1-2 days before refrigerating for a slightly tangier, naturally fermented flavor.
One time, I tried adding a teaspoon of coriander seeds and it gave a lovely warm spice that changed the whole vibe. Feel free to experiment a bit—this recipe is forgiving and invites creativity.
Serving & Storage Suggestions
These crispy garlic dill refrigerator pickles are best served cold, straight from the fridge. They’re fantastic as a crunchy side for sandwiches and burgers or as a zesty snack on their own.
Pair them with a hearty meal like a crispy buffalo chicken tater tot casserole or alongside sliders like the crispy Cuban sandwich sliders for an extra layer of flavor contrast.
Store your pickles in a sealed glass jar in the refrigerator, and they’ll keep well for up to 3 weeks. Over time, the flavor deepens, but the crispness may soften slightly, so enjoy them sooner if you want that perfect snap.
To re-crisp pickles that have softened a bit, soak them in ice water for 15-20 minutes before serving. Also, if you like a little extra garlic punch, you can add fresh slices to the jar after a few days.
Nutritional Information & Benefits
Per serving (about 3 slices): approximately 10 calories, 0g fat, 2g carbohydrates, 0.5g protein.
These pickles are low in calories and fat, making them a guilt-free snack. Garlic adds health benefits like immune support and anti-inflammatory properties, while dill offers antioxidants and may aid digestion.
Since this recipe uses vinegar and no added sugars beyond a teaspoon of sugar in the brine, it’s suitable for low-carb and gluten-free diets. Just be aware of sodium content if you’re monitoring salt intake.
Personally, I appreciate how these pickles satisfy my craving for something crunchy and tangy without derailing healthy eating goals—kind of like a smart snack hack.
Conclusion
If you’re after a quick, no-fuss way to make flavorful pickles that actually stay crispy, this crispy garlic dill refrigerator pickles recipe delivers exactly that. It’s approachable for beginners but yields results that impress even the most seasoned pickle fans.
Feel free to customize the garlic, herbs, or spice level to suit your taste and occasion. I love how this recipe lets you bring fresh, homemade flavor to your table with minimal waiting.
It’s one of those recipes I come back to whenever I want an easy, crunchy bite that packs a punch—plus it pairs beautifully with comfort foods like casseroles or sliders. If you make a batch, I’d love to hear how you tweak it or what you serve alongside!
FAQs About Crispy Garlic Dill Refrigerator Pickles
How long do refrigerator pickles last?
When stored in the fridge in a sealed jar, these pickles last up to 3 weeks. The flavor deepens over time but the crispness may lessen after about two weeks.
Can I use regular cucumbers instead of Kirby cucumbers?
You can, but Kirby cucumbers are preferred because they’re firmer and less watery, which helps keep the pickles crispy. If using regular cucumbers, try to pick small, firm ones and remove the ends.
Do I have to cook the brine?
Warming the brine helps dissolve the salt and sugar quickly and melds flavors, but you don’t need to boil it. If short on time, you can dissolve salt and sugar in warm water and then mix with vinegar.
Can I make these pickles spicy?
Absolutely! Adding sliced jalapeños or a pinch of red pepper flakes to the jar gives a nice spicy kick that complements the garlic and dill perfectly.
Are these pickles fermented?
No, these are quick refrigerator pickles preserved in vinegar, not fermented. However, you can leave them at room temperature for 1-2 days before refrigerating for a mild fermentation effect.
Pin This Recipe!
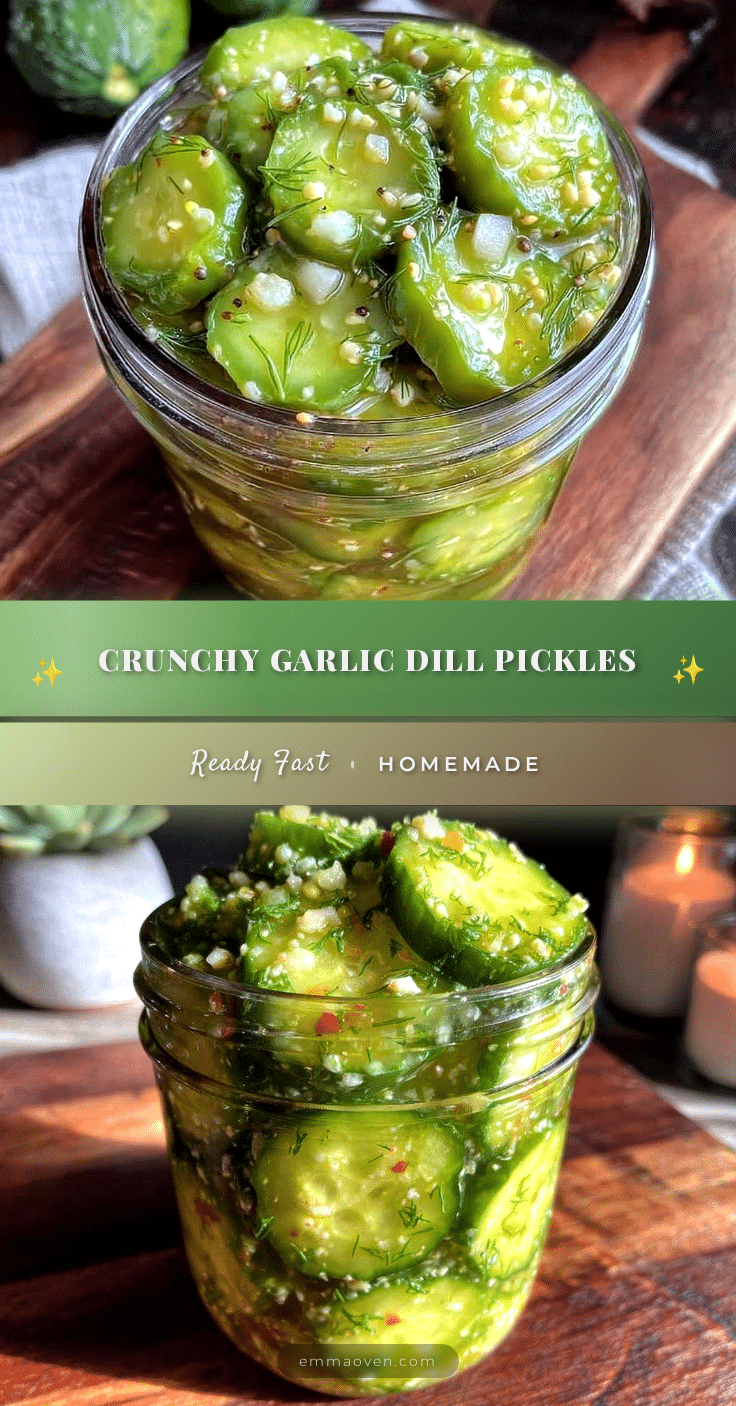
Crispy Garlic Dill Refrigerator Pickles
Quick and easy homemade refrigerator pickles with a perfect balance of tangy, savory, and crisp flavors, ready in just 24 hours.
- Prep Time: 10 minutes
- Cook Time: 5 minutes
- Total Time: 24 hours 15 minutes
- Yield: About 1 quart jar (approximately 4 servings) 1x
- Category: Snack
- Cuisine: American
Ingredients
- 1 pound (450 g) Kirby cucumbers
- 4–6 fresh dill sprigs
- 3–4 large garlic cloves, thinly sliced
- 1 cup (240 ml) white vinegar
- 1 cup (240 ml) water
- 1 tablespoon pickling salt or kosher salt
- 1 teaspoon granulated sugar
- 1 teaspoon black peppercorns
- 1 teaspoon mustard seeds (optional)
Instructions
- Wash and slice the cucumbers into 1/4-inch (6 mm) thick rounds or spears, trimming off the blossom ends.
- In a small saucepan, combine white vinegar, water, pickling salt, and sugar. Warm over medium heat, stirring until salt and sugar dissolve, about 4-5 minutes. Do not boil.
- Place dill sprigs, sliced garlic, black peppercorns, and optional mustard seeds into a clean quart-sized glass jar.
- Tightly pack the sliced cucumbers into the jar, leaving about 1/2 inch (1.5 cm) space at the top.
- Pour the warm brine over the cucumbers until fully submerged. Use tongs or a fork to press cucumbers down if needed. Seal the jar tightly.
- Refrigerate the jar for at least 24 hours before tasting. For more intense flavor, wait up to 48 hours.
- After 24 hours, open and enjoy the pickles. Store in the refrigerator and consume within 2-3 weeks.
Notes
Remove the blossom end of cucumbers to keep pickles crisp. Use pickling or kosher salt to avoid cloudiness and bitterness. Warm the brine to dissolve salt and sugar but do not boil. Keep cucumbers fully submerged in brine to prevent spoilage. For softer pickles, reduce salt or rinse cucumbers before pickling. To re-crisp softened pickles, soak in ice water for 15-20 minutes before serving.
Nutrition
- Serving Size: About 3 slices
- Calories: 10
- Carbohydrates: 2
- Protein: 0.5
Keywords: quick pickles, refrigerator pickles, garlic dill pickles, homemade pickles, easy pickles, crispy pickles