The jar was empty before I had a chance to grab my spoon. Third time that week. Someone texted me just yesterday asking if I could send over the recipe again — they wanted to make it for a brunch gathering. It’s funny how a simple homemade jam, like this seedless raspberry vanilla bean jam recipe, can quietly steal the spotlight. Nobody expected the smooth, fragrant spread to become the thing people actually raved about, but here we are.
It all started when I was hunting for a way to make raspberry jam without those pesky seeds that always got stuck in my teeth. I’m not usually the type to fuss over texture, but this jar? It vanished fast because it felt different — like a little jar of silky comfort. The vanilla bean added this subtle warmth that made it taste like a dessert you didn’t want to share but couldn’t help but offer anyway. Honestly, I was surprised by how often guests circled back for seconds, and then thirds.
Making jam at home has always felt a bit intimidating to me, especially when it comes to preserving the bright flavor of fresh raspberries. But this recipe, well, it’s straightforward enough for beginners and rewarding enough to keep me coming back. The way the vanilla bean swirls through the jam, faint but unmistakable, gives it a kind of understated elegance. It’s not just raspberry jam — it’s my small, quiet kitchen triumph.
Sometimes, it’s those unexpected little victories in the kitchen that stick with you the longest. This seedless raspberry vanilla bean jam recipe is one of those. It’s the kind of batch you make, then realize you want to keep the secret all to yourself, but can’t resist sharing because it’s just that good.
Why You’ll Love This Recipe
Honestly, there’s something about this seedless raspberry vanilla bean jam that just hits the right notes every time. It’s probably why it keeps popping up at breakfasts, snacks, and even as a special little gift from my kitchen. Here are a few reasons why this recipe might just become your go-to jam too:
- Quick & Easy: The whole process takes about 45 minutes, including cooking and cooling time — perfect for busy weekends when you want homemade without the fuss.
- Simple Ingredients: No fancy extras here — just fresh raspberries, vanilla bean, sugar, and lemon juice. You probably have most of these in your pantry or fridge already.
- Perfect for Gifting & Sharing: This jam feels special enough to gift but simple enough to whip up anytime you’re craving something sweet and homey.
- Crowd-Pleaser: Kids and adults alike love it. The seedless texture means no awkward crunch or stuck seeds, which always wins points in my book.
- Unbelievably Delicious: The vanilla bean’s floral notes play beautifully with the tart raspberries, creating a jam that’s bright, smooth, and just the right amount of sweet.
What sets this jam apart is the little trick of removing the seeds through gentle straining — it’s a bit of patience but so worth it for that silky texture. Plus, the vanilla bean isn’t just an afterthought; it’s carefully split and simmered with the berries, infusing the jam with layers of flavor you don’t get with extract alone. I’ve tried lots of raspberry jam recipes, but this one keeps me coming back because it feels like a small luxury that’s also simple and honest.
What Ingredients You Will Need
This seedless raspberry vanilla bean jam recipe uses straightforward, wholesome ingredients that pack a punch without complication. Each plays a key role in balancing flavor, texture, and that gorgeous silky finish.
- Fresh raspberries (about 4 cups / 600 grams) – ripe but firm berries work best for a bright flavor and better gel.
- Granulated sugar (3 cups / 600 grams) – balances the tartness and helps with preservation.
- Vanilla bean (1 whole bean) – split lengthwise to scrape out the seeds; both seeds and pod simmer with the berries for authentic vanilla warmth.
- Lemon juice (2 tablespoons / 30 ml) – fresh is best to add acidity, which helps the jam set and brightens the flavor.
- Pectin (optional, about 1 tablespoon) – if you want a firmer set, especially if your berries are super ripe and soft.
For the vanilla bean, I prefer using Madagascar pods from my local market — they tend to be plumper and more fragrant. If you don’t have access to fresh vanilla beans, a high-quality pure vanilla extract (about 1 teaspoon) can be substituted, but the flavor won’t be quite as rich or layered.
If fresh raspberries aren’t in season, frozen ones can do the trick, just thaw and drain off excess liquid before cooking. Also, if you want to keep this jam vegan and paleo-friendly, swapping granulated sugar with coconut sugar or maple syrup is an option, but note that it may alter the color and final taste a bit.
Equipment Needed
- Large heavy-bottomed pot – A 4-quart (4-liter) pot works well to cook the jam evenly without scorching. I’ve used stainless steel and enameled cast iron, both work fine.
- Fine mesh strainer or food mill – Essential for removing raspberry seeds to get that smooth, seedless texture. A food mill speeds things up, but a fine mesh sieve with a wooden spoon to press the pulp through works too.
- Wooden spoon or heatproof spatula – For stirring the jam gently as it cooks.
- Measuring cups and spoons – Accuracy helps with sugar and lemon juice amounts.
- Sterilized glass jars with lids – For storing the jam. Mason jars or any airtight jars are perfect.
- Optional: Candy thermometer – Useful if you want to check the jam’s setting point (around 220°F / 104°C), but not absolutely necessary if you rely on visual cues.
I remember once trying to rush the straining process without a good sieve, and the jam ended up gritty and disappointing. So trust me, investing in a decent fine mesh strainer pays off big time. Also, when sterilizing jars, I usually boil them for 10 minutes and keep them warm in the oven while finishing the jam — it’s a small step that feels worth the extra effort.
Preparation Method

- Prep the vanilla bean: Split the vanilla bean lengthwise with a sharp knife. Scrape out the tiny seeds using the back of the knife and set both seeds and pod aside.
- Cook raspberries and vanilla: In your large pot, combine the fresh raspberries, scraped vanilla seeds, vanilla pod, and lemon juice. Stir gently to mix.
- Heat gently: Place the pot over medium heat and warm the mixture until the berries start releasing juices, about 5–7 minutes. Stir occasionally to prevent sticking.
- Add sugar: Gradually stir in the granulated sugar, ensuring it dissolves completely. Keep the heat medium-low to avoid burning the sugar.
- Simmer and stir: Bring the mixture to a gentle boil, stirring frequently. Continue cooking for 15–20 minutes until the berries break down fully and the jam thickens slightly. If using pectin, stir it in now according to package instructions.
- Remove vanilla pod: Once the jam has thickened, fish out the vanilla pod and discard. It’s done its job infusing flavor.
- Strain the jam: Working in batches, pour the jam through a fine mesh strainer or food mill set over a bowl. Use a spatula or spoon to press the mixture, leaving seeds behind. This process takes about 10–15 minutes, but you’ll end up with that smooth seedless texture you want.
- Final cook: Return the strained jam to the pot and simmer gently for another 5 minutes to thicken further.
- Test the set: To check if the jam is ready, place a small spoonful on a chilled plate and let it cool for a minute. Run your finger through it — if it wrinkles and holds its shape, it’s done. If not, simmer a bit longer and test again.
- Jar the jam: Pour the hot jam into sterilized jars, leaving about ¼ inch (0.6 cm) headspace. Seal with lids while hot to create a vacuum seal as it cools.
- Cool and store: Let jars cool completely at room temperature. Store in the refrigerator for up to 3 weeks or process in a water bath for longer shelf life.
One thing I’ve learned is to keep stirring near the end to prevent sticking, especially once the jam starts thickening. It’s tempting to walk away, but a little attention here makes all the difference. Also, that straining step is a bit of a workout but trust me, it’s where the magic happens.
Cooking Tips & Techniques
Making seedless raspberry vanilla bean jam requires a bit of patience, but these tips can help you avoid common pitfalls and get the best results:
- Don’t rush the sugar dissolving: Add sugar gradually and stir gently. If sugar isn’t fully dissolved before boiling, it can crystalize and ruin the jam’s texture.
- Use fresh, ripe raspberries: Overripe berries can make the jam too runny; underripe berries are too tart. Aim for berries that are fragrant and firm.
- Keep an eye on temperature: If you have a candy thermometer, shooting for about 220°F (104°C) helps ensure the jam will set properly. Without one, rely on the wrinkle test on a chilled spoon.
- Strain carefully: Press the jam gently through the sieve rather than forcing it; pushing too hard can break seeds and add grit.
- Vanilla bean prep: Scrape the seeds first, then simmer the whole pod with berries. Don’t skip removing the pod before jarring—it can become bitter.
- Sterilize jars properly: Warm jars reduce the risk of cracking when you pour in hot jam and improve the seal.
- Patience during cooling: Let the jam cool completely at room temperature before refrigerating to avoid condensation spoiling the seal.
I remember the first time I tried skipping the straining step because I was “in a hurry.” The jam looked beautiful but had this gritty texture that no one enjoyed. Lesson learned: patience pays off. Also, I like to multitask by prepping my next meal while the jam simmers — it keeps the kitchen busy and the jam cooking perfectly.
Variations & Adaptations
This seedless raspberry vanilla bean jam recipe is incredibly flexible and easy to tweak based on your taste or dietary needs. Here are some variations I’ve tried or recommend:
- Mixed Berry Blend: Swap half the raspberries for strawberries or blueberries for a colorful twist and a slightly different flavor profile.
- Low-Sugar Version: Reduce sugar by ⅓ and add powdered pectin designed for low-sugar jams. The texture changes slightly but it’s still delicious.
- Vanilla Extract Substitute: If you don’t have vanilla beans, use 1 teaspoon of high-quality vanilla extract added at the end of cooking for a simpler version.
- Spiced Jam: Add a small cinnamon stick or a few cloves during the simmering stage for a cozy, warm flavor.
- Vegan & Paleo: Substitute granulated sugar with coconut sugar or maple syrup. Cooking times might vary, so watch the set carefully.
Personally, I once made a batch with a splash of fresh lemon zest and it added a bright zing that balanced the vanilla beautifully. For holiday gifts, I’ve added a dash of ground cardamom — a little twist that feels fancy but is super easy.
Serving & Storage Suggestions
This jam is lovely served slightly chilled or at room temperature. It’s a perfect spread on fresh toast, scones, or even dolloped over plain yogurt or ice cream. I’ve also enjoyed it alongside soft cheeses like brie or cream cheese for a sweet-savory bite.
Because the jam is seedless and smooth, it works wonderfully as a filling for thumbprint cookies or layered into breakfast parfaits. If you’re looking for inspiration, it pairs nicely with some of my savory breakfast casseroles like the easy cheesy tater tot breakfast casserole — the sweetness cuts through the savory richness beautifully.
Store the jam in sterilized glass jars in the refrigerator for up to three weeks. For longer storage, process jars in a boiling water bath for 10 minutes to seal and keep at room temperature for up to a year. When reheating, warm gently in a saucepan or microwave to restore spreadability — avoid boiling again, which can change texture.
Flavors tend to deepen and mellow over time, so if you can wait a week or two before digging in, you’ll be rewarded with a more rounded vanilla and raspberry harmony.
Nutritional Information & Benefits
Per 1 tablespoon (20g) serving, this seedless raspberry vanilla bean jam contains approximately:
| Calories | 50 |
|---|---|
| Total Carbohydrates | 13g |
| Sugars | 12g |
| Dietary Fiber | 0.5g |
| Fat | 0g |
| Protein | 0g |
Raspberries are rich in antioxidants and vitamin C, supporting immune health and skin vitality. The homemade nature of this jam means no preservatives or artificial colors, making it a better choice than many store-bought spreads. The vanilla bean adds flavor without calories or additives.
This jam is naturally gluten-free and vegan if made with plant-based sugar options. Keep in mind the sugar content if you’re watching carb intake, but the portion sizes are small enough to enjoy in moderation.
Conclusion
That smooth, fragrant jar of seedless raspberry vanilla bean jam is one of those kitchen wins that quietly sticks with you. It’s approachable enough for beginners but with a flavor that feels thoughtful and layered — a little treat you can share or keep all to yourself. I love how it turns simple ingredients into something that feels special without any fuss.
Feel free to tweak the sugar or spice it up to suit your taste. This jam has been a steady companion at breakfasts and snack times, and I hope it finds a place in your kitchen too. If you try it, I’d love to hear how you make it your own — sharing these little adaptations is part of the fun!
FAQs About Seedless Raspberry Vanilla Bean Jam
How do I remove the seeds from raspberry jam?
After cooking, pour the jam through a fine mesh strainer or food mill. Use a spatula or spoon to gently press the pulp through, leaving the seeds behind for a smooth, seedless texture.
Can I use frozen raspberries instead of fresh?
Yes, frozen raspberries work well. Thaw and drain excess liquid before cooking to avoid a runnier jam.
Do I have to use a vanilla bean, or can I use vanilla extract?
Vanilla bean gives a deeper, more complex flavor, but you can substitute 1 teaspoon of pure vanilla extract added at the end of cooking if needed.
How long does homemade raspberry jam last?
Refrigerated jam lasts about 3 weeks. If properly canned in sterilized jars with a water bath, it can last up to a year unopened.
Can I reduce the sugar in this jam recipe?
You can reduce sugar by about a third and use powdered pectin made for low-sugar jams, but the texture and sweetness will be different. Be sure to follow pectin package instructions.
Pin This Recipe!

Best Seedless Raspberry Vanilla Bean Jam Recipe Easy Homemade Jelly for Beginners
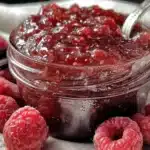
A smooth, fragrant seedless raspberry vanilla bean jam that’s easy to make and perfect for beginners. This jam features a silky texture and subtle vanilla warmth, ideal for spreading, gifting, or snacking.
- Prep Time: 10 minutes
- Cook Time: 35 minutes
- Total Time: 45 minutes
- Yield: About 4 cups (approximately 8 servings) 1x
- Category: Preserves
- Cuisine: American
Ingredients
- 4 cups fresh raspberries (about 600 grams)
- 3 cups granulated sugar (about 600 grams)
- 1 whole vanilla bean, split lengthwise
- 2 tablespoons fresh lemon juice (30 ml)
- 1 tablespoon pectin (optional, for firmer set)
Instructions
- Split the vanilla bean lengthwise with a sharp knife. Scrape out the tiny seeds using the back of the knife and set both seeds and pod aside.
- In a large heavy-bottomed pot, combine the fresh raspberries, scraped vanilla seeds, vanilla pod, and lemon juice. Stir gently to mix.
- Place the pot over medium heat and warm the mixture until the berries start releasing juices, about 5–7 minutes. Stir occasionally to prevent sticking.
- Gradually stir in the granulated sugar, ensuring it dissolves completely. Keep the heat medium-low to avoid burning the sugar.
- Bring the mixture to a gentle boil, stirring frequently. Continue cooking for 15–20 minutes until the berries break down fully and the jam thickens slightly. If using pectin, stir it in now according to package instructions.
- Once the jam has thickened, fish out the vanilla pod and discard.
- Working in batches, pour the jam through a fine mesh strainer or food mill set over a bowl. Use a spatula or spoon to press the mixture, leaving seeds behind. This process takes about 10–15 minutes.
- Return the strained jam to the pot and simmer gently for another 5 minutes to thicken further.
- To check if the jam is ready, place a small spoonful on a chilled plate and let it cool for a minute. Run your finger through it — if it wrinkles and holds its shape, it’s done. If not, simmer a bit longer and test again.
- Pour the hot jam into sterilized jars, leaving about ¼ inch (0.6 cm) headspace. Seal with lids while hot to create a vacuum seal as it cools.
- Let jars cool completely at room temperature. Store in the refrigerator for up to 3 weeks or process in a water bath for longer shelf life.
Notes
Add sugar gradually and stir gently to avoid crystallization. Use fresh, ripe raspberries for best flavor and gel. Strain carefully to avoid gritty texture. Remove vanilla pod before jarring to prevent bitterness. Sterilize jars properly and allow jam to cool completely before refrigeration. For a firmer set, add pectin as directed. Vanilla extract can substitute vanilla bean if needed. Frozen raspberries can be used if thawed and drained. Sugar can be reduced by one-third with low-sugar pectin. Jam can be stored refrigerated for 3 weeks or canned for up to 1 year.
Nutrition
- Serving Size: 1 tablespoon (20 gra
- Calories: 50
- Sugar: 12
- Carbohydrates: 13
- Fiber: 0.5
Keywords: seedless raspberry jam, vanilla bean jam, homemade jam, easy raspberry jelly, seedless jelly, beginner jam recipe, raspberry vanilla jam