It was one of those late spring afternoons when the sky had that soft, hazy light—almost like the world was holding its breath. I was rummaging through the freezer, hoping to find something that could hit the spot without much fuss. That’s when I spotted a bag of frozen cherries, a leftover from last summer’s fruit picking spree. Honestly, I wasn’t expecting much; I wasn’t even sure if a cobbler with biscuit topping would turn out right on a random whim. But with a cup of strong coffee by my side and a bit of curiosity, I decided to give it a shot.
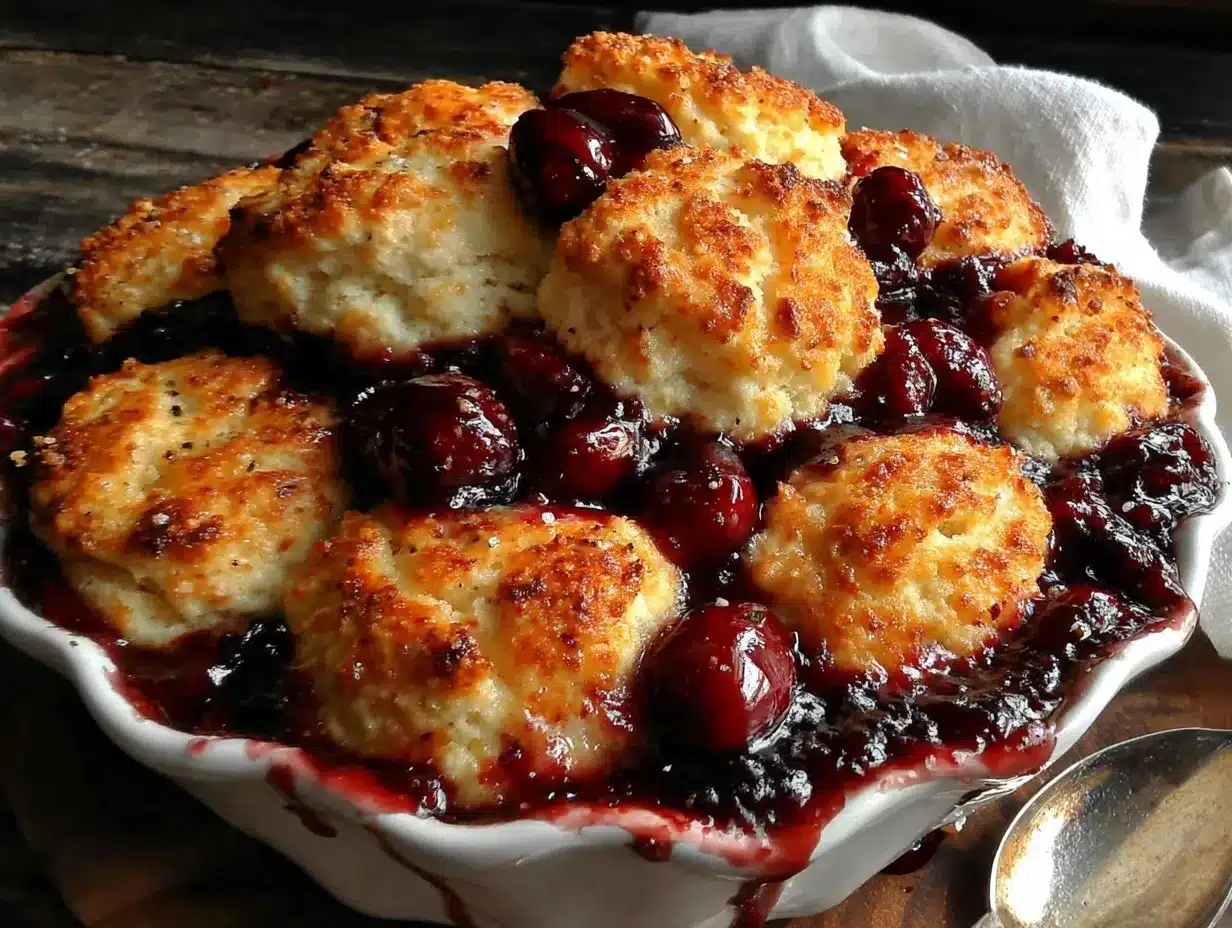
The kitchen soon filled with the subtle scent of warm cherries bubbling away, mixed with the buttery aroma of biscuit dough turning golden. And you know, those biscuits—they weren’t just any topping; they puffed up fluffy and tender, like little clouds resting atop a juicy, sweet filling. The first bite was a quiet revelation. It wasn’t just dessert; it was a moment of calm and comfort, an unexpected pleasure from a simple, almost accidental recipe.
Since then, this fluffy cherry cobbler with biscuit topping has become my go-to when I need that cozy reset—a dessert that feels like a soft hug on a plate. There’s something about the way the tart cherries balance the sweet, buttery biscuits that keeps pulling me back. I think it’s the kind of recipe that sticks with you, not because it’s flashy, but because it’s honest and just right.
Why You’ll Love This Recipe
- Quick & Easy: Comes together in under 45 minutes, perfect when you want a homemade treat without the hassle.
- Simple Ingredients: Uses pantry staples and frozen cherries you probably already have — no last-minute grocery runs.
- Perfect for Cozy Gatherings: Ideal for casual dinners, weekend treats, or sharing with friends on a lazy afternoon.
- Crowd-Pleaser: The mix of tart cherry filling and fluffy biscuit topping wins over kids and adults alike every time.
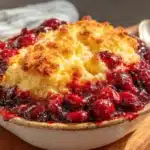
- Unbelievably Delicious: The biscuit topping is tender and airy, contrasting beautifully with the juicy, slightly tangy cherry base.
- This recipe isn’t just another cobbler — the biscuit topping is made from scratch with a touch of buttermilk, giving it that light, melt-in-your-mouth texture.
- It’s not overly sweet, striking a perfect balance that makes you savor every bite without feeling weighed down.
What Ingredients You Will Need
This recipe uses simple, wholesome ingredients to deliver bold flavor and satisfying texture without the fuss. Most are pantry staples, and the frozen cherries make it easy to enjoy this cobbler year-round.
- For the Cherry Filling:
- Frozen cherries – 4 cups (about 600g), thawed and drained slightly
- Granulated sugar – 3/4 cup (150g), adjust based on cherry tartness
- Cornstarch – 2 tablespoons (to thicken the filling)
- Fresh lemon juice – 1 tablespoon (adds brightness)
- Vanilla extract – 1 teaspoon (for depth of flavor)
- Salt – a pinch (to balance sweetness)
- For the Biscuit Topping:
- All-purpose flour – 2 cups (250g), sifted
- Baking powder – 1 tablespoon (for fluffiness)
- Baking soda – 1/2 teaspoon
- Salt – 1/2 teaspoon
- Unsalted butter – 6 tablespoons (85g), cold and cubed (I like Kerrygold for the richness)
- Buttermilk – 1 cup (240ml), cold (you can substitute with milk + 1 tbsp vinegar if needed)
- Granulated sugar – 2 tablespoons (for a hint of sweetness in the topping)
If you want to switch things up, almond flour works well for a gluten-free option, though the texture will be a bit denser. For dairy-free, swap butter with vegan margarine and use coconut milk mixed with lemon juice instead of buttermilk.
Equipment Needed
- Baking dish: A 9×13 inch (23×33 cm) ceramic or glass baking dish works best to hold the cherry filling and biscuit topping evenly.
- Mixing bowls: One large bowl for the biscuit dough and one medium bowl for mixing the cherry filling.
- Whisk and wooden spoon: For combining ingredients smoothly.
- Pastry cutter or fork: Helpful to cut butter into flour for the biscuit topping. If you don’t have one, fingers work just fine—just don’t overwork the dough.
- Measuring cups and spoons: For precise ingredient amounts.
- Oven mitts and cooling rack: Safety first! Cooling rack helps the cobbler settle to perfect serving temperature.
Budget tip: Use a silicone spatula instead of wooden spoons for easier cleanup. Also, a stand mixer isn’t necessary here, but it can speed up the biscuit dough prep if you have one.
Preparation Method
- Preheat your oven to 375°F (190°C). Lightly grease your 9×13 inch baking dish with butter or non-stick spray.
- Prepare the cherry filling: In a medium bowl, combine 4 cups thawed cherries, 3/4 cup sugar, 2 tablespoons cornstarch, 1 tablespoon lemon juice, 1 teaspoon vanilla extract, and a pinch of salt. Stir gently but thoroughly until the cherries are evenly coated. Set aside to let the flavors mingle while you prepare the topping. (This helps thicken the filling once baked.)
- Make the biscuit topping: In a large bowl, whisk together 2 cups flour, 1 tablespoon baking powder, 1/2 teaspoon baking soda, 1/2 teaspoon salt, and 2 tablespoons sugar.
- Cut in the 6 tablespoons of cold, cubed butter using a pastry cutter or your fingers until the mixture resembles coarse crumbs with pea-sized bits of butter.
- Pour in 1 cup cold buttermilk and stir gently with a wooden spoon until just combined. The dough should be soft and sticky but not overly wet. Don’t overmix — a few lumps are okay.
- Assemble the cobbler: Pour the cherry filling evenly into the prepared baking dish. Drop spoonfuls of biscuit dough over the cherries, spacing them evenly (they’ll spread and puff up as they bake).
- Bake the cobbler for 35 to 40 minutes, until the biscuit topping is golden brown and the cherry filling is bubbling at the edges.
- Remove from oven and let rest for about 10 minutes before serving. This lets the filling thicken up and cool to perfect spooning temperature.
Pro tip: If the biscuits brown too fast before the filling bubbles, tent the cobbler loosely with foil to avoid burning.
Cooking Tips & Techniques
One trick that really helped me nail this fluffy cherry cobbler with biscuit topping is making sure the butter stays cold when mixing the biscuit dough. Cold butter creates little pockets of steam when baking, which puff up into those tender, flaky biscuits you want.
Another thing: Don’t skip letting the cherry filling rest while you make the topping. This step activates the cornstarch and helps prevent a runny cobbler.
When dropping the biscuit dough on top, use a spoon or cookie scoop to keep size consistent. Uneven sizes can cause some biscuits to bake quicker and dry out.
Timing is important—try to get the cobbler into the oven right after assembly so the biscuit topping bakes properly without drying out or sitting too long.
Lastly, always let the cobbler cool slightly before serving. Jumping in too fast means a lava-like filling that’s hard to plate. A 10-minute rest makes all the difference for texture and flavor melding.
Variations & Adaptations
- Seasonal Twist: Swap cherries for fresh blueberries or peaches in summer. Toss them with a bit of cinnamon for added warmth.
- Dietary Adaptation: Use gluten-free flour blend instead of all-purpose to make this cobbler friendly for gluten sensitivities. Coconut yogurt can replace buttermilk for dairy-free diets.
- Flavor Boost: Add a pinch of almond extract to the cherry filling for a lovely nutty hint that pairs beautifully with cherries.
- Cooking Method: Try baking individual servings in ramekins for personalized portions and quicker baking time (about 25-30 minutes).
- Personal favorite: Once, I sprinkled some rolled oats and chopped pecans on top of the biscuit dough before baking for a crunchy contrast that had everyone asking for seconds.
Serving & Storage Suggestions
This fluffy cherry cobbler is best enjoyed warm, straight from the oven, with a scoop of vanilla ice cream or a dollop of whipped cream. The contrast between the hot, juicy cherries and cool cream is a simple joy.
Leftovers keep well in the refrigerator for up to 3 days, covered tightly with plastic wrap or foil. When reheating, warm in the oven at 325°F (160°C) for about 15 minutes to bring back the biscuit’s texture and keep the filling bubbly.
You can also freeze the unbaked cobbler for up to a month — just cover tightly and bake from frozen, adding about 10-15 extra minutes to the baking time.
Flavors tend to deepen after a day in the fridge, making it even more delicious the next day. Sometimes, I actually prefer it slightly cooled with a bit of fresh cream on top.
Nutritional Information & Benefits
Estimated per serving (1/8 of recipe): 320 calories, 8g fat, 55g carbohydrates, 3g fiber, 4g protein.
Cherries are rich in antioxidants and vitamins, particularly vitamin C, which helps support the immune system. Using buttermilk adds a bit of calcium and probiotics, beneficial for digestion.
This recipe can be adapted to lower sugar or gluten-free versions, making it flexible for various dietary needs. Just be mindful of the biscuit topping ingredients if allergies are a concern.
Conclusion
This fluffy cherry cobbler with biscuit topping is a humble dessert that delivers big on comfort and flavor. It’s the kind of recipe that makes you feel like you’ve got a secret weapon for any occasion—whether it’s a quiet night in or an impromptu gathering.
I love how adaptable it is, and honestly, making the biscuit topping from scratch brings a little extra magic to the table. You can tweak it to your taste or dietary needs and still get that perfect balance of juicy fruit and tender, fluffy topping every time.
Give it a try, and don’t be shy about sharing how you make it your own. I’d love to hear your spin on this cobbler — it’s always fun to see what others come up with!
Frequently Asked Questions
Can I use fresh cherries instead of frozen?
Yes! Fresh cherries work wonderfully in this recipe. Just pit and halve them. You might want to reduce the sugar slightly if your cherries are very sweet.
What if I don’t have buttermilk?
No worries! You can make a buttermilk substitute by adding 1 tablespoon of lemon juice or white vinegar to 1 cup of milk. Let it sit for 5 minutes before using.
How do I store leftover cobbler?
Cover and refrigerate leftovers for up to 3 days. Reheat in the oven at 325°F (160°C) for 15 minutes to restore texture and warmth.
Can I prepare this cobbler ahead of time?
Absolutely. You can assemble it and keep it covered in the fridge for a few hours before baking, or freeze it unbaked for up to a month.
Is this recipe gluten-free?
As written, no. But you can easily swap the all-purpose flour for a gluten-free blend to make it suitable for gluten-sensitive eaters.
PrintFluffy Cherry Cobbler with Biscuit Topping
A cozy and easy homemade cherry cobbler featuring a juicy tart cherry filling topped with tender, fluffy biscuits made from scratch with buttermilk.
- Prep Time: 15 minutes
- Cook Time: 40 minutes
- Total Time: 55 minutes
- Yield: 8 servings 1x
- Category: Dessert
- Cuisine: American
Ingredients
- 4 cups frozen cherries (about 600g), thawed and drained slightly
- 3/4 cup granulated sugar (150g), adjust based on cherry tartness
- 2 tablespoons cornstarch
- 1 tablespoon fresh lemon juice
- 1 teaspoon vanilla extract
- Pinch of salt
- 2 cups all-purpose flour (250g), sifted
- 1 tablespoon baking powder
- 1/2 teaspoon baking soda
- 1/2 teaspoon salt
- 6 tablespoons unsalted butter (85g), cold and cubed
- 1 cup buttermilk (240ml), cold
- 2 tablespoons granulated sugar
Instructions
- Preheat your oven to 375°F (190°C). Lightly grease a 9×13 inch baking dish with butter or non-stick spray.
- In a medium bowl, combine thawed cherries, sugar, cornstarch, lemon juice, vanilla extract, and a pinch of salt. Stir gently until cherries are evenly coated. Set aside.
- In a large bowl, whisk together flour, baking powder, baking soda, salt, and sugar.
- Cut in the cold, cubed butter using a pastry cutter or fingers until mixture resembles coarse crumbs with pea-sized bits of butter.
- Pour in cold buttermilk and stir gently with a wooden spoon until just combined. Dough should be soft and sticky with some lumps; do not overmix.
- Pour cherry filling evenly into the prepared baking dish.
- Drop spoonfuls of biscuit dough over the cherries, spacing them evenly.
- Bake for 35 to 40 minutes until biscuit topping is golden brown and cherry filling is bubbling at the edges.
- Remove from oven and let rest for about 10 minutes before serving.
Notes
Keep butter cold when mixing biscuit dough to create flaky biscuits. Let cherry filling rest while preparing topping to activate cornstarch. Use a spoon or cookie scoop for even biscuit sizes. Tent with foil if biscuits brown too fast. Let cobbler rest 10 minutes before serving for best texture.
Nutrition
- Serving Size: 1/8 of the cobbler
- Calories: 320
- Fat: 8
- Carbohydrates: 55
- Fiber: 3
- Protein: 4
Keywords: cherry cobbler, biscuit topping, easy dessert, homemade cobbler, cherry dessert, baking, comfort food