“You sure these nachos won’t fall apart?” my friend asked skeptically as I layered the last handful of chips, cheese, and toppings onto the tray. Honestly, I wasn’t sure either. It was one of those evenings where dinner plans fell through, and instead of panicking, I decided to throw together whatever was in the pantry. Nachos seemed like the easiest comfort food fix, but I wanted them crispy, loaded, and dripping with cheese — no sad, soggy chips allowed.
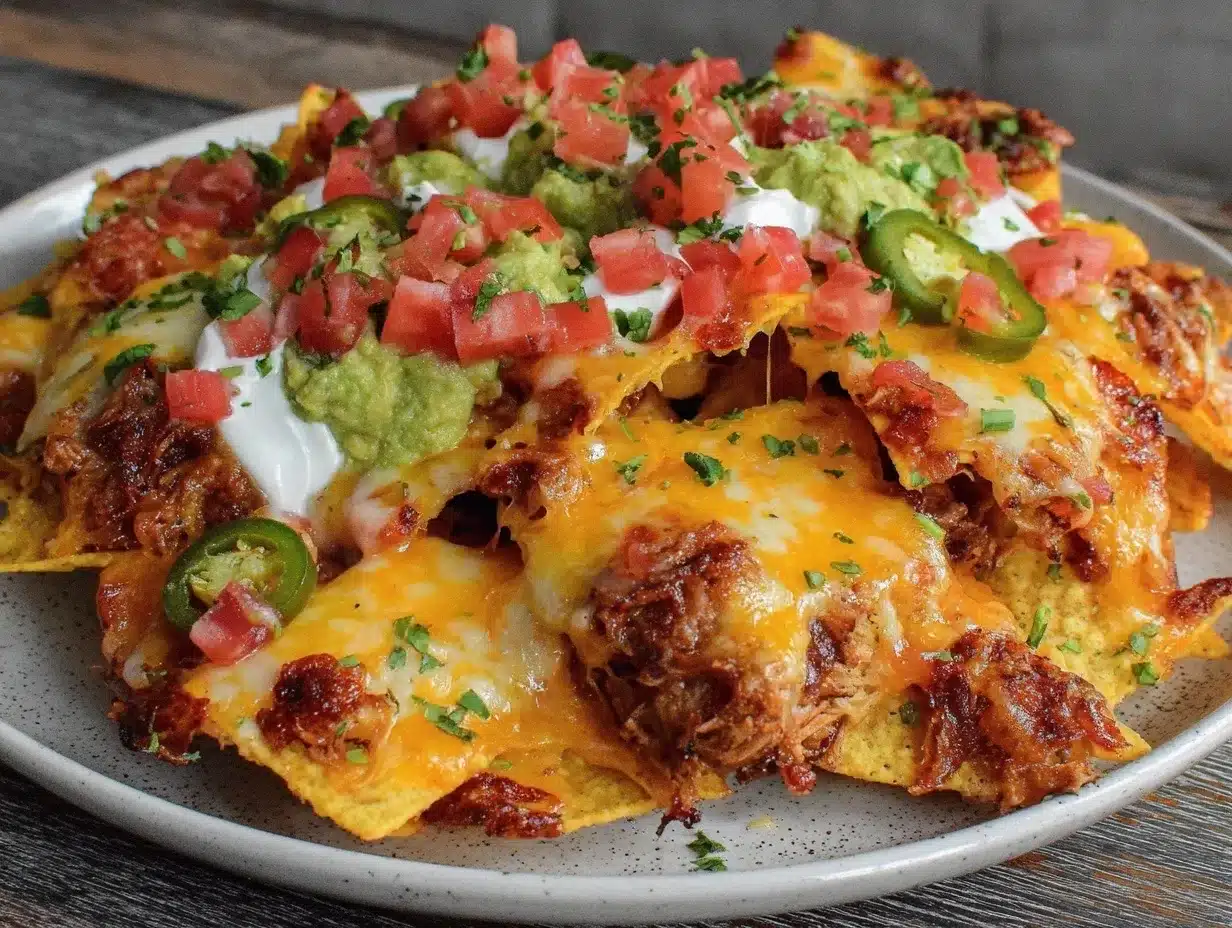
What happened next was a happy accident. I carefully built the layers, making sure to spread the cheese evenly and scatter toppings with a bit of intentional chaos. The oven did its magic, bubbling the cheese into gooey perfection and crisping the chips just right (thank goodness for the middle rack). When I pulled them out, the smell filled the kitchen with that irresistible mix of melted cheese and toasted corn. The crunch was spot on, and the toppings? Let’s just say the balance of spicy jalapeños, creamy sour cream, and fresh pico de gallo was unexpected but perfect.
Since that night, these crispy loaded nachos with cheesy melted goodness have become my go-to for casual hangouts, last-minute snacks, or even solo TV dinners. I can’t tell you how many times I’ve made them in the last month alone — and every time, they get devoured before I even finish plating. What stuck with me was how simple ingredients, some care with layering, and just the right oven trick turned a quick snack into something that feels like a celebration. Honestly, it’s the kind of recipe that makes you pause, smile, and maybe even close your eyes after the first bite. That’s why I keep coming back to it, and why I think you’re going to love it too.
Why You’ll Love This Recipe
This crispy loaded nachos recipe isn’t your run-of-the-mill snack. I’ve tested it thoroughly (and eaten way too many batches myself), so you’re getting a dish that nails the crave-worthy combo of crunch, gooey cheese, and fresh toppings every time. Here’s why it holds a special spot in my kitchen:
- Quick & Easy: Ready in under 30 minutes, it’s perfect for those busy evenings when you want something satisfying but don’t want to slave over the stove.
- Simple Ingredients: No need for fancy or obscure groceries. I used pantry staples like tortilla chips, shredded cheddar, and canned black beans, which you probably already have.
- Perfect for Game Day or Casual Gatherings: Whether you’re hosting friends, family, or just craving a solo snack, these nachos always bring people together.
- Crowd-Pleaser: My kids and their friends always ask for this recipe, and honestly, it’s a hit with adults too — the right mix of spicy, creamy, and crunchy.
- Unbelievably Delicious: The cheese melts just right, hugging every chip, while the toppings add layers of texture and flavor—thanks to a little trick I picked up from making crispy loaded tater tot nachos.
What makes this recipe stand out is the layering technique that keeps the chips crispy rather than soggy. Also, I mix two types of cheese for that melty, stretchy vibe—sharp cheddar for flavor and Monterey Jack for creaminess. And the secret to the perfect crisp? Baking at a moderate temperature on the middle rack, which browns the cheese without burning the chips. It’s a little culinary magic that made me a true nacho believer.
What Ingredients You Will Need
This recipe uses simple, wholesome ingredients to deliver bold flavor and satisfying texture without the fuss. Most are pantry staples or easy to find in any grocery store — and you can swap some out depending on what you like or have on hand.
- Tortilla Chips: About 8 cups (240g) sturdy, restaurant-style chips work best. Avoid thin chips that might get soggy too fast.
- Cheese Blend: 2 cups (200g) shredded sharp cheddar (I prefer Tillamook for flavor) and 1 cup (100g) shredded Monterey Jack for meltiness.
- Cooked Ground Beef or Turkey: 1/2 pound (225g), seasoned with taco spices (chili powder, cumin, paprika). Use plant-based crumbles for a vegetarian twist.
- Black Beans: 1 cup (170g), drained and rinsed, adds protein and texture.
- Jalapeños: 2 fresh, sliced thin for heat (adjust to taste), or use pickled jalapeños for tang.
- Green Onions: 3, chopped for freshness and color.
- Pico de Gallo: 1 cup (fresh tomatoes, onion, cilantro, lime juice, salt). You can also use store-bought salsa if you’re in a pinch.
- Sour Cream: For dolloping on top, about 1/2 cup (120ml).
- Olive Oil or Butter: 1 tablespoon to sauté beef and soften onions.
- Taco Seasoning: 1 tablespoon homemade or store-bought (watch the salt content).
Feel free to swap the black beans with pinto beans or add corn kernels for a bit of sweetness. I like using fresh jalapeños, but if you want less heat, mild banana peppers work well too. For a dairy-free version, you can try vegan cheese alternatives, and swap sour cream with cashew cream.
Equipment Needed
- Baking Sheet or Oven-Safe Tray: A rimmed baking sheet helps contain all the toppings and cheese without spills. I’ve tried cast iron skillets too, but sheets give more surface area for crispiness.
- Mixing Bowls: For combining taco meat and preparing pico de gallo.
- Skillet or Frying Pan: For browning the ground beef or turkey. A non-stick pan works great for easy cleanup.
- Sharp Knife and Cutting Board: For slicing jalapeños, chopping green onions, and dicing tomatoes.
- Grater: To shred your own cheese if you want maximum melty texture (pre-shredded sometimes contains anti-caking agents that affect melting).
- Measuring Cups and Spoons: For accurate seasoning and cheese measurements.
If you don’t have a baking sheet, you can use an oven-safe casserole dish, but watch the crispiness since chips may steam more easily in a deeper dish. Also, I keep a small silicone spatula handy to spread toppings evenly without breaking chips.
Preparation Method
- Preheat your oven to 375°F (190°C). This temperature crisps the chips nicely while melting the cheese without burning.
- Prepare the taco meat: Heat 1 tablespoon olive oil or butter in a skillet over medium heat. Add 1/2 pound (225g) ground beef or turkey and cook until browned, breaking up the meat with a spatula. Drain excess fat if necessary. Stir in 1 tablespoon taco seasoning and 1/4 cup (60ml) water. Simmer for 3-5 minutes until the seasoning coats the meat well and the liquid reduces. Set aside.
- Prepare pico de gallo: In a bowl, combine 1 cup diced fresh tomatoes, 1/4 cup finely chopped onion, 2 tablespoons chopped cilantro, juice of half a lime, and a pinch of salt. Mix and set aside for flavors to meld.
- Layer the nachos: On a rimmed baking sheet, spread 4 cups (120g) tortilla chips in an even layer. Sprinkle half of the shredded cheese blend evenly over the chips. Scatter half the seasoned meat, 1/2 cup black beans, and half the sliced jalapeños and green onions.
- Add another layer of 4 cups (120g) chips and repeat the cheese, meat, beans, jalapeños, and green onions layering.
- Bake in the oven for 10-12 minutes. Watch for the cheese to bubble and start to brown slightly. The chips around the edges should look golden and crispy.
- Remove from oven and add fresh toppings: Spoon the pico de gallo over the top and dollop sour cream in several spots.
- Serve immediately to enjoy the contrast of hot, melty cheese and crunchy chips with cool, fresh toppings.
Tip: If you want extra gooey cheese, you can broil the nachos for the last 1-2 minutes — but watch closely so nothing burns. Also, avoid piling too many wet toppings before baking, as they can make chips soggy.
Cooking Tips & Techniques
One of the trickiest parts about loaded nachos is keeping that perfect crunch while still getting plenty of melted, stretchy cheese. Here’s what I’ve learned from repeated trials (and a few burnt batches):
- Layering Matters: Spread chips in thinner layers with cheese between them rather than dumping everything on top. This helps melt the cheese evenly and keeps chips from getting overwhelmed.
- Choose the Right Cheese: Mixing sharp cheddar with Monterey Jack gives you flavor and melt – cheddar alone can get oily or dry. Avoid pre-shredded cheese if possible for better melting.
- Pre-cook Proteins Thoroughly: No one wants soggy meat. Make sure the taco meat is well-seasoned and drained of excess fat to keep the nachos crisp.
- Watch the Oven: Baking at 375°F (190°C) crisps without burning. Broiling is tempting for extra browning but keep a close eye!
- Fresh vs. Baked Toppings: Add wet or delicate ingredients like sour cream, guacamole, or fresh salsa after baking to avoid sogginess.
- Multitasking: While the meat simmers, prep your pico de gallo and shred cheese. Efficient kitchen flow saves time.
Trust me, the first time I tried layering cheese and toppings individually instead of tossing everything together was a game changer. It’s worth the extra few minutes to get that crispy-cheesy combo just right.
Variations & Adaptations
Nachos are wonderfully versatile, and this recipe is a great base to customize however you like. Here are a few variations I’ve enjoyed:
- Vegetarian Version: Skip the meat and add extra black beans, corn, and sautéed bell peppers. Try swapping seasoned lentils or textured vegetable protein for a meat-like texture.
- Spicy Kick: Add diced chipotle peppers in adobo sauce to the meat or sprinkle cayenne powder over the cheese. Fresh sliced jalapeños bring heat too.
- Different Cheeses: Use pepper jack for a spicy twist or queso fresco for a crumbly, tangy topping. For a creamy touch, drizzle queso blanco dip on top (similar to the one in the queso blanco dip recipe).
- Seasonal Toppings: In summer, swap pico de gallo with fresh mango salsa or add sliced avocado. Autumn calls for roasted butternut squash and sage.
- Gluten-Free Option: Use certified gluten-free tortilla chips to keep it safe for gluten-sensitive diets.
Once, I tried a loaded nachos twist with pulled pork and creamy coleslaw on top inspired by savory BBQ pulled pork sliders — let’s just say it was a messy, delicious hit!
Serving & Storage Suggestions
Loaded nachos are best enjoyed fresh and hot out of the oven when the cheese is melty and the chips are crisp. Serve them on a large platter or straight from the baking sheet for a casual vibe.
Pair with cold drinks like a crisp lager, margaritas, or even a sparkling water with lime to cut through the richness. Side dips like guacamole or a cool creamy ranch complement the spicy jalapeños and robust cheese perfectly.
If you have leftovers (which is rare!), store them in an airtight container in the refrigerator for up to 2 days. Reheat in the oven at 350°F (175°C) for 8-10 minutes to regain crispness — microwaving tends to make chips soggy.
Pro tip: Flavors deepen after sitting a bit, especially if you assemble the nachos and refrigerate before baking. This can actually make for a more cohesive taste experience.
Nutritional Information & Benefits
One serving (about 1/6th of the tray) of these crispy loaded nachos contains approximately:
| Calories | 450 kcal |
|---|---|
| Protein | 25g |
| Fat | 22g |
| Carbohydrates | 38g |
| Fiber | 7g |
The black beans contribute both protein and fiber, helping you feel fuller longer. Using lean ground turkey lowers saturated fat compared to beef, and fresh pico de gallo adds vitamin C and antioxidants. This recipe is naturally gluten-free if you use gluten-free chips and can be adapted for dairy-free diets with plant-based cheeses and sour cream alternatives.
Conclusion
These crispy loaded nachos with cheesy melted goodness are the kind of recipe that turns simple ingredients into a comforting, crowd-pleasing feast. Whether you’re feeding a group or treating yourself, the layers of crunch, melty cheese, seasoned meat, and fresh toppings come together in a way that’s hard to resist.
Feel free to tweak toppings, switch up proteins, or dial the heat up or down to make this recipe your own. I love how forgiving and adaptable it is — plus, it’s a perfect match for the crispy buffalo chicken tater tot casserole when you want a hearty game day spread.
Give these nachos a try next time hunger strikes, and let me know how you customize them. Honestly, once you nail this crisp-cheese balance, you’ll wonder why you ever settled for soggy nachos before. Happy snacking!
FAQs about Crispy Loaded Nachos
How can I keep nachos from getting soggy?
Layer chips with cheese in between rather than piling toppings all at once. Bake at a moderate temperature and add wet toppings like sour cream or salsa after baking.
Can I make these nachos ahead of time?
You can assemble and refrigerate before baking, then bake just before serving. Leftover nachos can be reheated in the oven to regain crispiness.
What cheeses work best for melting on nachos?
Sharp cheddar combined with Monterey Jack or mozzarella melts well and offers a good balance of flavor and stretchiness.
Can I make this recipe vegetarian or vegan?
Yes! Skip the meat and add extra beans and veggies. Use plant-based cheese and vegan sour cream to make it dairy-free.
What’s a good side to serve with loaded nachos?
Fresh guacamole, creamy ranch dip, or a crisp green salad pairs nicely to balance the richness of the nachos.
Pin This Recipe!

Crispy Loaded Nachos Recipe Easy Homemade Cheesy Melted Goodness

A quick and easy recipe for crispy, loaded nachos with a perfect balance of crunchy chips, gooey melted cheese, seasoned meat, and fresh toppings. Ideal for casual hangouts, game day, or last-minute snacks.
- Prep Time: 15 minutes
- Cook Time: 12 minutes
- Total Time: 27 minutes
- Yield: 6 servings 1x
- Category: Snack
- Cuisine: Mexican
Ingredients
- 8 cups (240g) sturdy tortilla chips
- 2 cups (200g) shredded sharp cheddar cheese
- 1 cup (100g) shredded Monterey Jack cheese
- 1/2 pound (225g) cooked ground beef or turkey, seasoned with taco spices (chili powder, cumin, paprika)
- 1 cup (170g) black beans, drained and rinsed
- 2 fresh jalapeños, sliced thin (or pickled jalapeños)
- 3 green onions, chopped
- 1 cup pico de gallo (fresh tomatoes, onion, cilantro, lime juice, salt)
- 1/2 cup (120ml) sour cream
- 1 tablespoon olive oil or butter
- 1 tablespoon taco seasoning
- 1/4 cup (60ml) water
Instructions
- Preheat your oven to 375°F (190°C).
- Heat olive oil or butter in a skillet over medium heat. Add ground beef or turkey and cook until browned, breaking up the meat with a spatula. Drain excess fat if necessary.
- Stir in taco seasoning and water. Simmer for 3-5 minutes until the seasoning coats the meat well and the liquid reduces. Set aside.
- Prepare pico de gallo by combining diced tomatoes, finely chopped onion, chopped cilantro, lime juice, and a pinch of salt in a bowl. Mix and set aside.
- On a rimmed baking sheet, spread 4 cups (120g) tortilla chips in an even layer.
- Sprinkle half of the shredded cheese blend evenly over the chips.
- Scatter half the seasoned meat, 1/2 cup black beans, and half the sliced jalapeños and green onions over the cheese.
- Add another layer of 4 cups (120g) chips and repeat the cheese, meat, beans, jalapeños, and green onions layering.
- Bake in the oven for 10-12 minutes until cheese bubbles and starts to brown slightly and chips are golden and crispy.
- Remove from oven and spoon pico de gallo over the top.
- Dollop sour cream in several spots.
- Serve immediately to enjoy the contrast of hot, melty cheese and crunchy chips with cool, fresh toppings.
Notes
Layer chips with cheese between layers to keep them crispy. Bake at 375°F on the middle rack to brown cheese without burning chips. Add wet toppings like sour cream and pico de gallo after baking to avoid sogginess. For extra gooey cheese, broil for 1-2 minutes but watch closely. Leftovers can be reheated in the oven at 350°F for 8-10 minutes to regain crispness.
Nutrition
- Serving Size: About 1/6th of the t
- Calories: 450
- Sugar: 4
- Sodium: 600
- Fat: 22
- Saturated Fat: 9
- Carbohydrates: 38
- Fiber: 7
- Protein: 25
Keywords: crispy nachos, loaded nachos, cheesy nachos, easy nachos recipe, game day snacks, homemade nachos, melted cheese nachos