“Are you seriously making fries again?” my roommate joked, eyeing the sizzling pan as the irresistible aroma of melting cheese and crispy bacon filled the kitchen. Honestly, I was just trying to whip up a quick snack after a long day, not knowing that these crispy loaded cheese fries with bacon and green onions would become my go-to comfort treat. The first time I threw together this mess of golden fries, sharp cheddar, smoky bacon, and fresh green onions, I was skeptical—fries loaded like this always seemed like a restaurant thing, a bit too over-the-top for my lazy kitchen nights.
But as I took that first bite, the crunch of perfectly crisp fries beneath gooey cheese and the punch of salty bacon hit me like a revelation. It wasn’t just a snack; it was a little celebration on a plate. Somehow, the bright green of the onions added a fresh zing that balanced the richness perfectly. Since that evening, I found myself making these more times than I can count—sometimes as a solo indulgence, other times to impress unexpected guests (who, by the way, always ask for the recipe).
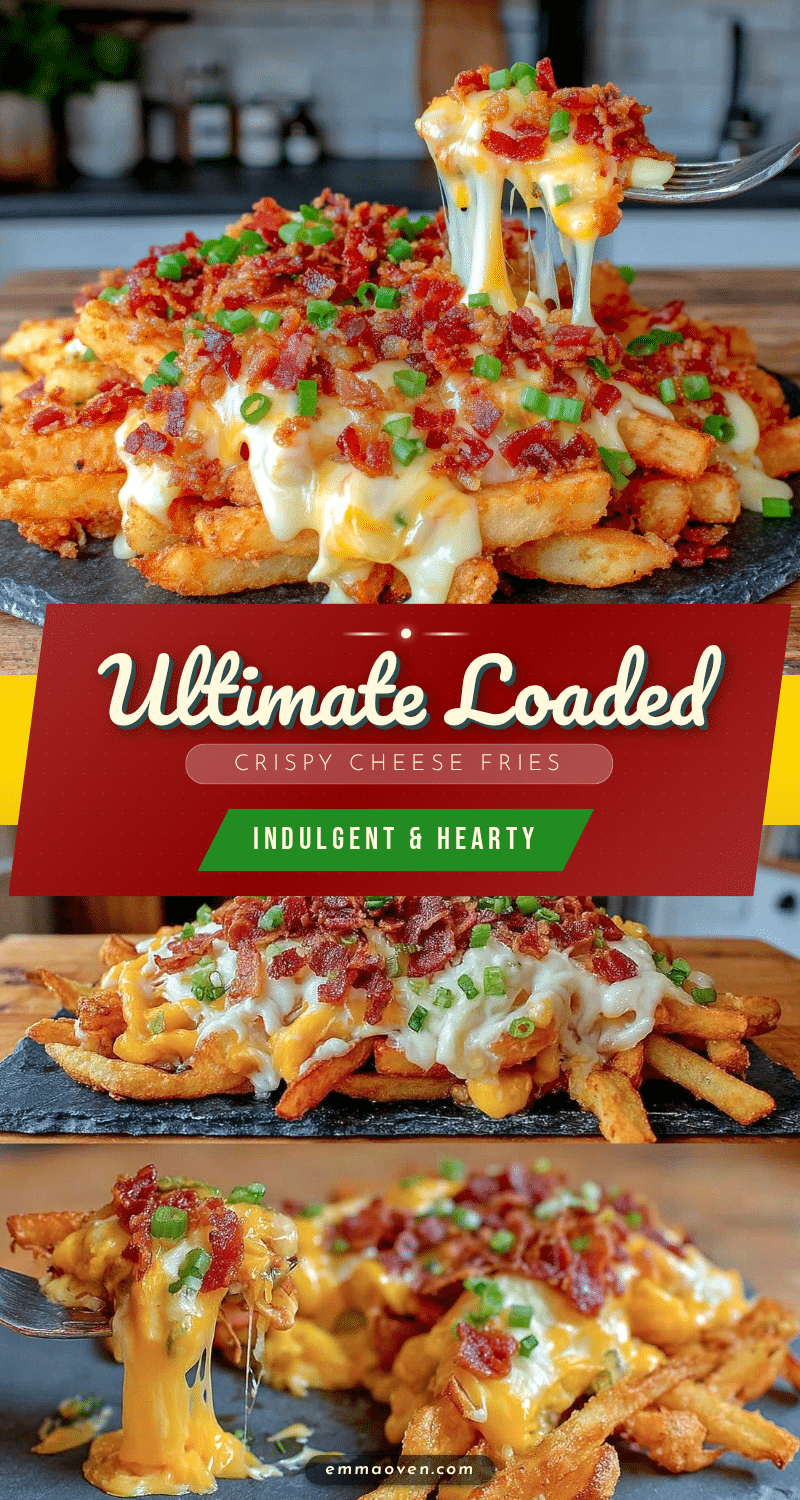
There’s something quietly satisfying about piling up fries—something we all know and love—but this recipe brings it next-level with layers of flavor and texture. No fancy ingredients, just trusty staples coming together to create that crispy loaded cheese fries with bacon and green onions magic. It’s a humble dish that promises to comfort and surprise, one cheesy, crunchy bite at a time.
And honestly, that’s why it stuck. Because it’s simple, satisfying, and exactly what a snack should be—without fuss, but with plenty of heart.
Why You’ll Love This Crispy Loaded Cheese Fries with Bacon and Green Onions Recipe
After testing and tweaking this recipe more times than I expected (yes, it’s kind of addictive), I’ve nailed down why these crispy loaded cheese fries with bacon and green onions stand out. They’re not just any loaded fries; they’re a snack experience you can pull off in your own kitchen without breaking a sweat.
- Quick & Easy: You can have these ready in under 30 minutes—perfect for those busy nights or surprise cravings when you want something seriously satisfying but fast.
- Simple Ingredients: No hunting for exotic items here. Everything you need is probably already chilling in your fridge or pantry—frozen fries, shredded cheddar, bacon, and fresh green onions.
- Perfect for Game Day & Gatherings: Whether it’s a casual hangout or a big game night, these loaded fries always steal the spotlight. They’re great finger food for sharing, too.
- Crowd-Pleaser: Kids love the cheesy, crispy combo, and adults can’t get enough of that smoky bacon punch. It’s a win-win.
- Unbelievably Delicious: The secret is in the layering and crisping—making sure those fries stay crunchy under melty cheese and bacon bits, with the fresh zing of green onions on top.
What makes this recipe different? For starters, I like to toss the fries in a touch of seasoning before baking to boost flavor, and I use a blend of sharp and mild cheddar to get that perfect melty stretch without overpowering the bacon’s smoky goodness. Plus, sprinkling the bacon and green onions right after the cheese melts keeps everything fresh and bright, not soggy.
This isn’t just a snack; it’s the kind that makes you pause mid-bite, smile quietly, and reach for just one more. If you enjoy dishes like the crispy BBQ bacon tater tot casserole, you’ll totally get the vibe here—comfort food with a crispy, cheesy twist that feels both indulgent and approachable.
What Ingredients You Will Need for Crispy Loaded Cheese Fries with Bacon and Green Onions
This recipe uses simple, wholesome ingredients to deliver bold flavor and satisfying texture without the fuss. Most are pantry staples or easy to find at any grocery store, making this a fuss-free snack that doesn’t skimp on flavor.
- Frozen French Fries (about 16 oz / 450 g): I prefer shoestring or crinkle-cut for extra crispiness, but you can use thicker fries if you like more potato heft.
- Bacon (6 slices): Thick-cut bacon works best for chewiness and smoky flavor. I usually grab a trusted brand like Oscar Mayer or Wright’s.
- Cheddar Cheese (2 cups / 200 g), shredded: Use a mix of sharp and mild cheddar for a balanced, melty texture. Freshly shredded cheese melts far better than pre-shredded.
- Green Onions (3-4 stalks), thinly sliced: Adds a fresh, slightly peppery bite that cuts through the richness.
- Olive Oil (1 tablespoon): Tossing fries in a little oil helps crisp them up in the oven.
- Seasoning: Salt (to taste), black pepper (freshly ground), and a pinch of smoked paprika or chili powder (optional but recommended for a subtle kick).
If you want to switch things up, you can swap bacon with turkey bacon for a leaner option or use dairy-free cheese to keep it vegan-friendly. For a gluten-free snack, double-check your frozen fries and bacon labels, as some brands add gluten-containing ingredients as fillers.
Equipment Needed
- Baking Sheet: A rimmed baking sheet is ideal for cooking the fries evenly. Line it with parchment paper for easier cleanup.
- Wire Rack (optional): Placing fries on a wire rack over the baking sheet helps air circulate and keeps them extra crispy, but you can bake directly on the sheet if you don’t have one.
- Mixing Bowl: For tossing fries with oil and seasoning.
- Skillet or Frying Pan: To cook the bacon until crisp.
- Cheese Grater: Freshly shredding cheese makes a difference in melt and texture.
- Sharp Knife and Cutting Board: For slicing green onions.
If you don’t have a wire rack, no worries—just spread the fries out evenly and flip halfway through baking. For bacon, I’ve tried microwave and pan methods, but frying on the stove gives the best control over crispness without drying it out. And if you want to keep your baking sheet in tip-top shape, a quick wipe with warm soapy water after using parchment paper usually does the trick.
Preparation Method for Crispy Loaded Cheese Fries with Bacon and Green Onions
- Preheat your oven to 425°F (220°C). This high heat is key for getting those fries crisp without waiting forever.
- Toss the frozen fries in olive oil and seasoning. In a large mixing bowl, add 1 tablespoon olive oil, a pinch of salt, black pepper, and smoked paprika or chili powder if using. Add the fries and toss gently until evenly coated. This step adds flavor and helps crisp the fries up in the oven.
- Arrange fries on a baking sheet. Spread them out in a single layer, ideally on a wire rack over the sheet to allow hot air circulation. Bake for 20–25 minutes, flipping halfway through, until golden and crispy. Watch closely near the end to avoid burning.
- Cook the bacon. While fries bake, place bacon slices in a cold skillet and cook over medium heat, turning occasionally for even crispness. Once crispy, transfer to a paper towel-lined plate to drain excess fat, then chop into bite-sized pieces.
- Remove fries from the oven. Sprinkle the shredded cheddar evenly over the hot fries. Return to the oven for 3–5 minutes, or until the cheese melts and bubbles.
- Add the bacon and green onions. Once the cheese is melted, scatter the chopped bacon and sliced green onions on top. The residual heat will warm these just enough without wilting the onions’ fresh flavor.
- Serve immediately. For best results, enjoy the fries hot and crispy straight from the oven. Grab a fork or dive in finger-first—either way, it’s pure comfort.
Quick tip: If your cheese isn’t melting evenly, try covering the fries loosely with foil during the last few minutes to trap heat without steaming them. And if your fries seem soggy, a quick broil for a minute or two after adding toppings can revive the crisp.
Cooking Tips & Techniques for Perfect Crispy Loaded Cheese Fries
Getting crispy loaded cheese fries just right can be a little tricky, but a few tricks go a long way. First, don’t overcrowd your baking sheet. Fries need space to crisp up instead of steaming each other.
Another thing I learned the hard way: tossing frozen fries in oil and seasoning before baking makes a huge difference. It’s tempting to skip, but that little step is the secret to restaurant-quality crunch at home.
When cooking bacon, starting it in a cold pan and cooking gently lets the fat render out slowly, producing crisp, evenly cooked pieces. Rushing it over high heat often means burnt edges and chewy centers—definitely not what you want topping your fries.
Finally, timing is everything. Add cheese when fries are hot and nearly done, so it melts quickly without overcooking the fries. Then add bacon and green onions last to keep them fresh and flavorful. Multitasking by cooking bacon while fries bake saves time and keeps everything piping hot.
I remember the first time I tried layering cheese too early—the fries got soggy and limp. Lesson learned: patience is key, and layering at the right moment pays off big time.
Variations & Adaptations
This crispy loaded cheese fries recipe is a solid base, but it’s easy to customize if you want to switch things up or accommodate different tastes.
- Spicy Kick: Add sliced jalapeños or a drizzle of hot sauce for some heat. You could even sprinkle crushed red pepper flakes into the seasoning mix.
- Cheese Blend: Swap cheddar for pepper jack or mozzarella to change the flavor profile. For a smoky vibe, try smoked gouda or even a sprinkle of parmesan.
- Vegetarian Version: Skip the bacon and add sautéed mushrooms or caramelized onions for a savory twist. A sprinkle of smoked paprika helps add depth without meat.
- Healthier Baked Fries: Use sweet potato fries for a touch of natural sweetness and extra nutrients. Just adjust baking times as needed since sweet potato fries can cook faster.
- Air Fryer Option: If you have an air fryer, crisp the fries there for 15–20 minutes at 400°F (200°C), then add cheese and toppings under a quick broil or back in the air fryer for a few minutes.
Personally, I once tried adding a dollop of sour cream and a sprinkle of crispy fried onions on top—total game changer. It brought a creamy crunch that made the dish feel even more indulgent.
Serving & Storage Suggestions
Serve these crispy loaded cheese fries straight from the oven for the best crunch and melty goodness. They’re fantastic on their own or paired with a tangy dipping sauce like ranch, chipotle mayo, or even a homemade queso blanco dip.
If you’re planning a casual get-together, consider serving alongside other snacks like buffalo chicken 7-layer dip or crispy buffalo chicken tater tot casserole for a spread that keeps guests coming back for more.
Leftover fries can be stored in an airtight container in the fridge for 2–3 days. To reheat, spread them on a baking sheet and pop in a 400°F (200°C) oven for 5–7 minutes to revive crispiness. Microwaving is tempting but usually results in soggy fries, so oven reheating is worth the wait.
Flavors tend to mellow and meld if stored overnight, which some people actually prefer. Just add fresh green onions or a sprinkle of cheese again before reheating for a little brightness.
Nutritional Information & Benefits
One serving of these crispy loaded cheese fries (about one-third of the recipe) roughly contains:
| Nutrient | Amount |
|---|---|
| Calories | 450-500 kcal |
| Protein | 20 g |
| Fat | 30 g |
| Carbohydrates | 30 g |
| Fiber | 3 g |
| Sodium | 750 mg |
The bacon adds protein and that smoky flavor, while green onions provide vitamin K and antioxidants. Using frozen fries might mean slightly higher sodium, so watch added salt if you’re sodium-conscious. This dish is definitely a treat, but balancing it with a fresh salad or vegetable side rounds out the meal nicely.
Conclusion
All said and done, these crispy loaded cheese fries with bacon and green onions are exactly what snack dreams are made of: crispy, cheesy, smoky, and fresh all at once. Whether you’re feeding a crowd or indulging solo, this recipe is flexible enough to fit your mood and kitchen style.
I love how it turns simple frozen fries into something special with just a few ingredients and no fuss. And honestly, it’s one of those recipes where the little tweaks you make become your own signature. So go ahead, make it yours—add your favorite cheese, spice it up, or keep it classic.
If you try this recipe, I’d love to hear how you made it your own. Drop a comment below or share your variations! Because, at the end of the day, food is best when it brings people together, one crispy bite at a time.
Frequently Asked Questions about Crispy Loaded Cheese Fries with Bacon and Green Onions
Can I make these fries ahead of time?
You can prepare the fries and bacon in advance, but it’s best to add cheese and green onions just before serving to keep the fries crispy and the onions fresh.
What’s the best way to keep fries crispy after baking?
Use a wire rack while baking to allow air circulation, and avoid overcrowding the pan. Reheating in the oven rather than the microwave helps maintain crispiness.
Can I use fresh potatoes instead of frozen fries?
Absolutely! Just cut potatoes into fries, soak them in cold water for 30 minutes to remove starch, dry thoroughly, toss in oil and seasoning, then bake until crispy (usually 30-40 minutes).
How do I make this recipe vegetarian?
Simply omit the bacon and consider adding sautéed mushrooms or caramelized onions for extra savory flavor. A sprinkle of smoked paprika helps add that smoky touch.
Is it possible to make this recipe gluten-free?
Yes! Just confirm that your frozen fries and bacon are labeled gluten-free, as some brands add gluten-containing fillers or flavorings.
Pin This Recipe!
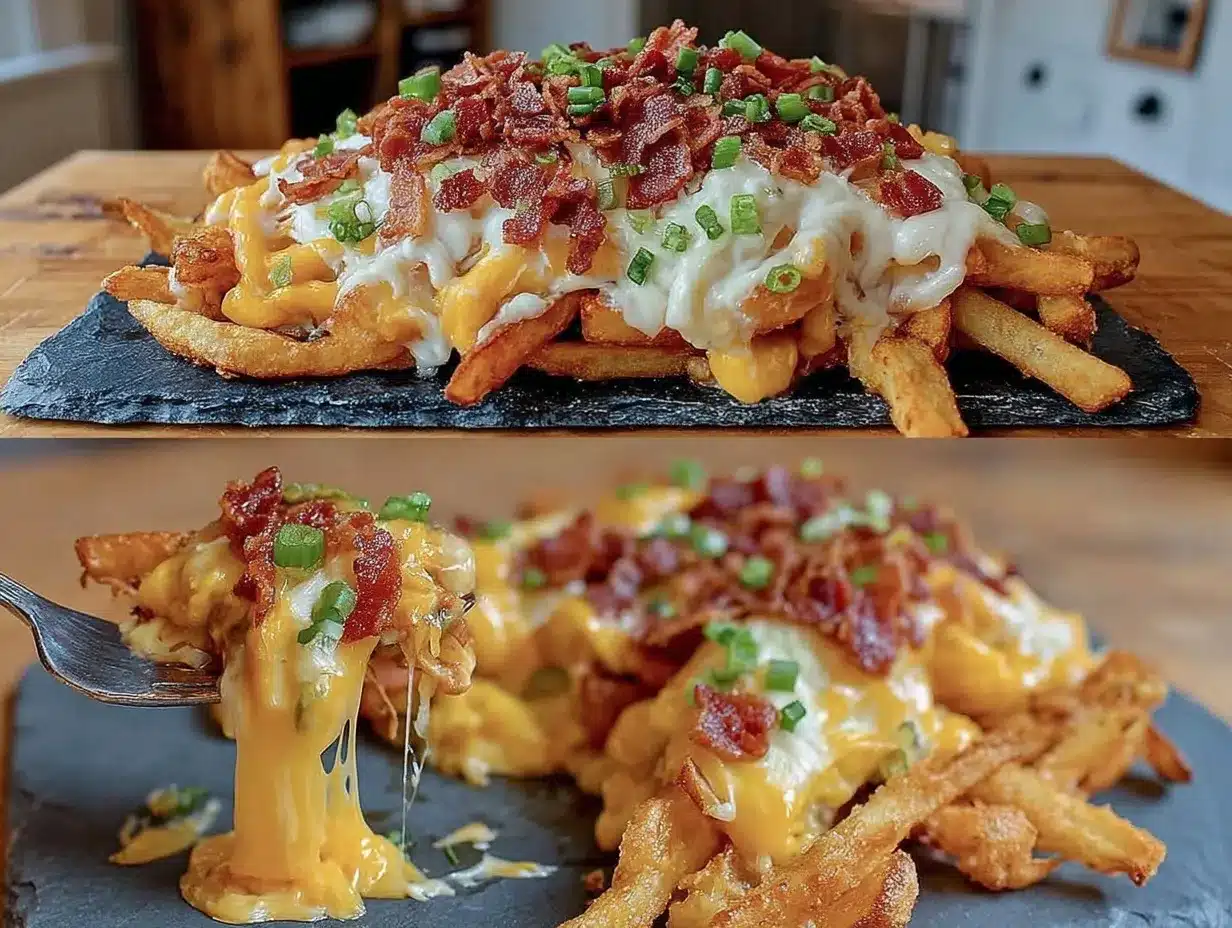
Crispy Loaded Cheese Fries with Bacon and Green Onions

A quick and easy snack featuring crispy baked fries topped with melted cheddar cheese, smoky bacon, and fresh green onions for a perfect balance of flavors and textures.
- Prep Time: 10 minutes
- Cook Time: 25-30 minutes
- Total Time: 35-40 minutes
- Yield: 3 servings 1x
- Category: Snack
- Cuisine: American
Ingredients
- 16 oz (450 g) frozen French fries (shoestring or crinkle-cut preferred)
- 6 slices thick-cut bacon
- 2 cups (200 g) shredded cheddar cheese (mix of sharp and mild)
- 3–4 stalks green onions, thinly sliced
- 1 tablespoon olive oil
- Salt, to taste
- Freshly ground black pepper, to taste
- Pinch of smoked paprika or chili powder (optional)
Instructions
- Preheat your oven to 425°F (220°C).
- In a large mixing bowl, toss the frozen fries with olive oil, salt, black pepper, and smoked paprika or chili powder if using until evenly coated.
- Arrange fries in a single layer on a rimmed baking sheet, ideally on a wire rack to allow air circulation.
- Bake fries for 20–25 minutes, flipping halfway through, until golden and crispy. Watch closely near the end to avoid burning.
- While fries bake, cook bacon in a cold skillet over medium heat, turning occasionally until crispy. Transfer to paper towel-lined plate to drain excess fat, then chop into bite-sized pieces.
- Remove fries from oven and evenly sprinkle shredded cheddar cheese over the hot fries.
- Return fries to the oven for 3–5 minutes, or until cheese melts and bubbles.
- Scatter chopped bacon and sliced green onions on top of the melted cheese.
- Serve immediately while hot and crispy.
Notes
Use a wire rack on the baking sheet to keep fries extra crispy. Toss fries in oil and seasoning before baking for better flavor and crunch. Cook bacon slowly in a cold pan for even crispness. Add cheese only after fries are nearly done to avoid sogginess. For reheating, use the oven to maintain crispiness. Cover fries loosely with foil if cheese melts unevenly. Broil briefly after adding toppings to revive crispiness if needed.
Nutrition
- Serving Size: About one-third of t
- Calories: 475
- Sugar: 2
- Sodium: 750
- Fat: 30
- Saturated Fat: 12
- Carbohydrates: 30
- Fiber: 3
- Protein: 20
Keywords: loaded fries, cheese fries, bacon fries, green onions, crispy fries, snack recipe, easy snack, game day food