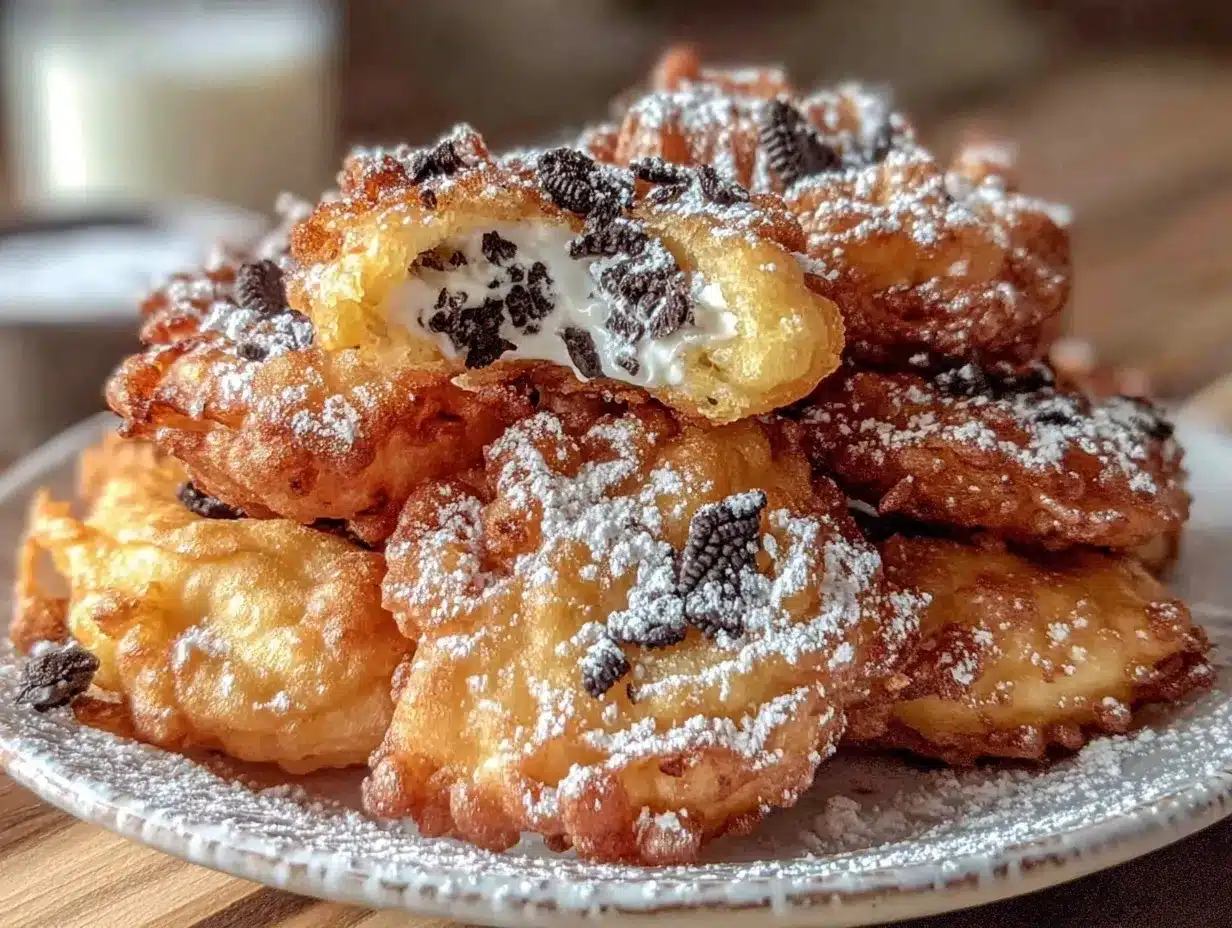
“You can’t mess up Oreos,” my niece declared one afternoon, eyes gleaming after her first bite of these crispy deep-fried Oreos. Honestly, I was skeptical too. The idea of dunking those classic cookies into batter and then hot oil sounded like one of those carnival stunts that’s more about the thrill than the flavor. But that day, after a quick batch whipped up in my kitchen, I realized this sweet treat wasn’t just a fairground novelty — it was a real crowd-pleaser, a guilty pleasure with a golden, crunchy jacket that somehow made the familiar Oreo filling taste even more irresistible.
I remember the kitchen smelling like a mix of sugary dough and toasted cookies, and the sound of tiny bubbles as each Oreo sizzled in the fryer. It felt like I’d stumbled on an easy secret, the kind you share quietly because it’s too good to keep under wraps. Since then, these crispy deep-fried Oreos have sneaked into my snack rotation more than I care to admit — an occasional indulgence that somehow feels like a small celebration in the middle of a hectic week.
What really stuck with me was how simple it was to pull off. No fancy equipment or weird ingredients, just a handful of pantry staples and a bit of patience. And hey, if you’re looking to impress friends or just need a sweet escape, this recipe fits the bill without any fuss. Plus, it pairs surprisingly well with savory bites like those from my crispy buffalo chicken tater tot casserole — a combo that makes game day a whole lot tastier.
It’s funny how something so simple can turn an afternoon upside down — from “meh” to “wow.” This recipe isn’t just about the deep-fried Oreos themselves; it’s about that moment of crunch, sweetness, and nostalgia all wrapped up in one bite. It’s the kind of treat that reminds you to pause, savor, and maybe sneak a second (or third) without guilt. That’s why it’s still my go-to when I want a little comfort with a twist.
Why You’ll Love This Recipe
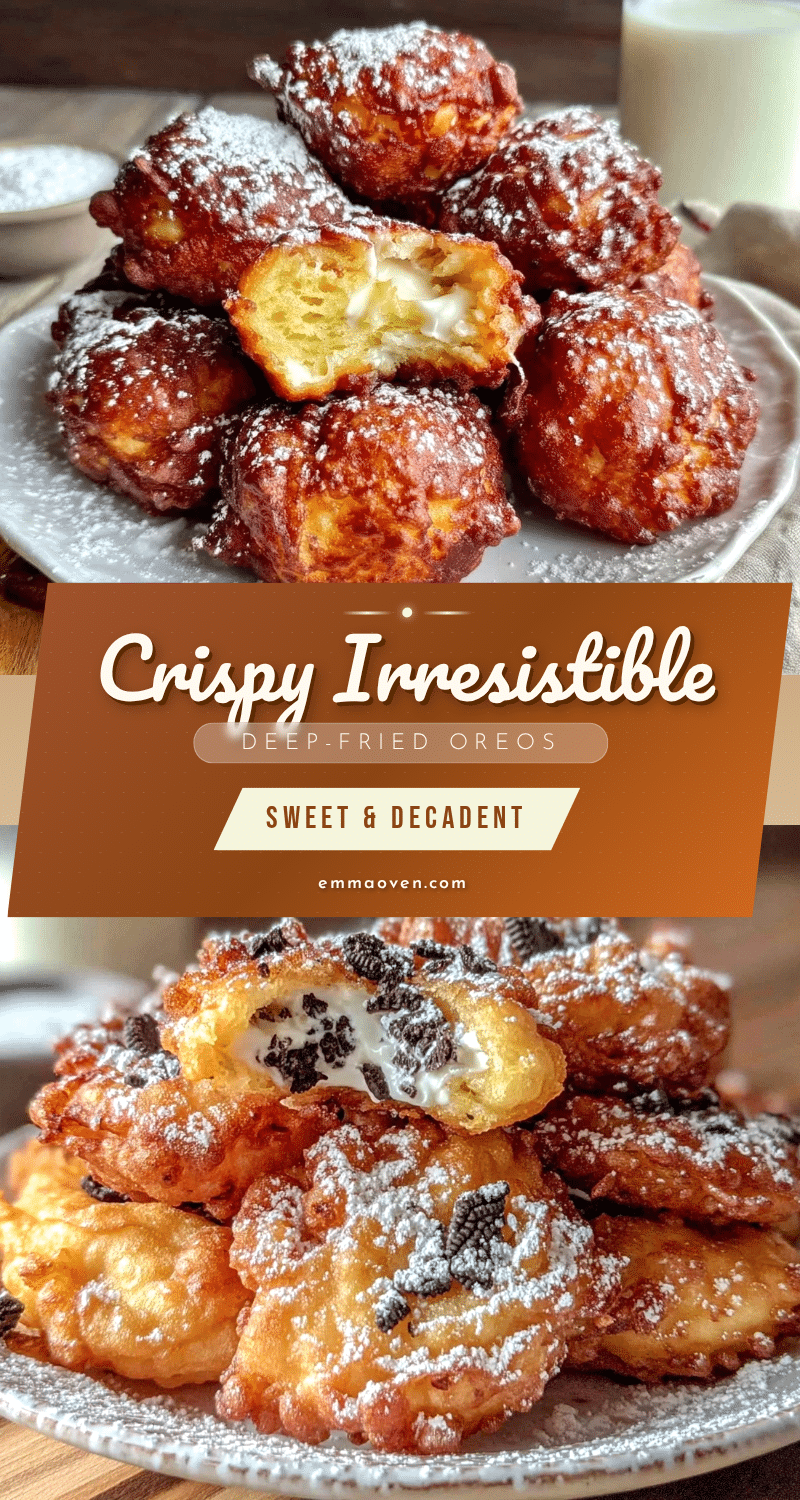
Honestly, the magic of this crispy deep-fried Oreos recipe lies in its perfect balance of textures and flavors — crunchy on the outside, soft and sweet inside. I’ve tested this recipe multiple times to get the batter just right so that it crisps up beautifully without overpowering the Oreo’s signature cream filling. Here’s what makes it stand out:
- Quick & Easy: Ready in about 20 minutes, perfect when you need a last-minute sweet treat that feels special.
- Simple Ingredients: No complicated pantry raid needed — just basic baking essentials and Oreos.
- Perfect for Parties & Snacks: Whether it’s a casual get-together or a fun family dessert, these are always a hit.
- Crowd-Pleaser: Kids and adults alike go wild for the crispy coating paired with that creamy filling.
- Unbelievably Delicious: The contrast between the hot, crispy batter and the melty Oreo center is pure comfort food bliss.
This recipe isn’t your average deep-fried cookie ordeal. The batter is light enough to let the Oreo flavor shine but thick enough to create that crave-worthy crunch. Plus, using a simple pancake-style batter means you can tweak it easily — maybe add a splash of vanilla or cinnamon for a personal touch. Over the years, I’ve found this recipe to be a reliable sweet treat that’s both nostalgic and exciting, perfect for indulging without much hassle.
What Ingredients You Will Need
This recipe uses simple, wholesome ingredients to deliver bold flavor and satisfying texture without the fuss. Most of these you probably already have in your kitchen, which is a big win when the sweet tooth hits unexpectedly.
- Oreos: Classic sandwich cookies work best. I usually go for the original flavor, but you can experiment with Double Stuf or even flavored Oreos for a twist.
- All-purpose flour: The base for the batter, providing structure and crispiness.
- Baking powder: Just a pinch to give the batter a little lift and lightness.
- Sugar: Granulated sugar adds a touch of sweetness to balance the batter.
- Salt: A pinch enhances the overall flavor.
- Milk: Whole milk is ideal for a rich batter, but you can use 2% or a dairy-free alternative like almond milk if needed.
- Egg: Helps bind the batter together and adds moisture.
- Vanilla extract: A splash for subtle warmth and depth.
- Vegetable oil or canola oil: For frying — choose a neutral oil with a high smoke point.
- Powdered sugar: For dusting the finished deep-fried Oreos, adding that classic sweet finish.
As for brands, I usually pick Gold Medal flour for consistent texture, and when it comes to Oreos, Nabisco originals are my go-to—they hold up well in hot oil without falling apart. If you want to make this gluten-free, try swapping the all-purpose flour with a gluten-free baking blend, though you might need to adjust milk amounts slightly to keep the batter smooth.
Equipment Needed
- Deep fryer or heavy-bottomed pot: A deep fryer is perfect for temperature control, but a sturdy pot works just as well.
- Thermometer: Essential for monitoring oil temperature (around 350°F / 175°C) to get that crisp without burning.
- Slotted spoon or spider strainer: For safely removing the Oreos from hot oil.
- Mixing bowls: One for batter, one for dry ingredients.
- Whisk: To mix the batter smoothly without lumps.
- Paper towels or wire rack: For draining excess oil after frying.
If you don’t have a deep fryer, a heavy-bottomed pot and a reliable thermometer are your best friends here. Avoid shallow pans — the oil needs to be deep enough to fully submerge the Oreos so they cook evenly. I’ve also found a spider strainer much safer than a slotted spoon when fishing these little treats out — less chance of splashes.
Preparation Method
- Preheat the oil: Heat about 3 to 4 inches of vegetable oil in your deep fryer or pot to 350°F (175°C). Use a thermometer to keep the temperature steady; too hot and the batter burns, too cool and the Oreos get greasy. This step usually takes around 10 minutes.
- Prepare the batter: In a medium bowl, whisk together 1 cup (120 g) of all-purpose flour, 1 tablespoon of granulated sugar, 1 teaspoon of baking powder, and a pinch of salt. In a separate bowl, beat 1 large egg with 3/4 cup (180 ml) of whole milk and 1 teaspoon of vanilla extract. Slowly add the wet ingredients to the dry, whisking gently to form a smooth, slightly thick batter. Let it rest for 5 minutes—this helps the flour hydrate and the batter thicken just right.
- Dip the Oreos: Working quickly, dunk each Oreo into the batter, making sure it’s fully coated. You want a nice even layer of batter without it dripping too much. If the batter is too thick, add a splash more milk; if too thin, sprinkle in a bit more flour.
- Fry in batches: Carefully lower the coated Oreos into the hot oil using your spider strainer or slotted spoon. Fry 3 to 4 at a time — overcrowding drops the oil temperature and leads to soggy treats. Each batch should take about 2 to 3 minutes to turn golden brown and crispy. Flip halfway through for even color.
- Drain and cool: Remove the Oreos and place them on paper towels or a wire rack to drain excess oil. Let them cool for a couple of minutes; the filling will be hot and melty.
- Serve: Dust with powdered sugar just before serving for that classic sweet finish. Optionally, drizzle with chocolate or caramel sauce for an extra treat.
Beware — the Oreos will be hot inside, so patience pays off here! If your batter starts to get lumpy, give it a quick whisk before dipping the next batch. Also, keep an eye on your oil temperature, adjusting the heat as needed to prevent burning or undercooking.
Cooking Tips & Techniques
From my experience, a few small tricks make a big difference with deep-fried Oreos. First, don’t skip resting the batter. I’ve found this step helps the batter cling better and fry up crispier. Also, keeping the oil temperature steady is key — I once let it dip too low and ended up with greasy, floppy Oreos (not the vibe you want!).
When frying, use a thermometer religiously. I’ve tried eyeballing it before; trust me, it never ends well. If you don’t have one, test the oil by dropping a small bit of batter in — it should bubble up immediately and float to the top.
Another tip: fry in small batches. I know it’s tempting to toss a bunch in at once (been there!), but overcrowding lowers the oil temperature and ruins that crisp texture. Plus, flipping the Oreos carefully halfway through helps them brown evenly.
If you want to save time, you can prepare the batter ahead of time and refrigerate it for up to an hour. Just give it a gentle stir before using. And for an extra festive touch, try sprinkling cinnamon sugar over the powdered sugar — it adds a cozy warm note.
Variations & Adaptations
There’s plenty of room to play with this crispy deep-fried Oreos recipe depending on your cravings or dietary needs.
- Flavor twists: Swap classic Oreos for Golden Oreos or seasonal flavors like pumpkin spice for autumn vibes. You can also add a pinch of cinnamon or nutmeg to the batter for warmth.
- Gluten-free option: Use a gluten-free baking blend instead of all-purpose flour. Just be mindful the texture might be slightly different, but still delicious.
- Healthier air-fried version: If you want less oil, try air-frying the batter-coated Oreos at 370°F (190°C) for 6-8 minutes until golden and crispy. The texture won’t be quite the same, but it’s a fun alternative.
- Chocolate lovers: Drizzle melted chocolate or add chocolate chips to the batter for an indulgent upgrade. For an extra creamy surprise, serve with a scoop of ice cream.
Personally, I once tossed in some mini marshmallows around the Oreos before frying — it was a gooey, melty mess but absolutely delightful. If you’re curious about making more crispy, indulgent snacks, you might enjoy the crispy bacon-wrapped jalapeño poppers I made last summer — different vibe but same crispy satisfaction!
Serving & Storage Suggestions
Serve these crispy deep-fried Oreos warm for the best experience. The outer batter is at its crunchiest, and the Oreo center is soft and melty—honestly, that contrast is the heart of the treat. Dust generously with powdered sugar and maybe add a drizzle of chocolate or caramel sauce for extra flair.
They’re perfect to serve alongside a cold glass of milk or even a cup of rich coffee. For a party, pair them with savory bites like my crispy cheesy tater tot ranch bake to balance sweet and salty flavors.
If you have leftovers (which sometimes happens, but honestly not often), store them in an airtight container at room temperature for up to 24 hours. Reheat briefly in a toaster oven or air fryer to bring back some crispness. Avoid microwaving unless you want them soft and a bit oily.
Keep in mind that the longer they sit, the softer the batter gets as it absorbs moisture from the filling, so they’re best enjoyed fresh. But hey, sometimes that slightly softened texture is just right for a midnight snack.
Nutritional Information & Benefits
While deep-fried Oreos are definitely an indulgence, here’s a rough idea of what you’re biting into per serving (about 3 Oreos):
| Nutrient | Amount |
|---|---|
| Calories | 350-400 kcal |
| Fat | 22 g |
| Carbohydrates | 40 g |
| Protein | 3 g |
| Sugar | 22 g |
This treat is high in sugar and fat, so it’s a good idea to enjoy it occasionally rather than regularly. The Oreos themselves bring a nostalgic element, while the batter adds extra carbs and fat from frying. For those sensitive to gluten or dairy, swapping ingredients like gluten-free flour or non-dairy milk can help adapt the recipe.
From a wellness perspective, I see this recipe as a joyful way to indulge without overthinking. It’s perfect for those moments when comfort food is exactly what you need to reset or celebrate small wins.
Conclusion
If you’re after a sweet, crispy treat that’s easy to make and guaranteed to impress, these crispy deep-fried Oreos fit the bill perfectly. They’re a fun twist on a classic cookie — nostalgic yet new — and honestly, they’ve become my go-to when I want something quick but special in the dessert department.
Feel free to customize the batter or Oreos to your liking, or try warming them up with a side of vanilla ice cream for a little extra indulgence. I love how this recipe turns simple ingredients into something that feels like a mini celebration.
Give these a try and don’t be surprised if you find yourself making them again and again — just like I did. And if you want to switch from sweets to savory snacks, the creamy buffalo chicken 7-layer dip is a perfect partner for your next gathering. Happy frying!
Frequently Asked Questions
Can I use other cookies besides Oreos?
Yes! While Oreos hold up best due to their firm texture and cream filling, you can experiment with other sandwich cookies. Just watch the frying time closely since some cookies may melt faster.
What oil is best for frying deep-fried Oreos?
Use a neutral oil with a high smoke point like vegetable, canola, or peanut oil. Avoid olive oil or butter because they burn quickly and affect flavor.
Can I bake these instead of frying?
Baking won’t give the same crispy texture, but you can try air-frying for a less oily alternative. Air-fry at 370°F (190°C) for 6-8 minutes until golden.
How do I know when the oil is the right temperature?
Use a deep-fry thermometer to keep the oil at around 350°F (175°C). If you don’t have one, drop a small bit of batter in; it should bubble and rise immediately.
Can I make the batter ahead of time?
Yes, you can prepare the batter and refrigerate it for up to an hour. Stir gently before using to maintain the right consistency.
Pin This Recipe!
Crispy Deep-Fried Oreos

A quick and easy recipe for crispy deep-fried Oreos with a golden crunchy batter and melty Oreo center, perfect for parties and sweet indulgence.
- Prep Time: 10 minutes
- Cook Time: 10 minutes
- Total Time: 20 minutes
- Yield: About 12 Oreos (serves 4) 1x
- Category: Dessert
- Cuisine: American
Ingredients
- Oreos (original flavor recommended, but Double Stuf or flavored Oreos can be used)
- 1 cup all-purpose flour (120 g)
- 1 tablespoon granulated sugar
- 1 teaspoon baking powder
- Pinch of salt
- 3/4 cup whole milk (180 ml) or dairy-free alternative
- 1 large egg
- 1 teaspoon vanilla extract
- Vegetable oil or canola oil for frying (neutral oil with high smoke point)
- Powdered sugar for dusting
Instructions
- Preheat about 3 to 4 inches of vegetable oil in a deep fryer or heavy-bottomed pot to 350°F (175°C). Use a thermometer to maintain temperature.
- In a medium bowl, whisk together flour, sugar, baking powder, and salt.
- In a separate bowl, beat the egg with milk and vanilla extract.
- Slowly add wet ingredients to dry ingredients, whisking gently to form a smooth, slightly thick batter. Let rest for 5 minutes.
- Dip each Oreo quickly into the batter, coating evenly without dripping too much.
- Carefully lower 3 to 4 coated Oreos into hot oil using a spider strainer or slotted spoon. Fry for 2 to 3 minutes, flipping halfway, until golden brown and crispy.
- Remove Oreos and drain on paper towels or wire rack. Let cool for a couple of minutes.
- Dust with powdered sugar before serving. Optionally drizzle with chocolate or caramel sauce.
Notes
Keep oil temperature steady at 350°F to avoid greasy or burnt Oreos. Resting the batter helps it cling better and fry crispier. Fry in small batches to maintain oil temperature. Batter can be refrigerated for up to an hour. For a healthier option, air-fry at 370°F for 6-8 minutes.
Nutrition
- Serving Size: About 3 Oreos per se
- Calories: 375
- Sugar: 22
- Fat: 22
- Carbohydrates: 40
- Protein: 3
Keywords: deep-fried Oreos, crispy Oreos, fried cookies, sweet treat, carnival food, easy dessert, party snack