It was one of those evenings where I barely had the energy to think, let alone cook a full meal. My kitchen was a mess from a busy day, and honestly, I just wanted something quick but satisfying. I rummaged through the fridge and found some tortillas, cheese, and a few random veggies. I wasn’t expecting much, but thought, “Why not try something fun?” That’s when the idea of the Crispy Blooming Quesadilla Ring with Zesty Salsa came to life—sort of by accident, actually.
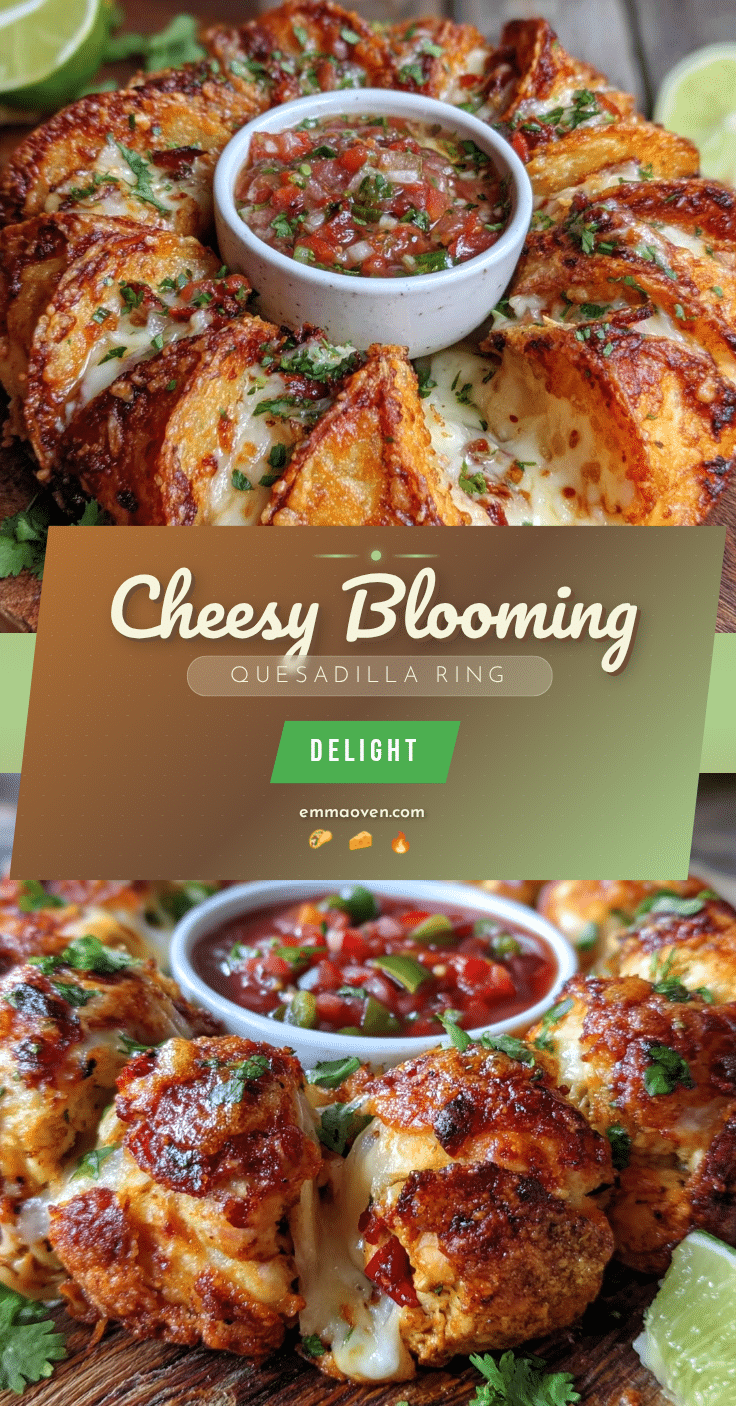
I started layering cheese and fillings inside tortilla wedges arranged in a circular pattern, thinking it might look pretty but not trusting the end result. To my surprise, it turned into this golden, crispy, cheesy ring that pulled apart in perfect segments. The zingy salsa I whipped up on the side brought the whole thing together. People kept coming back to the kitchen asking for more, and I realized this wasn’t just a quick snack—it was a keeper.
What stuck with me was how something so simple felt so special and fun to eat. The Crispy Blooming Quesadilla Ring isn’t just any quesadilla; it’s a crowd-pleaser that feels like a mini celebration, even on a hectic night. Plus, the crispy edges with melty cheese inside? Honestly, that combo is pure comfort food magic.
It’s become my go-to when I want something easy but memorable, and I have a feeling it might become yours too.
Why You’ll Love This Recipe
- Quick & Easy: Comes together in under 30 minutes, perfect for busy weeknights or last-minute get-togethers.
- Simple Ingredients: Uses common pantry staples you probably already have—no need for a special grocery run.
- Perfect for Parties: Great for casual gatherings, game nights, or even a fun family dinner where everyone can grab their own slice.
- Crowd-Pleaser: Kids and adults alike love pulling apart the crispy wedges filled with gooey cheese and savory fillings.
- Unbelievably Delicious: The mix of crunchy edges, melty cheese, and fresh zesty salsa hits all the right notes for comfort and flavor.
- This recipe stands out because of its clever “ring” presentation that turns a classic quesadilla into an interactive dish. Plus, the homemade salsa adds a fresh, tangy kick that balances the richness perfectly.
- It’s not just a recipe; it’s a simple way to impress guests or make a casual night in feel a little more special.
What Ingredients You Will Need
This recipe uses simple, wholesome ingredients to deliver bold flavor and satisfying texture without the fuss. Most are pantry staples, and many can be swapped easily depending on what you have on hand.
- Flour tortillas: 8 medium-sized (10-inch) tortillas work best for forming the ring. Look for fresh ones with flexibility.
- Shredded cheese: 2 cups (about 200g) of a melty cheese like cheddar, Monterey Jack, or a Mexican blend. I prefer Sargento for good melt and flavor.
- Cooked chicken or black beans: 1 cup shredded chicken or 1 cup rinsed black beans for a vegetarian twist.
- Bell peppers: 1 small, diced (red or green adds a nice crunch and color).
- Red onion: ¼ cup finely chopped for a subtle bite.
- Jalapeño: 1 small, seeded and diced (optional, adds heat).
- Olive oil or butter: 2 tablespoons for brushing the ring before baking (adds crispiness).
- Salt and pepper: To taste.
- For the zesty salsa:
- 2 medium tomatoes, finely chopped
- ½ small red onion, minced
- 1 small jalapeño, seeded and minced
- Juice of 1 lime (adds a bright tang)
- ¼ cup fresh cilantro, chopped
- Salt and pepper to taste
If you want to switch things up, you can swap the chicken for cooked ground beef or even mushrooms for a vegetarian take. For a gluten-free option, use corn tortillas but be gentle when shaping the ring.
Equipment Needed
- Baking sheet: A rimmed baking sheet is perfect for holding the quesadilla ring while it bakes.
- Parchment paper or silicone baking mat: Prevents sticking and helps with cleanup.
- Sharp knife: Essential for cutting the tortillas into wedges cleanly.
- Mixing bowls: For the salsa and mixing fillings.
- Brush: To apply oil or butter evenly on the ring for crispiness. If you don’t have a brush, a spoon works in a pinch.
- Cutting board: For chopping veggies and slicing the ring.
I’ve tried making this without parchment, but it tends to stick more, so don’t skip that if you can help it. Also, a pizza cutter can be a handy alternative for slicing the finished ring into wedges evenly.
Preparation Method

- Preheat your oven to 400°F (200°C). Line a baking sheet with parchment paper.
- Cut each tortilla into 8 equal wedges. Stack them neatly for easy layering.
- On the parchment, arrange the tortilla wedges in a circle with points facing inward, overlapping slightly to form a ring about 10 inches across.
- Layer fillings: Sprinkle a thin layer of shredded cheese evenly over the tortilla wedges.
- Add the cooked chicken or black beans, diced bell peppers, red onion, and jalapeño. Season lightly with salt and pepper.
- Top with another layer of cheese. Then carefully place a second ring of tortilla wedges on top, pointing outward, overlapping the first ring and creating a blooming flower effect.
- Press gently but firmly to seal the edges. Brush the top and edges with olive oil or melted butter to ensure a golden, crispy finish.
- Bake for 15-18 minutes, until the cheese is melted and the edges are crisp and golden brown.
- While baking, prepare the zesty salsa: Combine chopped tomatoes, red onion, jalapeño, cilantro, and lime juice in a bowl. Season with salt and pepper, stir, and let it sit for flavors to meld.
- Remove the quesadilla ring from the oven and let it cool for 5 minutes. Use a spatula to transfer it to a serving plate.
- Serve warm with the zesty salsa on the side for dipping.
Pro tip: Don’t overload the ring with fillings or it might get soggy or hard to slice. Keeping the layers balanced helps everything crisp up perfectly.
Cooking Tips & Techniques
Getting that signature crispy texture means brushing the ring with oil or butter before baking—it’s a small step that makes a big difference. I’ve learned this the hard way after a few soggy attempts.
Also, using medium-sized tortillas works best; too small and the ring is fiddly, too big and it won’t bloom nicely. When cutting the tortillas, a sharp knife or pizza cutter helps get clean edges for better layering.
Multitasking by prepping the salsa while the ring bakes saves time and keeps everything fresh. If you like extra melty cheese, cover the ring loosely with foil during the first 10 minutes of baking, then uncover to crisp the top.
Watch the oven closely—every oven’s a little different, and you want golden edges, not burnt ones. If you notice it browning too fast, lower the temp by 25°F (about 15°C) and bake a bit longer.
Variations & Adaptations
- Vegetarian version: Skip the chicken and add black beans, corn, or sautéed mushrooms for a hearty filling.
- Spicy kick: Add more jalapeño or a few dashes of hot sauce inside the ring for heat lovers.
- Cheese swaps: Try pepper jack for a smoky twist or mozzarella for extra stretchy cheese pull.
- Gluten-free adaptation: Use soft corn tortillas, but gently warm them first to avoid cracking.
- Seasonal twist: In summer, add fresh corn kernels and diced avocado to the filling for brightness.
- One variation I love is adding caramelized onions and a sprinkle of smoked paprika inside—the sweet and smoky combo with the crispy ring is next level.
Serving & Storage Suggestions
Serve the Crispy Blooming Quesadilla Ring warm right out of the oven alongside the zesty salsa for dipping. It pairs well with a fresh green salad or simple guacamole for a fuller meal.
Leftovers store well in the refrigerator wrapped tightly in foil or an airtight container. Reheat in a skillet or oven to bring back the crispiness—microwaving tends to make it soggy.
If you want to freeze the ring, assemble but don’t bake it first. Wrap tightly and freeze for up to a month. Bake from frozen, adding a few extra minutes to the baking time.
The flavors actually deepen a bit after resting, so if you have leftovers, letting them sit overnight in the fridge helps the salsa and fillings meld beautifully.
Nutritional Information & Benefits
This recipe offers a balanced mix of protein, carbs, and fats with roughly 350-400 calories per serving (based on 8 servings). The chicken or beans provide satisfying protein, while the cheese adds calcium and richness.
Using fresh veggies like bell peppers, onions, and tomatoes in the salsa adds vitamins and antioxidants. This quesadilla ring can easily fit into a gluten-free or vegetarian diet by swapping ingredients.
While it’s indulgent comfort food, the homemade salsa keeps things fresh and light with no added sugars or preservatives. In my experience, this recipe strikes a nice balance between satisfying cravings and wholesome ingredients.
Conclusion
The Crispy Blooming Quesadilla Ring with Zesty Salsa is a fun, tasty way to turn simple ingredients into something memorable. Whether you’re feeding a crowd or just treating yourself, it’s a recipe that invites sharing and smiles.
Feel free to tweak the fillings and spice level to suit your taste—that’s part of the joy! I keep coming back to this recipe because it’s quick, delicious, and always gets compliments without a lot of fuss.
Give it a try next time you want a no-fuss, flavorful meal that’s as fun to eat as it is to make. I’d love to hear how you make it your own!
FAQs
Can I make the quesadilla ring ahead of time?
You can assemble it and store it in the fridge for a few hours before baking, but it’s best enjoyed fresh and warm right after baking for the crispiest texture.
What’s the best cheese to use for melting?
Cheddar, Monterey Jack, or a Mexican blend works well. Mozzarella is great for stretchiness but milder in flavor.
Can I use corn tortillas instead of flour?
Yes, but warm them gently first to avoid cracking. Corn tortillas are less flexible, so handle carefully when shaping the ring.
How do I store leftovers?
Wrap leftovers tightly and refrigerate. Reheat in the oven or skillet to keep the edges crispy. Avoid microwaving if you want to maintain texture.
Can I add other fillings like vegetables or meats?
Absolutely! Diced tomatoes, corn, caramelized onions, cooked ground beef, or even sautéed mushrooms are all tasty options.
Pin This Recipe!
Crispy Blooming Quesadilla Ring Recipe Easy Homemade with Zesty Salsa

A quick and easy crispy quesadilla ring filled with melty cheese, chicken or beans, and fresh veggies, served with a zesty homemade salsa. Perfect for parties or a fun family dinner.
- Prep Time: 10 minutes
- Cook Time: 15-18 minutes
- Total Time: 25-28 minutes
- Yield: 8 servings 1x
- Category: Main Course
- Cuisine: Mexican
Ingredients
- 8 medium-sized (10-inch) flour tortillas
- 2 cups shredded cheese (cheddar, Monterey Jack, or Mexican blend)
- 1 cup cooked shredded chicken or 1 cup rinsed black beans
- 1 small bell pepper, diced (red or green)
- 1/4 cup finely chopped red onion
- 1 small jalapeño, seeded and diced (optional)
- 2 tablespoons olive oil or butter, for brushing
- Salt and pepper to taste
- For the zesty salsa:
- 2 medium tomatoes, finely chopped
- 1/2 small red onion, minced
- 1 small jalapeño, seeded and minced
- Juice of 1 lime
- 1/4 cup fresh cilantro, chopped
- Salt and pepper to taste
Instructions
- Preheat your oven to 400°F (200°C). Line a baking sheet with parchment paper.
- Cut each tortilla into 8 equal wedges. Stack them neatly for easy layering.
- On the parchment, arrange the tortilla wedges in a circle with points facing inward, overlapping slightly to form a ring about 10 inches across.
- Sprinkle a thin layer of shredded cheese evenly over the tortilla wedges.
- Add the cooked chicken or black beans, diced bell peppers, red onion, and jalapeño. Season lightly with salt and pepper.
- Top with another layer of cheese. Then carefully place a second ring of tortilla wedges on top, pointing outward, overlapping the first ring and creating a blooming flower effect.
- Press gently but firmly to seal the edges. Brush the top and edges with olive oil or melted butter to ensure a golden, crispy finish.
- Bake for 15-18 minutes, until the cheese is melted and the edges are crisp and golden brown.
- While baking, prepare the zesty salsa by combining chopped tomatoes, red onion, jalapeño, cilantro, and lime juice in a bowl. Season with salt and pepper, stir, and let it sit for flavors to meld.
- Remove the quesadilla ring from the oven and let it cool for 5 minutes. Use a spatula to transfer it to a serving plate.
- Serve warm with the zesty salsa on the side for dipping.
Notes
Do not overload the ring with fillings to avoid sogginess or difficulty slicing. Brushing with oil or butter before baking ensures a crispy texture. Use medium-sized tortillas for best results. For extra melty cheese, cover loosely with foil for the first 10 minutes of baking. Adjust oven temperature if edges brown too quickly. Corn tortillas can be used for gluten-free but warm gently to avoid cracking.
Nutrition
- Serving Size: 1 wedge (1/8 of the
- Calories: 375
- Sugar: 3
- Sodium: 450
- Fat: 18
- Saturated Fat: 8
- Carbohydrates: 32
- Fiber: 3
- Protein: 20
Keywords: quesadilla ring, crispy quesadilla, blooming quesadilla, zesty salsa, easy party recipe, cheesy quesadilla, quick dinner, vegetarian option, gluten-free option