“You sure you want to try this?” my friend asked, eyeing the golden breaded chicken I had just pulled from the pan. Honestly, I wasn’t convinced myself at first. I’d been craving something comforting but different — and chicken katsu curry was this mysterious dish I’d only had at a little Japanese spot downtown. Somehow, I thought making it at home would be a hassle or just wouldn’t come close. Turns out, I was so wrong.
That evening, with the scent of frying panko crumbs filling the kitchen and the rich aroma of simmering curry sauce, I realized something: crispy chicken katsu curry isn’t just a restaurant treat. It’s a home-cooked hug, especially when paired with sticky rice and a tangy splash of pickled ginger. The crunch, the warmth, and that sweet-tart zing from the ginger all came together in a way that made me pause and just savor each bite.
Funny enough, this recipe wasn’t planned. I had leftover chicken breasts and a craving for something cozy. A quick scroll through my pantry, some improvisation, and a dash of curiosity turned this into a weeknight staple. It’s one of those recipes that keeps sneaking onto my dinner table because it’s just that reliable—comfort food with a little crispy twist and an unexpected kick.
So, if you’ve ever hesitated about making crispy chicken katsu curry at home, I get it. But trust me, once you try it, you’ll find yourself reaching for this recipe again and again. It’s simple, satisfying, and something about the balance of textures and flavors just sticks with you—in the best way.
Why You’ll Love This Recipe
After making this crispy chicken katsu curry a few times (okay, more than a few), I can say it’s one of those dishes that surprises you with how straightforward it is to pull off at home. Here’s why it’s worth adding to your recipe box:
- Quick & Easy: From start to finish, this meal comes together in under 40 minutes, perfect for busy weeknights or when you need a hearty fix fast.
- Simple Ingredients: No need to hunt down obscure spices or fancy sauces. Most of the ingredients are pantry staples or easy-to-find items that you probably already have.
- Perfect for Cozy Dinners: This recipe hits that comfort food sweet spot—warm, crispy, and satisfying—ideal for chilly evenings or when you just want a meal that feels like a treat.
- Crowd-Pleaser: Whether it’s kids or adults, the crispy chicken and mild curry sauce combo always seems to win people over.
- Unbelievably Delicious: The contrast between the crunchy panko crust, tender chicken, and velvety curry makes every bite exciting yet comforting.
What sets this recipe apart is the attention to texture and balance. For instance, I like to use Japanese-style panko breadcrumbs—they give that ultra-crispy coating without feeling heavy or greasy. The curry sauce is rich but not overpowering, and the sticky rice soaks up every drop perfectly. Plus, the pickled ginger isn’t just garnish—it cuts through the richness with a bright, zesty pop. This isn’t just another curry dish; it’s one that feels thoughtfully put together, yet easy enough to whip up without stress.
Honestly, this recipe has become my go-to when I want to impress guests without spending hours in the kitchen. And if you’re curious about other easy, satisfying comfort foods, you might enjoy my crispy buffalo chicken tater tot casserole—another crowd favorite that’s just as simple to make.
What Ingredients You Will Need
This crispy chicken katsu curry recipe uses straightforward ingredients that come together to create bold flavors and delightful textures. Most are pantry staples, with a few fresh items to keep it authentic. Here’s what you’ll gather:
- For the Chicken Katsu:
- 2 large chicken breasts, pounded to even thickness (about 6-8 oz / 170-225 g each)
- Salt and pepper, to taste
- ½ cup (60 g) all-purpose flour
- 2 large eggs, beaten, room temperature
- 1 cup (100 g) Japanese-style panko breadcrumbs (I prefer Yamamotoyama brand for best crunch)
- Vegetable oil, for frying (enough for shallow frying, about 1 inch deep)
- For the Curry Sauce:
- 2 tablespoons unsalted butter
- 1 medium onion, finely chopped
- 2 cloves garlic, minced
- 1 tablespoon grated fresh ginger
- 1 tablespoon curry powder (mild or medium heat, depending on preference)
- 1 tablespoon all-purpose flour
- 2 cups (480 ml) chicken broth (low sodium preferred)
- 1 tablespoon soy sauce
- 1 teaspoon honey or sugar
- Salt and pepper, to taste
- For the Sticky Rice:
- 1 cup (190 g) short-grain sushi rice or sticky rice
- 1¼ cups (300 ml) water
- Pinch of salt
- For the Pickled Ginger:
- Store-bought pickled ginger slices (available in Asian markets or the sushi aisle)
- Optional: fresh cilantro or scallions for garnish
If you want to swap for a gluten-free option, you can use almond flour or gluten-free panko for the coating, and tamari instead of soy sauce in the curry. Also, in warmer months, I sometimes add fresh peas or carrots to the sauce for a pop of color and sweetness.
Equipment Needed
- Large skillet or frying pan (preferably heavy-bottomed) for frying the chicken
- Medium saucepan with lid for cooking sticky rice
- Medium saucepan for preparing the curry sauce
- Mixing bowls for dredging the chicken in flour, egg, and panko
- Sharp knife and cutting board for prepping onions, garlic, and ginger
- Meat mallet or rolling pin (to pound the chicken breasts evenly)
- Slotted spoon or tongs for flipping and removing chicken from oil
- Fine mesh sieve or colander (optional, for rinsing rice)
I’ve found that using a cast-iron skillet or a good non-stick pan helps maintain even heat during frying. If you don’t have a meat mallet, a heavy pan or even a rolling pin wrapped in plastic wrap works just fine for pounding chicken. For sticky rice, a rice cooker works wonders, but a simple saucepan with a tight-fitting lid gets the job done well too.
Preparation Method
- Prep the Chicken: Place each chicken breast between two sheets of plastic wrap and gently pound with a meat mallet or rolling pin until about ½ inch (1.3 cm) thick. This ensures even cooking and a tender bite. Season both sides lightly with salt and pepper.
- Set Up Breading Stations: In three shallow bowls, place the flour in the first, beaten eggs in the second, and panko breadcrumbs in the third. This classic dredging method will give your chicken that signature crispy coating.
- Bread the Chicken: Dredge each breast in flour, shaking off excess, then dip into the egg wash, and finally coat thoroughly with panko. Press the panko gently to help it stick well. Place the breaded chicken on a wire rack or plate while you heat the oil.
- Cook the Sticky Rice: Rinse the rice under cold water until the water runs clear to remove excess starch. Combine rice, water, and a pinch of salt in a saucepan. Bring to a boil, then reduce heat to low, cover, and simmer for 15 minutes. Remove from heat and let sit, covered, for 10 minutes without lifting the lid.
- Fry the Chicken Katsu: Heat about 1 inch (2.5 cm) of vegetable oil in a skillet over medium-high heat until shimmering (around 350°F / 175°C). Carefully add chicken breasts and fry for 3-4 minutes per side, or until golden brown and cooked through (internal temp of 165°F / 74°C). Avoid overcrowding the pan; fry in batches if needed. Transfer to a paper towel-lined plate to drain.
- Make the Curry Sauce: In a separate saucepan, melt butter over medium heat. Add chopped onion and sauté until softened and slightly golden, about 5 minutes. Stir in garlic and ginger, cooking for 1 minute until fragrant. Sprinkle in curry powder and flour; stir constantly for 2 minutes to make a roux.
- Simmer the Sauce: Gradually whisk in chicken broth to avoid lumps, then add soy sauce and honey. Bring to a gentle simmer and cook until thickened, about 10-12 minutes. Season with salt and pepper to taste. If the sauce becomes too thick, thin with a bit more broth or water.
- Assemble and Serve: Slice the crispy chicken katsu into strips. Plate a generous scoop of sticky rice, arrange chicken slices on top or beside, and ladle warm curry sauce over the chicken. Garnish with pickled ginger and fresh cilantro or scallions if desired.
Pro tip: If your chicken is browning too fast before cooking through, lower the heat slightly. Also, don’t skip resting the rice after cooking—it makes all the difference in stickiness and texture.
Cooking Tips & Techniques
Getting the perfect crispy chicken katsu curry at home is all about attention to detail, but it’s easier than it looks when you know a few insider tips.
- Pound the Chicken Evenly: Uneven thickness means uneven cooking. If some parts are thicker, they’ll take longer to cook and risk drying out the thinner edges. I’ve learned this the hard way after a few attempts where the chicken was either raw in the middle or overcooked on the edges.
- Use Japanese Panko Breadcrumbs: They’re larger and flakier than regular breadcrumbs, which creates that incredible crunch without soaking up too much oil. If you can’t find them, plain breadcrumbs work but expect a different texture.
- Oil Temperature Matters: Use a thermometer or test with a small breadcrumb—if it sizzles and browns quickly, you’re good to go. Too hot and the crust burns before the chicken cooks; too cool and the coating becomes greasy and soggy.
- Make the Curry Sauce Ahead: The sauce can be made up to a day in advance and reheated gently. This allows the flavors to mellow and deepen, giving you a richer curry experience.
- Sticky Rice Technique: Don’t skip rinsing the rice! It removes extra starch that can make the rice gummy. Also, letting it rest off heat locks in moisture and perfect texture.
- Multitask Smartly: While the sauce simmers, bread the chicken, then fry it last to serve everything hot and fresh.
One time, I rushed the frying step and ended up with soggy chicken. Since then, I always make sure the oil is hot enough and the chicken pieces aren’t crowded. It’s a game-changer and worth the little extra patience.
Variations & Adaptations
This recipe is pretty flexible, and I’ve tried a few spins depending on mood and pantry availability:
- Vegetarian Version: Swap the chicken for firm tofu or eggplant slices. Coat and fry them the same way, then serve with the curry sauce and rice. It’s surprisingly satisfying!
- Spicy Kick: Add a teaspoon of chili powder or a splash of sriracha to the curry sauce for a little heat. Works great if you like your curry with a bit of a punch.
- Low-Carb Option: Replace sticky rice with cauliflower rice and use almond flour or crushed pork rinds for the breading to keep it keto-friendly.
- Seasonal Veggies: Stir in steamed broccoli, carrots, or snap peas into the curry sauce for extra color and nutrients.
- Oven-Baked Katsu: If you prefer less oil, bake the breaded chicken in a preheated oven at 425°F (220°C) for 20-25 minutes, flipping halfway, until golden and crisp.
Personally, I tried the baked version during a busy week and was amazed at how close it came to the fried texture without the mess. Perfect for when I want crispy chicken but fewer dishes to clean.
Serving & Storage Suggestions
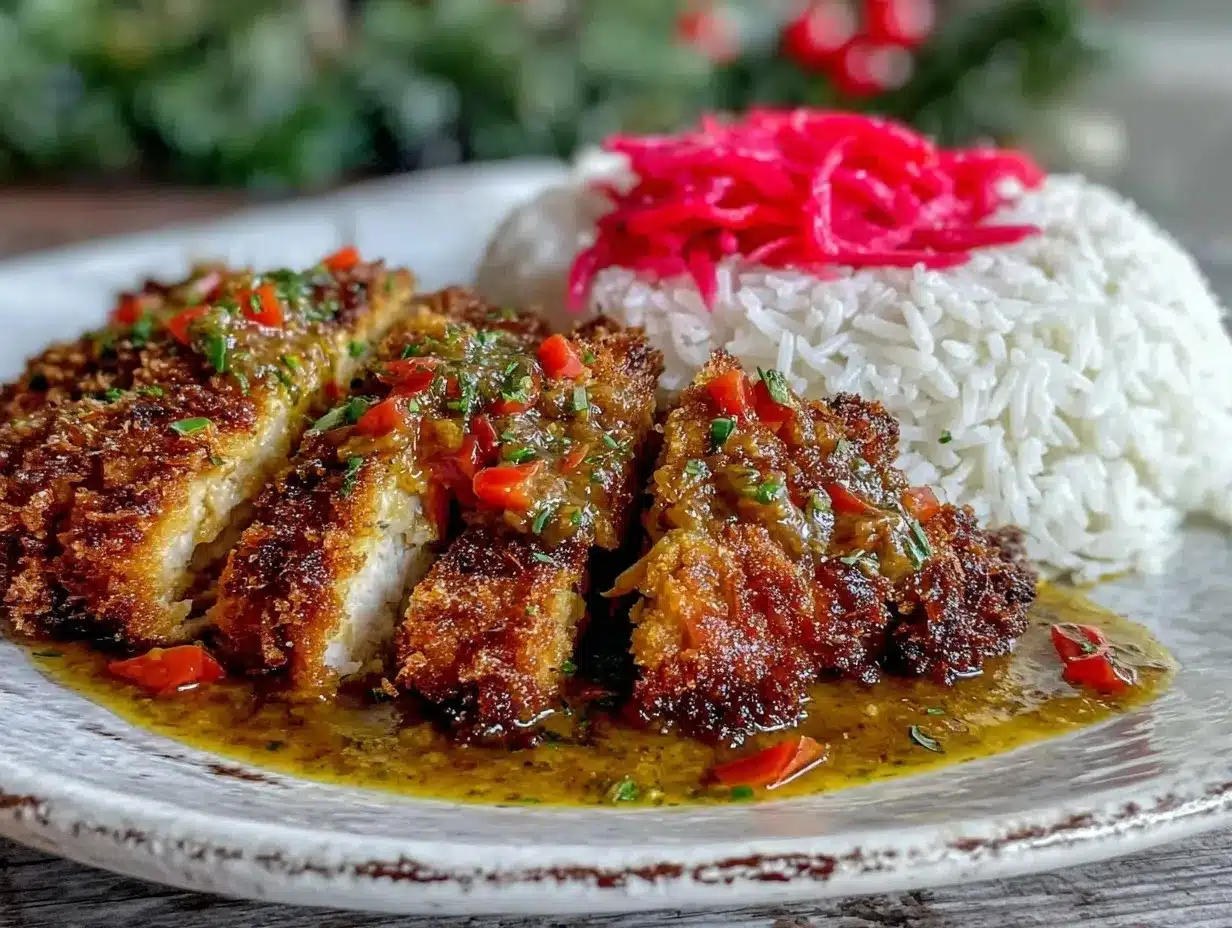
Serve this crispy chicken katsu curry hot, straight from the pan. The sticky rice should be fluffy and slightly warm, with the curry sauce generously poured over the chicken slices. The pickled ginger on the side adds a refreshing contrast that brightens the whole dish.
This meal pairs beautifully with a simple cucumber salad or steamed greens to add freshness. For drinks, a cold green tea or sparkling water with a slice of lemon complements the rich flavors nicely.
Store leftovers in an airtight container in the refrigerator for up to 3 days. Keep the chicken separate from the curry sauce if you want to maintain the crispiness—reheat chicken in a toaster oven or skillet to bring back the crunch, while warming the curry sauce gently on the stove or microwave.
Freezing is possible but the texture of the breading might suffer. If freezing, wrap the chicken tightly and thaw overnight in the fridge before reheating.
Flavors tend to meld beautifully if you make the curry sauce ahead, so leftovers can actually taste even better after a day or two.
Nutritional Information & Benefits
Per serving (recipe makes about 2 servings): approximately 550 calories, 35g protein, 45g carbohydrates, and 20g fat.
The chicken provides a lean source of protein, while the sticky rice offers quick energy from complex carbs. Using Japanese panko keeps the breading light, and the curry sauce brings antioxidants from turmeric and ginger, which have anti-inflammatory benefits.
While this recipe isn’t low-fat, it strikes a balance between indulgence and nutrition when enjoyed in moderation. Using homemade pickled ginger avoids extra preservatives found in some store-bought versions. Plus, you can easily modify the recipe for gluten-free or low-carb diets by swapping out ingredients as needed.
Conclusion
This crispy chicken katsu curry with sticky rice and pickled ginger has found a cozy spot in my meal rotation, thanks to its crispy, flavorful, and comforting qualities. It’s a dish that feels special without requiring hours in the kitchen—perfect for when you want something satisfying but fuss-free.
Feel free to tweak the spice level, swap ingredients, or add your favorite veggies to make it truly your own. I love how versatile this recipe is and how it brings a bit of Japanese comfort food magic into my everyday cooking.
If you give it a try, I’d love to hear how you adapted it or what sides you paired it with. Sharing those little twists makes cooking feel like a shared adventure, don’t you think? Here’s to many crispy, curry-filled dinners ahead!
Frequently Asked Questions
Can I use chicken thighs instead of breasts for this recipe?
Absolutely! Boneless, skinless chicken thighs work great and stay juicy. Just adjust the cooking time slightly since thighs can be thicker.
How can I make the curry sauce spicier?
Add chili powder, cayenne pepper, or a splash of hot sauce to the curry sauce during cooking. Start small and taste as you go to find your preferred heat level.
What’s the best way to reheat the chicken katsu without losing crispiness?
Reheat in a toaster oven or skillet over medium heat to crisp up the breading again. Avoid microwaving alone as it tends to make the coating soggy.
Is there a substitute for pickled ginger if I can’t find it?
You can try thinly sliced fresh ginger marinated briefly in rice vinegar and a pinch of sugar or use a mild kimchi as a tangy alternative.
Can I prepare parts of this recipe ahead of time?
Yes, the curry sauce can be made up to a day ahead and reheated gently. The rice and chicken are best cooked fresh but can be prepped separately to save time on busy nights.
Pin This Recipe!
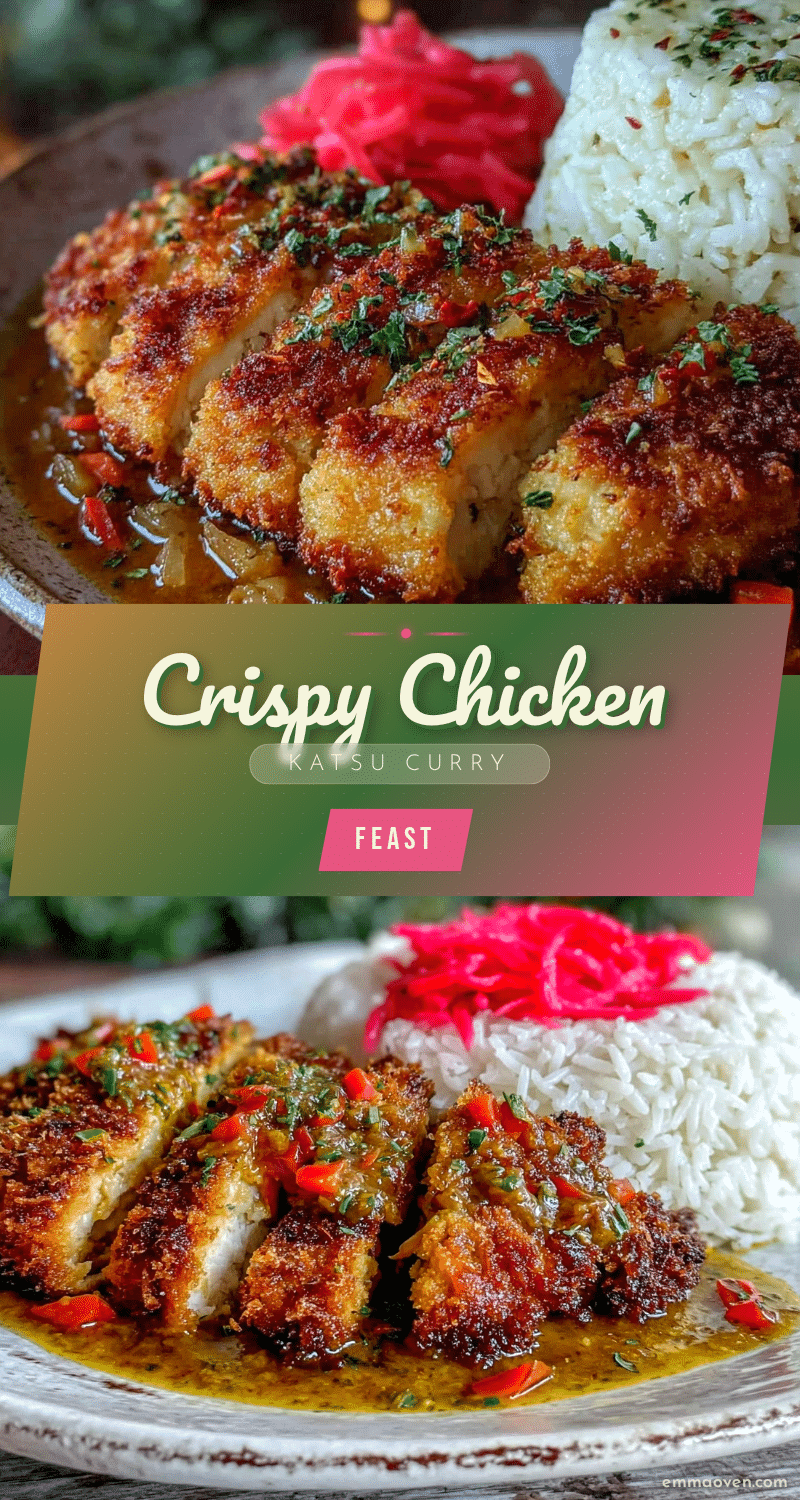
Crispy Chicken Katsu Curry Recipe Easy Homemade with Sticky Rice and Pickled Ginger

A comforting and crispy Japanese-inspired chicken katsu curry served with sticky rice and tangy pickled ginger. This easy homemade recipe delivers a perfect balance of textures and flavors in under 40 minutes.
- Prep Time: 15 minutes
- Cook Time: 25 minutes
- Total Time: 40 minutes
- Yield: 2 servings 1x
- Category: Main Course
- Cuisine: Japanese
Ingredients
- 2 large chicken breasts, pounded to even thickness (about 6–8 oz / 170–225 g each)
- Salt and pepper, to taste
- ½ cup (60 g) all-purpose flour
- 2 large eggs, beaten, room temperature
- 1 cup (100 g) Japanese-style panko breadcrumbs
- Vegetable oil, for shallow frying (about 1 inch deep)
- 2 tablespoons unsalted butter
- 1 medium onion, finely chopped
- 2 cloves garlic, minced
- 1 tablespoon grated fresh ginger
- 1 tablespoon curry powder (mild or medium heat)
- 1 tablespoon all-purpose flour
- 2 cups (480 ml) chicken broth (low sodium preferred)
- 1 tablespoon soy sauce
- 1 teaspoon honey or sugar
- Salt and pepper, to taste
- 1 cup (190 g) short-grain sushi rice or sticky rice
- 1¼ cups (300 ml) water
- Pinch of salt
- Store-bought pickled ginger slices
- Optional: fresh cilantro or scallions for garnish
Instructions
- Place each chicken breast between two sheets of plastic wrap and gently pound with a meat mallet or rolling pin until about ½ inch (1.3 cm) thick. Season both sides lightly with salt and pepper.
- Set up three shallow bowls: flour in the first, beaten eggs in the second, and panko breadcrumbs in the third.
- Dredge each chicken breast in flour, shaking off excess, then dip into the egg wash, and coat thoroughly with panko. Press panko gently to help it stick. Place breaded chicken on a wire rack or plate.
- Rinse the rice under cold water until water runs clear. Combine rice, water, and a pinch of salt in a saucepan. Bring to a boil, reduce heat to low, cover, and simmer for 15 minutes. Remove from heat and let sit, covered, for 10 minutes.
- Heat about 1 inch of vegetable oil in a skillet over medium-high heat until shimmering (around 350°F / 175°C). Fry chicken breasts for 3-4 minutes per side until golden brown and cooked through (internal temp 165°F / 74°C). Fry in batches if needed. Drain on paper towels.
- In a separate saucepan, melt butter over medium heat. Add chopped onion and sauté until softened and slightly golden, about 5 minutes. Stir in garlic and ginger, cooking for 1 minute until fragrant.
- Sprinkle in curry powder and flour; stir constantly for 2 minutes to make a roux.
- Gradually whisk in chicken broth to avoid lumps, then add soy sauce and honey. Bring to a gentle simmer and cook until thickened, about 10-12 minutes. Season with salt and pepper to taste. Thin with broth or water if too thick.
- Slice the crispy chicken katsu into strips. Plate sticky rice, arrange chicken slices on or beside it, and ladle warm curry sauce over the chicken. Garnish with pickled ginger and fresh cilantro or scallions if desired.
Notes
Use Japanese-style panko for best crunch. Maintain oil temperature around 350°F to avoid greasy or burnt coating. Rinse rice thoroughly and let it rest after cooking for perfect stickiness. Curry sauce can be made ahead and reheated gently. For gluten-free, substitute almond flour or gluten-free panko and tamari for soy sauce. Oven-baking option available at 425°F for 20-25 minutes.
Nutrition
- Serving Size: 1 serving (half the
- Calories: 550
- Fat: 20
- Carbohydrates: 45
- Protein: 35
Keywords: chicken katsu, curry, Japanese curry, crispy chicken, sticky rice, pickled ginger, comfort food, easy dinner