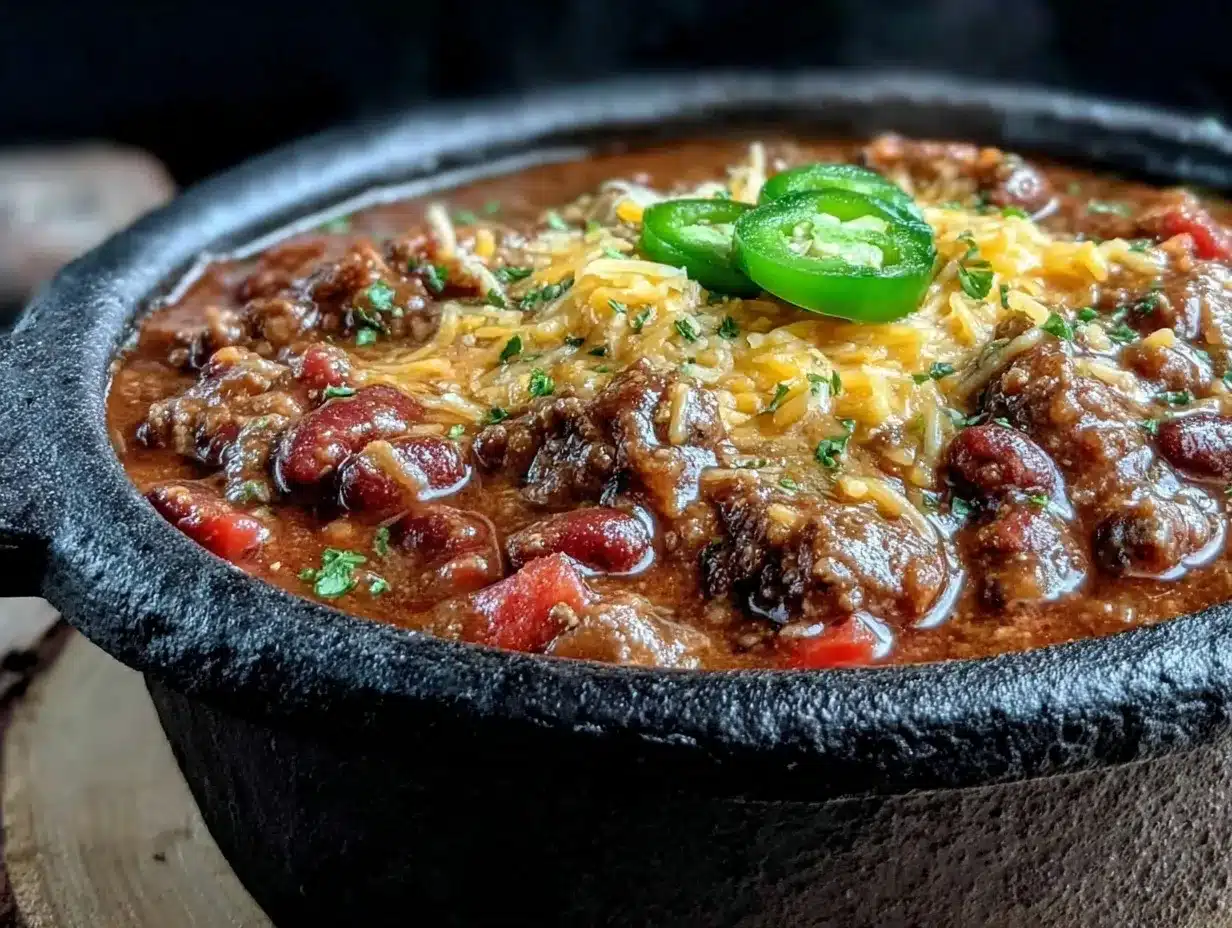
It was one of those crisp autumn evenings when the campfire crackled just right, and the stars started popping out one by one overhead. I’d been fumbling with lightweight camping meals all summer, trying to find something that didn’t feel like a sad afterthought after a long day on the trail. Honestly, I was skeptical about lugging a heavy Dutch oven into the woods. But that night, as the spicy aroma of my first attempt at hearty Dutch oven chili wrapped around our little campsite, all doubts melted away. The chili simmered slowly, thick and rich, filling the air with smoky, savory notes that made everyone pause and inhale deeply.
That recipe, born out of a mix of trial, error, and a stubborn craving for real comfort food far from home, became my go-to for camping trips. It’s honestly a lifesaver—warm, filling, and easy enough to toss together without a full kitchen. The best part? It tastes like you spent hours fussing over it, when really, it’s just about layering good ingredients and letting the Dutch oven do its magic. Now, whether it’s a weekend in the mountains or a backyard campout, this Dutch oven chili is the meal everyone asks for again and again. It’s the kind of recipe that turns a simple outdoor night into a cozy, memorable feast.
Why You’ll Love This Recipe
- Quick & Easy: This chili comes together in about 30 minutes of prep, then simmers to perfection while you relax by the fire.
- Simple Ingredients: No need for complicated spices or hard-to-find items—most are pantry staples you probably already have.
- Perfect for Camping: Designed specifically for Dutch oven cooking outdoors, it’s hearty and warm, ideal for chilly nights under the stars.
- Crowd-Pleaser: Kids, adults, picky eaters—everyone tends to love this chili’s comforting flavor and satisfying texture.
- Unbelievably Delicious: The secret is slow simmering in a cast iron Dutch oven, which melds flavors beautifully for a rich, smoky taste.
- Unique Touch: I add a splash of dark beer and a hint of smoked paprika that takes this chili beyond the usual campfire fare.
- Comfort Food Outdoors: It’s the kind of meal that makes you forget you’re roughing it and instead feel like you’re indulging in a warm, hearty feast.
What Ingredients You Will Need
This recipe uses simple, wholesome ingredients to deliver bold flavor and satisfying texture without the fuss. Most of these are pantry staples perfect for packing ahead or grabbing last minute at the store.
- Ground beef: 1 pound (450 g), preferably 80/20 for good flavor and fat balance
- Onion: 1 medium, diced (adds sweetness and depth)
- Garlic: 3 cloves, minced (essential for that aromatic kick)
- Red bell pepper: 1 medium, diced (adds color and mild sweetness)
- Canned diced tomatoes: 1 (14.5 oz / 410 g) can (go for no-salt-added if you prefer)
- Canned kidney beans: 1 (15 oz / 425 g) can, drained and rinsed (classic chili texture)
- Canned black beans: 1 (15 oz / 425 g) can, drained and rinsed (optional, for extra protein and texture)
- Tomato paste: 2 tablespoons (concentrates tomato flavor)
- Beef broth: 1 cup (240 ml) (adds richness—substitute with vegetable broth for a lighter option)
- Dark beer: ½ cup (120 ml) (adds subtle bitterness and depth, but can omit if preferred)
- Chili powder: 2 tablespoons (I like McCormick for consistent spice)
- Ground cumin: 1 teaspoon (warm earthiness)
- Smoked paprika: 1 teaspoon (smoky flavor that really sets this chili apart)
- Oregano: 1 teaspoon, dried (herbal note)
- Salt and pepper: to taste
- Olive oil: 1 tablespoon (for sautéing)
- Optional toppings: shredded cheddar, chopped green onions, sour cream, fresh cilantro
For substitutions, you can swap ground beef for ground turkey or a plant-based alternative. Use canned beans you prefer or fresh if you have the time to soak and cook. In summer, fresh diced tomatoes can replace canned for a brighter flavor.
Equipment Needed
- Dutch oven: A 12-inch cast iron Dutch oven works perfectly for this recipe; it holds heat evenly and is great for campfire cooking.
- Campfire tripod or grill grate: To suspend or support the Dutch oven over coals or flames.
- Heat-resistant gloves or pot holders: Essential for safely handling the hot Dutch oven.
- Long-handled wooden spoon or spatula: For stirring without getting too close to the heat.
- Sharp knife and cutting board: For prepping your veggies and meat.
- Measuring spoons and cups: To keep your seasoning balanced.
If you don’t have a Dutch oven, a heavy-duty cast iron skillet with a lid can work in a pinch, but the depth of a Dutch oven is ideal for simmering chili. For budget options, Lodge cast iron Dutch ovens are reliable and affordable. Remember to season your cast iron well and dry it thoroughly after each use to prevent rusting.
Preparation Method
- Prepare your fire or heat source: Get your campfire coals ready or heat your stove to medium heat. The goal is steady, moderate heat for simmering.
- Heat the Dutch oven: Add 1 tablespoon olive oil to the Dutch oven and let it warm up (about 2 minutes). You want the oil shimmering but not smoking.
- Sauté the aromatics: Add diced onion, bell pepper, and garlic. Cook for 5-7 minutes, stirring occasionally, until softened and fragrant. This step builds the base flavor.
- Brown the beef: Crumble in the ground beef, cooking until it’s browned and no longer pink (about 8 minutes). Break up any large chunks as it cooks to ensure even texture.
- Add spices: Stir in chili powder, cumin, smoked paprika, and oregano. Cook for 1 minute to toast the spices—it really wakes them up.
- Incorporate tomato paste: Mix in 2 tablespoons of tomato paste. This thickens the chili and amps up the tomato flavor.
- Add liquids and beans: Pour in canned diced tomatoes (with juice), beef broth, and dark beer. Stir in drained kidney beans and black beans if using.
- Simmer: Reduce heat to low (or move Dutch oven to a cooler spot over the fire), cover with lid, and let the chili simmer gently for 30-40 minutes. Stir occasionally to prevent sticking.
- Season to taste: After simmering, taste and adjust salt and pepper as needed. If it feels too thick, add a splash more broth or water.
- Serve: Spoon chili into bowls and top with your favorite garnishes like sharp cheddar, sour cream, and fresh herbs.
Pro tip: If your chili sticks to the bottom, add a little extra liquid and stir gently. The smell will be your best guide—it should be rich, smoky, and inviting when ready. Don’t rush the simmer; patience pays off big here.
Cooking Tips & Techniques
Cooking chili in a Dutch oven outdoors is an art of balancing heat and timing. One thing I learned the hard way is to keep your fire steady—not too hot, or the chili scorches; not too low, or it won’t develop that deep flavor. Using charcoal briquettes alongside wood helps maintain consistent heat.
When browning the meat, don’t rush it. Getting a good sear adds flavor through the Maillard reaction, which you can almost smell in the air. Stirring too often breaks up the meat excessively, so let it sit for a couple of minutes before turning.
Adding the spices before the liquids is key—it blooms their fragrance and integrates their flavor fully. Smoked paprika is my secret weapon; if you skip it, the chili might taste a little flat.
Multitasking tip: While the chili simmers, prep your toppings and set up your serving area. This way, everything’s ready when the chili’s done, and you can enjoy the moment instead of scrambling.
Variations & Adaptations
This recipe is surprisingly flexible depending on your dietary needs or what you have on hand. Here are some variations I’ve tried and loved:
- Vegetarian version: Replace ground beef with a mix of diced mushrooms and lentils. Use vegetable broth and skip the beer or choose a non-alcoholic malt beverage.
- Spicy kick: Add chopped jalapeños or a dash of cayenne pepper when sautéing the onions for those who like heat.
- Bean swap: Use pinto beans or chickpeas instead of kidney and black beans for a different texture and flavor profile.
- Slow cooker adaptation: Brown the meat and veggies on the stove, then transfer everything to a slow cooker. Cook on low for 6-8 hours or high for 3-4 hours.
- Gluten-free: This recipe is naturally gluten-free if you check your broth and beer labels carefully.
Once, I tried adding a handful of corn kernels near the end of cooking—surprisingly good and added a nice sweetness. Feel free to experiment with what’s in your pantry!
Serving & Storage Suggestions
This chili is best served hot, fresh from the Dutch oven, ideally with a crusty bread or cornbread alongside. It pairs wonderfully with a cold beer or a warm cup of cocoa when camping.
Leftovers keep well in an airtight container in the fridge for up to 4 days. Reheat gently on the stove or over campfire coals, stirring occasionally to prevent burning. The flavors actually deepen after a day or two, making it even better.
If you want to freeze portions, let the chili cool completely, then store in freezer-safe containers for up to 3 months. Thaw overnight in the fridge before reheating.
Nutritional Information & Benefits
This hearty Dutch oven chili packs a punch of protein and fiber thanks to the beef and beans. One serving (about 1.5 cups) contains roughly 350-400 calories, 25 grams of protein, and 10 grams of fiber, making it great for sustained energy on outdoor adventures.
The beans add heart-healthy fiber and minerals, while the tomatoes provide antioxidants like lycopene. Using lean ground beef helps keep the fat content moderate. Plus, the chili is naturally gluten-free and can be adapted for dairy-free diets by skipping cheese and sour cream toppings.
From a practical standpoint, it’s a balanced meal that keeps you full and satisfied after a long day of hiking or exploring.
Conclusion
This hearty Dutch oven chili has become my camping staple, not because it’s fancy, but because it’s honest food that comforts and fuels. It’s adaptable, forgiving, and rewarding in that way only a well-loved recipe can be. I hope you find it as dependable and satisfying as I do on your outdoor trips or even cozy nights at home.
Feel free to tweak it to your taste and share your twists—I’m always curious how others make it their own. Cooking outdoors should be fun, approachable, and a little bit soulful, and this chili hits all those notes for me every time.
So, grab your Dutch oven, gather your ingredients, and let this chili be the tasty anchor to your next camping adventure.
Frequently Asked Questions
Can I make this chili ahead of time?
Absolutely! It tastes even better the next day. Just store it in the fridge overnight and reheat gently before serving.
What if I don’t have a Dutch oven?
You can use a heavy-bottomed pot or a cast iron skillet with a lid, but a Dutch oven is best for even heat and slow simmering, especially outdoors.
Can I make this chili vegetarian?
Yes, swap out the ground beef for mushrooms, lentils, or your favorite plant-based protein and use vegetable broth.
How spicy is this chili?
It’s mildly spicy but you can easily adjust by adding more chili powder or fresh peppers to suit your heat preference.
How do I store leftover chili while camping?
Keep leftovers in a sealed container in a cooler. Reheat over your campfire or portable stove before eating.
Pin This Recipe!
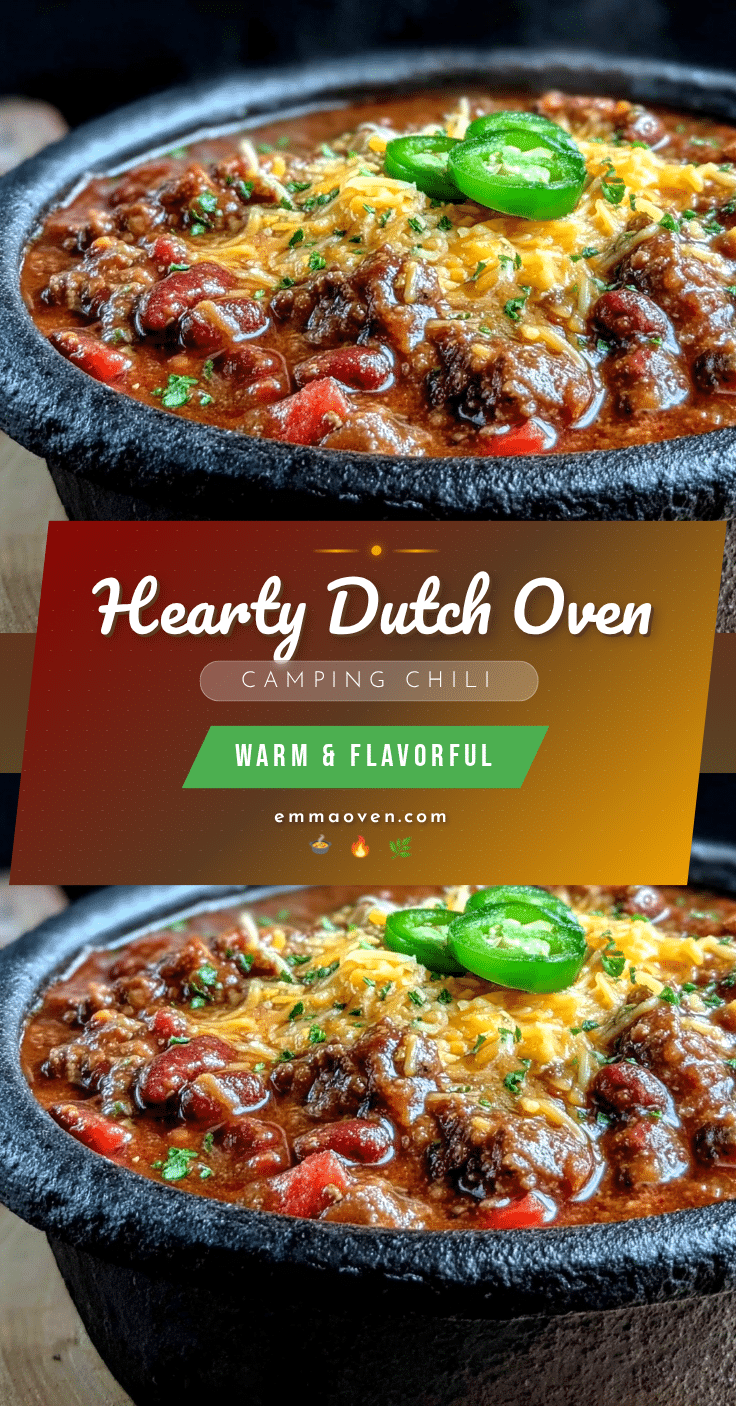
Hearty Dutch Oven Chili

A warm, filling, and easy Dutch oven chili recipe perfect for camping and outdoor meals, featuring a rich, smoky flavor with simple pantry ingredients.
- Prep Time: 30 minutes
- Cook Time: 40 minutes
- Total Time: 1 hour 10 minutes
- Yield: 6 servings 1x
- Category: Main Course
- Cuisine: American
Ingredients
- 1 pound ground beef (80/20)
- 1 medium onion, diced
- 3 cloves garlic, minced
- 1 medium red bell pepper, diced
- 1 (14.5 oz) can diced tomatoes (no-salt-added optional)
- 1 (15 oz) can kidney beans, drained and rinsed
- 1 (15 oz) can black beans, drained and rinsed (optional)
- 2 tablespoons tomato paste
- 1 cup beef broth
- 1/2 cup dark beer (optional)
- 2 tablespoons chili powder
- 1 teaspoon ground cumin
- 1 teaspoon smoked paprika
- 1 teaspoon dried oregano
- Salt and pepper to taste
- 1 tablespoon olive oil
- Optional toppings: shredded cheddar, chopped green onions, sour cream, fresh cilantro
Instructions
- Prepare your fire or heat source to medium heat for steady simmering.
- Heat 1 tablespoon olive oil in the Dutch oven until shimmering (about 2 minutes).
- Add diced onion, bell pepper, and garlic; sauté for 5-7 minutes until softened and fragrant.
- Add ground beef and cook until browned and no longer pink, about 8 minutes, breaking up large chunks.
- Stir in chili powder, cumin, smoked paprika, and oregano; cook for 1 minute to toast spices.
- Mix in 2 tablespoons tomato paste to thicken and enhance tomato flavor.
- Add canned diced tomatoes with juice, beef broth, dark beer, kidney beans, and black beans if using; stir well.
- Reduce heat to low, cover, and simmer gently for 30-40 minutes, stirring occasionally to prevent sticking.
- Taste and adjust salt and pepper; add more broth or water if chili is too thick.
- Serve hot with optional toppings like shredded cheddar, sour cream, and fresh herbs.
Notes
Maintain steady medium heat to avoid scorching. Toast spices before adding liquids to enhance flavor. If chili sticks to the bottom, add extra liquid and stir gently. For vegetarian version, substitute ground beef with mushrooms and lentils and use vegetable broth and non-alcoholic malt beverage instead of beer.
Nutrition
- Serving Size: About 1.5 cups per s
- Calories: 375
- Sugar: 6
- Sodium: 550
- Fat: 15
- Saturated Fat: 5
- Carbohydrates: 30
- Fiber: 10
- Protein: 25
Keywords: Dutch oven chili, camping meal, hearty chili, easy chili recipe, outdoor cooking, cast iron chili, smoky chili, camping food