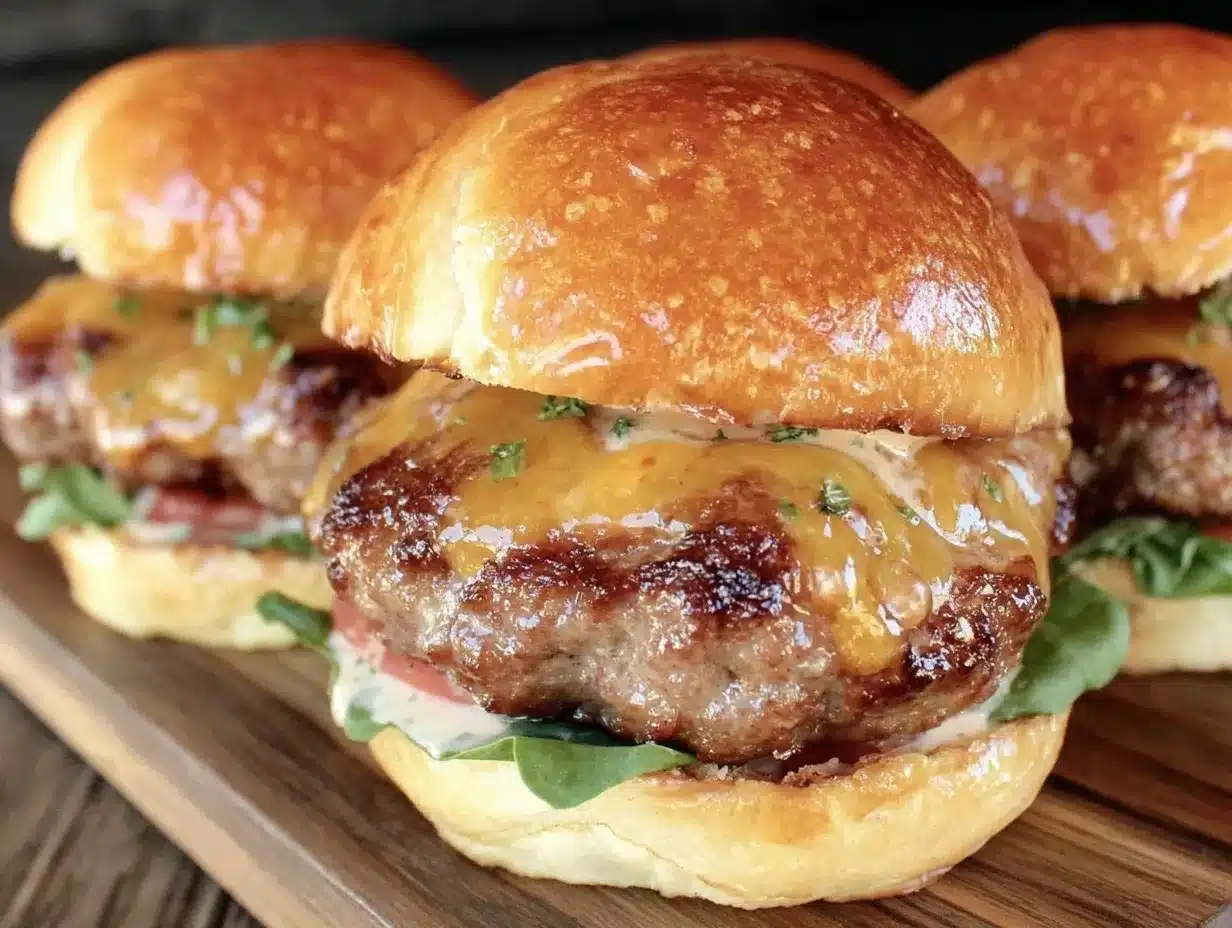
Let me tell you, the scent of sizzling beef mingling with melted cheese and that tangy creamy special sauce wafting from my kitchen is enough to make anyone’s mouth water. The first time I made these juicy cheeseburger sliders with creamy special sauce, I was instantly hooked—the kind of moment where you pause, take a deep breath, and just smile because you know you’re onto something truly special. Years ago, when I was knee-high to a grasshopper, my grandma used to make the most scrumptious mini burgers for family picnics. This recipe is my spin on that nostalgic comfort food, perfected over countless weekend get-togethers and casual game nights.
Honestly, my family couldn’t stop sneaking these sliders off the platter (and I can’t really blame them). You know what makes these sliders stand out? It’s the balance of juicy beef, gooey cheese, and that creamy special sauce that ties everything together with just the right zing. Perfect for potlucks, casual parties, or a sweet treat for the kids, these sliders brighten up any occasion and are dangerously easy to whip up. I’ve tested this recipe multiple times in the name of research, of course, and it’s now a staple for family gatherings and gifting. Trust me, this is one you’re going to want to bookmark.
Why You’ll Love This Juicy Cheeseburger Sliders Recipe
This juicy cheeseburger sliders recipe with creamy special sauce has quickly become a favorite for many reasons. Having whipped these up for busy weeknights and last-minute get-togethers, I can vouch for how quick and satisfying they are. Here’s what makes them so irresistible:
- Quick & Easy: Comes together in just 30 minutes, perfect when you want something tasty without fussing in the kitchen.
- Simple Ingredients: No fancy grocery trips needed; you likely already have everything in your pantry and fridge.
- Perfect for Casual Gatherings: Great for game days, family dinners, and potlucks where finger foods steal the show.
- Crowd-Pleaser: Kids and adults alike rave about these sliders—they’re always the first to disappear.
- Unbelievably Delicious: The juicy texture combined with melty cheese and creamy special sauce creates a mouthwatering flavor combo that feels like a warm hug.
What truly sets this recipe apart is the creamy special sauce—a tangy, slightly smoky blend that complements the beef perfectly and isn’t your run-of-the-mill burger condiment. Plus, I use a simple technique to keep the patties tender and juicy, like mixing in a bit of onion and Worcestershire sauce, so every bite packs a punch. Honestly, you’re not just making sliders; you’re making memories with every bite.
What Ingredients You Will Need
This recipe uses simple, wholesome ingredients to deliver bold flavor and satisfying texture without the fuss. Most of these are pantry staples, making it easy to throw together on a whim.
- For the Sliders:
- 1 lb (450 g) ground beef (80/20 blend for juiciness)
- 1 small onion, finely chopped (adds moisture and flavor)
- 1 teaspoon Worcestershire sauce (for a savory boost)
- Salt and freshly ground black pepper, to taste
- 4-6 slider buns (soft, preferably brioche or potato rolls)
- 4-6 slices cheddar cheese (sharp or mild, depending on preference)
- Butter, for toasting buns (unsalted, softened)
- For the Creamy Special Sauce:
- ½ cup mayonnaise (I recommend Duke’s or Hellmann’s for best texture)
- 2 tablespoons ketchup
- 1 tablespoon yellow mustard
- 1 tablespoon sweet pickle relish (adds a nice tang and crunch)
- 1 teaspoon smoked paprika (for subtle smoky depth)
- 1 teaspoon apple cider vinegar (balances the sweetness)
- Salt and pepper, to taste
- Optional Toppings:
- Thinly sliced pickles
- Fresh lettuce leaves
- Thin tomato slices
- Red onion rings
If you want a gluten-free option, swap slider buns for gluten-free rolls or serve open-faced on lettuce wraps. For dairy-free, use vegan cheese and mayo alternatives. In summer, try adding fresh tomato slices for a bright, juicy pop.
Equipment Needed
- Large mixing bowl – for combining beef and seasonings evenly.
- Non-stick skillet or cast-iron pan – perfect for getting that nice sear on the patties.
- Spatula – a sturdy one helps flip sliders without breaking them apart.
- Measuring spoons and cups – to get the special sauce just right.
- Small bowl – for mixing the creamy special sauce.
- Knife and cutting board – for chopping onions and optional toppings.
- Optional: a grill pan or outdoor grill for that smoky char flavor.
If you don’t have a cast-iron skillet, a heavy-bottomed stainless steel pan works well too. I’ve even used a griddle when making a big batch for parties. For the special sauce, using a whisk or fork to blend it smoothly is all you need—no fancy equipment necessary. A budget-friendly tip: use a sturdy plastic spatula; it’s easier on your pans and affordable.
Preparation Method
- Mix the Patty Ingredients (10 minutes): In a large bowl, combine 1 lb (450 g) ground beef, finely chopped small onion, 1 teaspoon Worcestershire sauce, salt, and freshly ground black pepper. Use your hands to mix gently—overworking the meat can make patties tough.
- Form the Sliders (5 minutes): Divide the mixture into 4-6 equal portions (about 3-4 oz or 85-115 g each). Shape each into a small round patty slightly larger than your slider buns to account for shrinkage during cooking. Press a gentle dimple in the center of each to keep them from puffing up.
- Prepare the Special Sauce (5 minutes): In a small bowl, whisk together ½ cup mayonnaise, 2 tablespoons ketchup, 1 tablespoon yellow mustard, 1 tablespoon sweet pickle relish, 1 teaspoon smoked paprika, and 1 teaspoon apple cider vinegar. Season with salt and pepper to taste. Refrigerate until ready to serve.
- Cook the Patties (10-15 minutes): Heat a non-stick skillet or cast-iron pan over medium-high heat. Lightly oil the pan if needed. Place patties in the pan without crowding. Cook for 3-4 minutes per side, flipping once, until browned and cooked through (internal temp of 160°F/71°C). Add a slice of cheddar cheese on each patty during the last minute to melt.
- Toast the Buns (2-3 minutes): While patties cook, butter the insides of slider buns. Toast them in a separate pan or under a broiler just until golden and slightly crisp—this prevents sogginess once assembled.
- Assemble the Sliders (5 minutes): Spread a generous dollop of creamy special sauce on the bottom bun. Add the cheesy patty, then optional toppings like pickles, lettuce, tomato, or onions. Cap with the top bun and serve immediately.
Tip: If you notice patties shrinking too much, try chilling them briefly before cooking. The dimple trick really helps keep them flat. Also, don’t rush flipping—letting a crust form means less sticking and better texture.
Cooking Tips & Techniques
One of the trickiest parts about sliders is keeping the patties juicy and flavorful without drying out. Honestly, mixing in finely chopped onion and Worcestershire sauce works wonders—like magic, it keeps the beef tender. Also, resist pressing down on the patties with your spatula while cooking; it squeezes out all the juices, and nobody wants dry sliders.
To get that perfect melty cheese, add the slices during the last minute of cooking and cover the pan with a lid if you have one. This traps heat and melts cheese evenly without overcooking the meat. If you’re cooking a big batch, consider using a grill pan to get those beautiful char marks that add extra flavor and texture.
When toasting buns, buttering them first creates a golden, slightly crisp surface that holds up against the juicy patties and creamy sauce. Letting the buns cool a moment after toasting prevents steam buildup, which can cause sogginess.
Multitasking tip: While patties cook, mix the special sauce and chop any toppings. It keeps the process smooth and fast, meaning you get to eat sooner (which is honestly the best part).
Variations & Adaptations
- Vegetarian Version: Swap ground beef for plant-based burger patties or seasoned black bean sliders. The creamy special sauce works just as well here.
- Spicy Kick: Add a teaspoon of hot sauce to the special sauce or sprinkle cayenne pepper into the beef mix for a subtle heat that wakes up your taste buds.
- Seasonal Twist: In summer, add fresh tomato slices and crisp lettuce for a refreshing bite. In cooler months, swap cheddar for smoked gouda and add caramelized onions for a cozy vibe.
- Gluten-Free: Use gluten-free slider buns or lettuce wraps to keep it friendly for gluten-sensitive eaters.
- Personal Favorite: I once tried adding a touch of caramelized bacon bits inside the patties for an extra savory surprise. Trust me, it’s dangerously good!
Serving & Storage Suggestions
Serve these juicy cheeseburger sliders hot off the pan for the best experience. They pair beautifully with crispy oven fries, tangy coleslaw, or a simple garden salad. For drinks, a cold soda, iced tea, or even a light beer complements the richness perfectly.
If you have leftovers (though rare!), wrap them tightly in foil and store in the refrigerator for up to 2 days. To reheat, pop them in a 350°F (175°C) oven for about 10 minutes to avoid soggy buns. The flavors actually deepen after a day, so if you can wait, reheated sliders still taste fantastic.
When storing patties and buns separately, keep the special sauce chilled and add it fresh before serving to keep everything tasting vibrant.
Nutritional Information & Benefits
Each juicy cheeseburger slider contains approximately 250-300 calories depending on size and toppings. Ground beef provides a good source of protein, iron, and vitamin B12, essential for energy and muscle health. The creamy special sauce adds richness but can be lightened by swapping mayonnaise for Greek yogurt if preferred.
This recipe can be adapted for various dietary needs—using gluten-free buns or plant-based patties to accommodate gluten intolerance or vegetarian diets. Just keep an eye on the ingredients in your condiments to avoid hidden allergens.
From a wellness perspective, making sliders at home lets you control the quality of ingredients, cutting back on preservatives and excess salt often found in takeout versions. Plus, serving with fresh veggies boosts the overall nutrient profile.
Conclusion
If you’re looking for a juicy cheeseburger sliders recipe with creamy special sauce that’s quick, easy, and downright delicious, this one ticks all the boxes. It’s customizable, family-friendly, and honestly, it feels like a warm hug on a plate. I love how it brings everyone together—kids, adults, picky eaters—you name it.
Give it a try, tweak the toppings to your liking, and don’t forget to share how you made it your own. Got questions or variations you’ve tried? Drop a comment below—I’d love to hear from you. Happy cooking, and may your sliders always be juicy!
Frequently Asked Questions
How do I keep the sliders from falling apart?
Don’t overmix the beef and avoid pressing the patties too hard when forming them. Adding a small dimple in the center helps keep them flat during cooking.
Can I make the special sauce ahead of time?
Absolutely! The sauce tastes even better after sitting in the fridge for a few hours. Just keep it covered and give it a quick stir before serving.
What’s the best cheese for cheeseburger sliders?
Cheddar is classic, but you can also use American, gouda, or pepper jack for a little extra flavor kick.
Can I bake the sliders instead of frying?
Yes, bake at 375°F (190°C) for 15-20 minutes, flipping halfway through. Add cheese in the last few minutes so it melts perfectly.
Are these sliders freezer-friendly?
You can freeze cooked patties (without buns) for up to 3 months. Thaw overnight in the fridge and reheat before assembling sliders fresh.
Pin This Recipe!
Juicy Cheeseburger Sliders Recipe with Easy Creamy Special Sauce

These juicy cheeseburger sliders feature a perfect balance of juicy beef, melted cheese, and a tangy creamy special sauce, making them ideal for casual gatherings and quick meals.
- Prep Time: 20 minutes
- Cook Time: 15 minutes
- Total Time: 35 minutes
- Yield: 4-6 servings 1x
- Category: Main Course
- Cuisine: American
Ingredients
- 1 lb ground beef (80/20 blend for juiciness)
- 1 small onion, finely chopped
- 1 teaspoon Worcestershire sauce
- Salt and freshly ground black pepper, to taste
- 4–6 slider buns (soft, preferably brioche or potato rolls)
- 4–6 slices cheddar cheese (sharp or mild)
- Butter, for toasting buns (unsalted, softened)
- ½ cup mayonnaise
- 2 tablespoons ketchup
- 1 tablespoon yellow mustard
- 1 tablespoon sweet pickle relish
- 1 teaspoon smoked paprika
- 1 teaspoon apple cider vinegar
- Salt and pepper, to taste
- Optional toppings: thinly sliced pickles, fresh lettuce leaves, thin tomato slices, red onion rings
Instructions
- In a large bowl, combine ground beef, finely chopped onion, Worcestershire sauce, salt, and pepper. Mix gently by hand to avoid tough patties.
- Divide the mixture into 4-6 equal portions (about 3-4 oz each). Shape each into a small round patty slightly larger than the slider buns. Press a gentle dimple in the center of each patty.
- In a small bowl, whisk together mayonnaise, ketchup, yellow mustard, sweet pickle relish, smoked paprika, apple cider vinegar, salt, and pepper. Refrigerate until ready to serve.
- Heat a non-stick skillet or cast-iron pan over medium-high heat. Lightly oil if needed. Cook patties for 3-4 minutes per side until browned and cooked through (internal temperature 160°F). Add a slice of cheddar cheese on each patty during the last minute to melt.
- Butter the insides of slider buns and toast them in a separate pan or under a broiler until golden and slightly crisp.
- Assemble sliders by spreading a generous amount of special sauce on the bottom bun, adding the cheesy patty, optional toppings, and topping with the slider bun. Serve immediately.
Notes
Do not overmix the beef to keep patties tender. Press a dimple in the center of patties to prevent puffing. Add cheese in the last minute of cooking and cover the pan to melt evenly. Butter buns before toasting to prevent sogginess. For gluten-free, use gluten-free buns or lettuce wraps. For dairy-free, use vegan cheese and mayo alternatives. Sauce tastes better after chilling for a few hours.
Nutrition
- Serving Size: 1 slider
- Calories: 275
- Sugar: 4
- Sodium: 450
- Fat: 18
- Saturated Fat: 7
- Carbohydrates: 15
- Fiber: 1
- Protein: 15
Keywords: cheeseburger sliders, creamy special sauce, juicy beef sliders, easy sliders recipe, party food, game day snacks