Grabbed the last tube of crescent rolls from the fridge—the one that’s been hiding behind the pickles for weeks—when I realized kickoff was in thirty minutes and I had absolutely nothing ready. The doorbell was already ringing, and I could hear my brother yelling something about parking spots. Classic.
I needed something fast. Something that looked like I actually planned ahead. And honestly? Something that would disappear before halftime so I wouldn’t be stuck with leftovers for days. That’s when this Game Day Taco Dip Ring was born—out of pure panic and a half-empty jar of salsa.
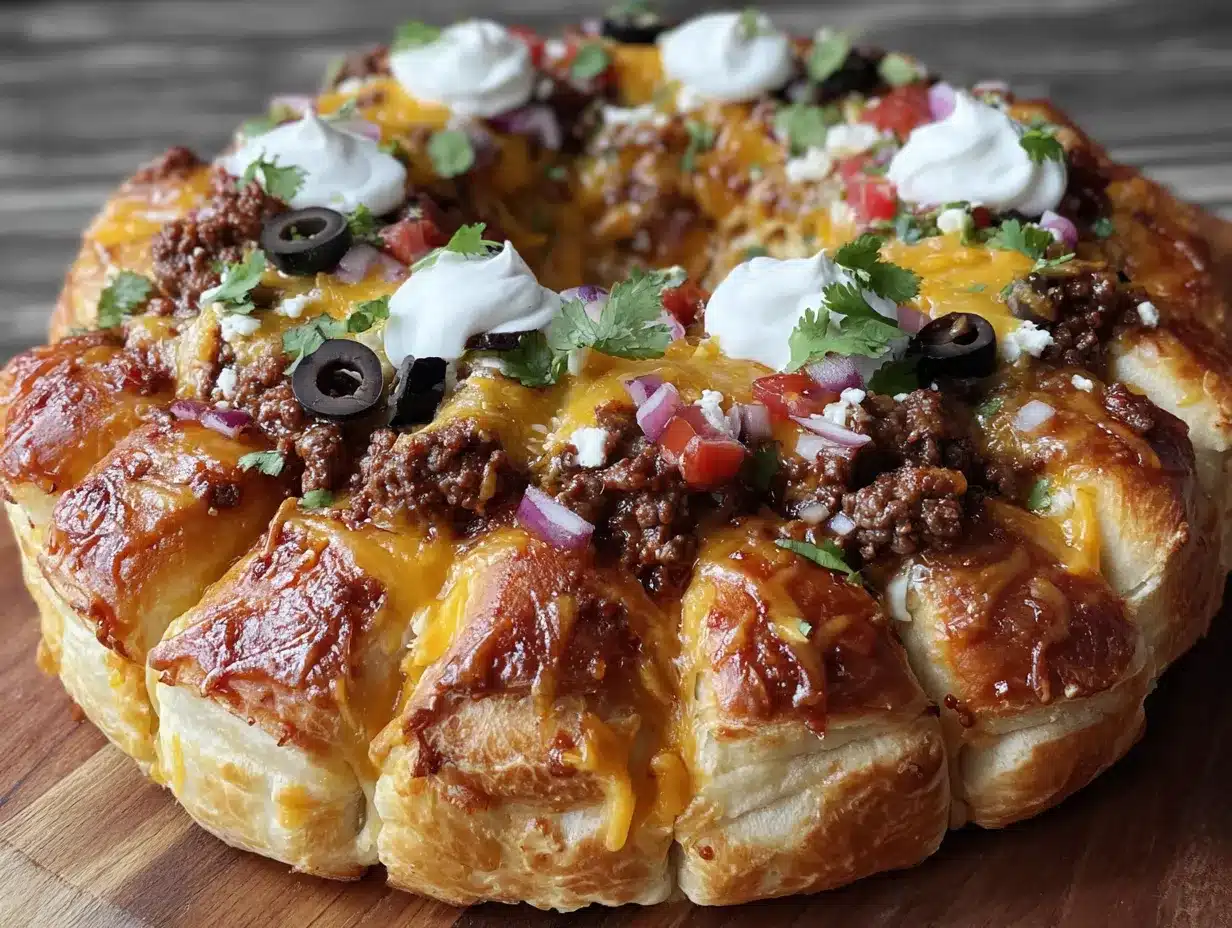
It’s one of those recipes that feels like cheating. You know, where people ask for the recipe and you just smile because it came together in less time than it takes to find the game on TV. The crescent dough bakes up golden and flaky, wrapped around all the taco dip goodness you’d normally scoop out of a bowl. Except now it’s portable. And way more fun to eat.
This isn’t some fancy Pinterest fail waiting to happen. It’s real food for real people who want to actually watch the game instead of standing in the kitchen. Trust me on this one.
Why You’ll Love This Game Day Taco Dip Ring
I’ve tested this recipe more times than I care to admit. Burned my fingers on hot cheese more than once. But every single batch disappeared before the first quarter ended. That’s when I knew I had something special.
- Ready in 20 Minutes: From fridge to table in the time it takes to warm up leftovers. Seriously.
- Simple Ingredients: You probably have most of this stuff already. No weird grocery store hunts.
- Perfect for Crowds: Everyone grabs a piece. No double-dipping drama. No bowls running out.
- Kid-Approved: My nephew ate three pieces before I even sat down. Three.
- Looks Impressive: The ring shape makes it look like you tried way harder than you actually did.
What makes this different from every other dip out there? It’s the texture. You get that crispy, buttery crescent exterior with all the warm, melty taco filling inside. Every bite has crunch and creaminess. It’s not just another bowl of dip with chips—it’s dip that carries itself.
This is the kind of appetizer that makes people close their eyes for a second after that first bite. The kind that gets texted around the next day. Comfort food that actually works for game day without keeping you stuck in the kitchen.
What Ingredients You Will Need
This Game Day Taco Dip Ring uses simple, everyday ingredients that come together fast. No fancy stuff here—just good old-fashioned taco flavors wrapped in buttery dough.
For the Filling
- 1 pound ground beef (80/20 works best for flavor; drain excess fat)
- 1 packet taco seasoning (I prefer Old El Paso or homemade if you have time)
- 1 cup salsa (medium heat works great; drain slightly if watery)
- 8 ounces cream cheese, softened (full fat gives best texture)
- 1 cup shredded cheddar cheese (sharp cheddar adds more punch)
- 1/2 cup shredded Monterey Jack cheese (for that melty stretch)
For the Dough & Assembly
- 2 cans (8 oz each) refrigerated crescent rolls (Pillsbury is my go-to)
- 1 egg, beaten (for that golden wash on top)
- Optional toppings: chopped cilantro, sliced jalapeños, diced tomatoes, sour cream for dipping
Look for crescent rolls that aren’t expired—trust me, I learned that one the hard way. The dough should feel soft and pliable, not stiff. If your cream cheese is cold, microwave it for about 15 seconds to soften. Makes mixing way easier.
For the ground beef, I usually go with 80/20 because it has enough fat to stay juicy without getting greasy. Drain it well after cooking. Nobody wants a soggy ring.
If you’re feeling adventurous, swap the ground beef for ground turkey or even plant-based crumbles. Works just as well. You can also use creamy buffalo chicken 7 layer dip filling ideas if you want a spicy twist on the same concept.
Equipment Needed
- Large skillet for browning the beef
- Large baking sheet (lined with parchment paper or silicone mat)
- Mixing bowl for combining filling ingredients
- Spatula or wooden spoon for stirring
- Knife or pizza cutter for slicing (optional, for serving)
- Pastry brush for egg wash (or just use a spoon)
Don’t have a pastry brush? No worries. I’ve used a clean finger before and it worked fine. For the baking sheet, make sure it’s sturdy—thin ones can warp under high heat. I use a half-sheet pan and it’s perfect.
If you don’t have parchment paper, aluminum foil works but spray it well with non-stick spray. Crescent dough likes to stick to things.
Preparation Method
- Preheat your oven to 375°F (190°C). Line a large baking sheet with parchment paper and set aside.
- Cook the ground beef. Heat a large skillet over medium-high heat. Add the ground beef and cook for 5-7 minutes, breaking it apart with a spatula, until no longer pink. Drain any excess fat. Return to the skillet.
- Season the beef. Add the taco seasoning and 1/4 cup water (or as directed on your packet). Stir and let it simmer for 2 minutes until thickened. Remove from heat and let cool slightly—about 5 minutes.
- Mix the filling. In a large bowl, combine the cooked beef, softened cream cheese, salsa, cheddar cheese, and Monterey Jack cheese. Stir until everything is well incorporated. The cream cheese should be fully blended in—no white streaks. Taste and adjust seasoning if needed.
- Prepare the crescent dough. Open both cans of crescent rolls. Separate each triangle along the perforated lines. Arrange the triangles in a circle on your prepared baking sheet, with the wide ends overlapping in the center and the pointed ends pointing outward. Think of a sun shape. Leave a 4-5 inch open space in the middle.
- Add the filling. Spoon the taco filling evenly onto the wide ends of the crescent triangles, forming a ring. Don’t overfill—about 1/4 cup per triangle is plenty. You want the dough to be able to fold over without bursting.
- Fold and seal. Gently lift each pointed end of dough and fold it over the filling, tucking the tip under the center ring. The dough will look a bit messy—that’s okay. It bakes up beautiful. Make sure all the filling is covered.
- Brush with egg wash. Beat the egg in a small bowl and brush it over the exposed dough. This gives that gorgeous golden-brown finish.
- Bake. Place in the preheated oven and bake for 15-18 minutes, until the dough is deep golden brown and the filling is bubbly. Let it cool on the baking sheet for 5 minutes before serving. The cheese will be molten hot—don’t burn your mouth like I did the first time.
- Add toppings and serve. Sprinkle with chopped cilantro, diced tomatoes, or sliced jalapeños if desired. Serve warm with sour cream, guacamole, or extra salsa on the side.
The filling should feel thick and scoopable, not runny. If it seems too wet, add a bit more cheese to tighten it up. The dough should be golden and flaky when done, with some cheese possibly oozing out—that’s the best part.
Cooking Tips & Techniques
I’ve made this Game Day Taco Dip Ring more times than I can count, and I’ve definitely learned a few things the hard way. Let me save you some trouble.
Don’t overfill the dough. I know it’s tempting to pile on the filling, but less is more here. Too much and the dough won’t seal properly, leaving you with a leaky mess. Stick to about 1/4 cup per triangle.
Let the beef cool slightly before mixing with cream cheese. Hot beef will melt the cream cheese into a liquid mess. Give it 5 minutes to cool down. Your filling will stay thick and easy to work with.
Seal the edges well. Pinch the dough where it overlaps to prevent blowouts. I usually tuck the tips under the center ring firmly. If any filling escapes, just push it back in with a spatula.
Use parchment paper. Crescent dough has a tendency to stick. Parchment makes cleanup a breeze and ensures your ring comes off the pan in one piece.
Watch the oven. Every oven runs a little differently. Start checking at 15 minutes. You want deep golden brown, not burnt. If the edges are browning too fast, tent loosely with foil for the last few minutes.
One time I forgot to drain the beef fat and ended up with a greasy ring that fell apart. Now I always drain it well. Learn from my mistakes.
Variations & Adaptations
This Game Day Taco Dip Ring is super flexible. Here are some ways to switch it up:
- Chicken Taco Ring: Swap ground beef for shredded rotisserie chicken. Mix with taco seasoning and salsa. Same method, different protein.
- Spicy Version: Add diced jalapeños to the filling, use hot salsa, and sprinkle cayenne pepper on top before baking. Bring the heat.
- Vegetarian Option: Use black beans, corn, and bell peppers instead of meat. Add an extra 1/2 cup of cheese for richness. Works perfectly.
- Breakfast Ring: Use scrambled eggs, cooked breakfast sausage, and cheddar. Serve with salsa verde. Great for brunch game days.
- Low-Carb Version: Skip the crescent dough and bake the filling in a greased pie dish. Top with cheese and bake until bubbly. Not a ring, but still delicious.
I once made a buffalo chicken version using crispy buffalo chicken tater tot casserole flavors—added hot sauce and blue cheese crumbles to the filling. It was gone in minutes. Feel free to experiment.
Serving & Storage Suggestions
Serve this Game Day Taco Dip Ring warm, right off the baking sheet. It’s best within 20 minutes of coming out of the oven when the dough is still flaky and the cheese is melty. Set it on a cutting board with small plates and let people pull pieces off.
It pairs beautifully with sour cream, guacamole, or extra salsa on the side. For a full spread, add a bowl of classic 7 layer Mexican dip and some crunchy tortilla chips. Honestly, it’s a whole meal disguised as an appetizer.
Storage: Leftovers keep in an airtight container in the fridge for up to 3 days. The dough will soften a bit, but it’s still tasty.
Reheating: Pop individual pieces in the microwave for 20-30 seconds. For crispier results, reheat in a 350°F oven for 5-7 minutes. The air fryer works great too—3 minutes at 350°F.
Make Ahead: You can assemble the ring completely (without egg wash) up to 24 hours ahead. Cover tightly with plastic wrap and refrigerate. Brush with egg wash just before baking. Add 2-3 minutes to the bake time if starting from cold.
The flavors actually get better overnight—the taco seasoning melds with the cream cheese in a beautiful way. Just don’t expect leftovers to last long.
Nutritional Information & Benefits
Per serving (based on 8 servings):
- Calories: 410
- Protein: 22g
- Carbohydrates: 24g
- Fat: 26g
- Fiber: 2g
- Sodium: 890mg
This Game Day Taco Dip Ring packs a solid protein punch from the ground beef and cheese, which helps keep you full during the game. The cream cheese adds calcium and a bit of richness without being over the top.
If you’re watching sodium, use low-sodium taco seasoning and reduced-sodium cheese. You can also swap in ground turkey for a leaner option—cuts the fat by about a third.
It’s not health food, but it’s real food made with real ingredients. And honestly? Sometimes that’s exactly what game day calls for.
Conclusion
This Game Day Taco Dip Ring has saved me more times than I can count. It’s the recipe I pull out when I need something fast, impressive, and guaranteed to disappear. No stress, no complicated techniques, just good food that people actually want to eat.
I love how forgiving it is. You can mess up the shaping and it still looks beautiful. You can swap ingredients based on what’s in your fridge. It’s basically impossible to ruin, which is my favorite kind of recipe.
Try it for your next game day gathering. Customize it with your favorite toppings. Make it your own. And when everyone asks for the recipe, just smile and tell them it’s our little secret.
Drop a comment below and let me know how yours turned out. What variations did you try? Did anyone ask for seconds? I’d love to hear your stories—and your game day victories.
Frequently Asked Questions
Can I make this Game Day Taco Dip Ring ahead of time?
Yes! Assemble the ring completely (without egg wash), cover tightly, and refrigerate for up to 24 hours. Brush with egg wash just before baking. Add 2-3 minutes to the bake time if starting cold.
Can I freeze this taco dip ring?
You can freeze the baked ring for up to 2 months. Wrap tightly in foil and place in a freezer bag. Thaw overnight in the fridge and reheat in a 350°F oven for 10-12 minutes.
What if I don’t have crescent roll dough?
Use puff pastry sheets instead. Cut each sheet into triangles and follow the same assembly method. Bake time may increase by 2-3 minutes. You can also use pizza dough for a heartier version.
How do I prevent the filling from leaking out?
Don’t overfill the dough, and make sure the edges are sealed well. Pinch the dough where it overlaps. If any filling escapes during baking, just push it back with a spatula right when it comes out of the oven.
Can I make this vegetarian?
Absolutely. Swap the ground beef for a mix of black beans, corn, and diced bell peppers. Add an extra 1/2 cup of cheese for richness. You can also use plant-based ground meat substitute.
Pin This Recipe!
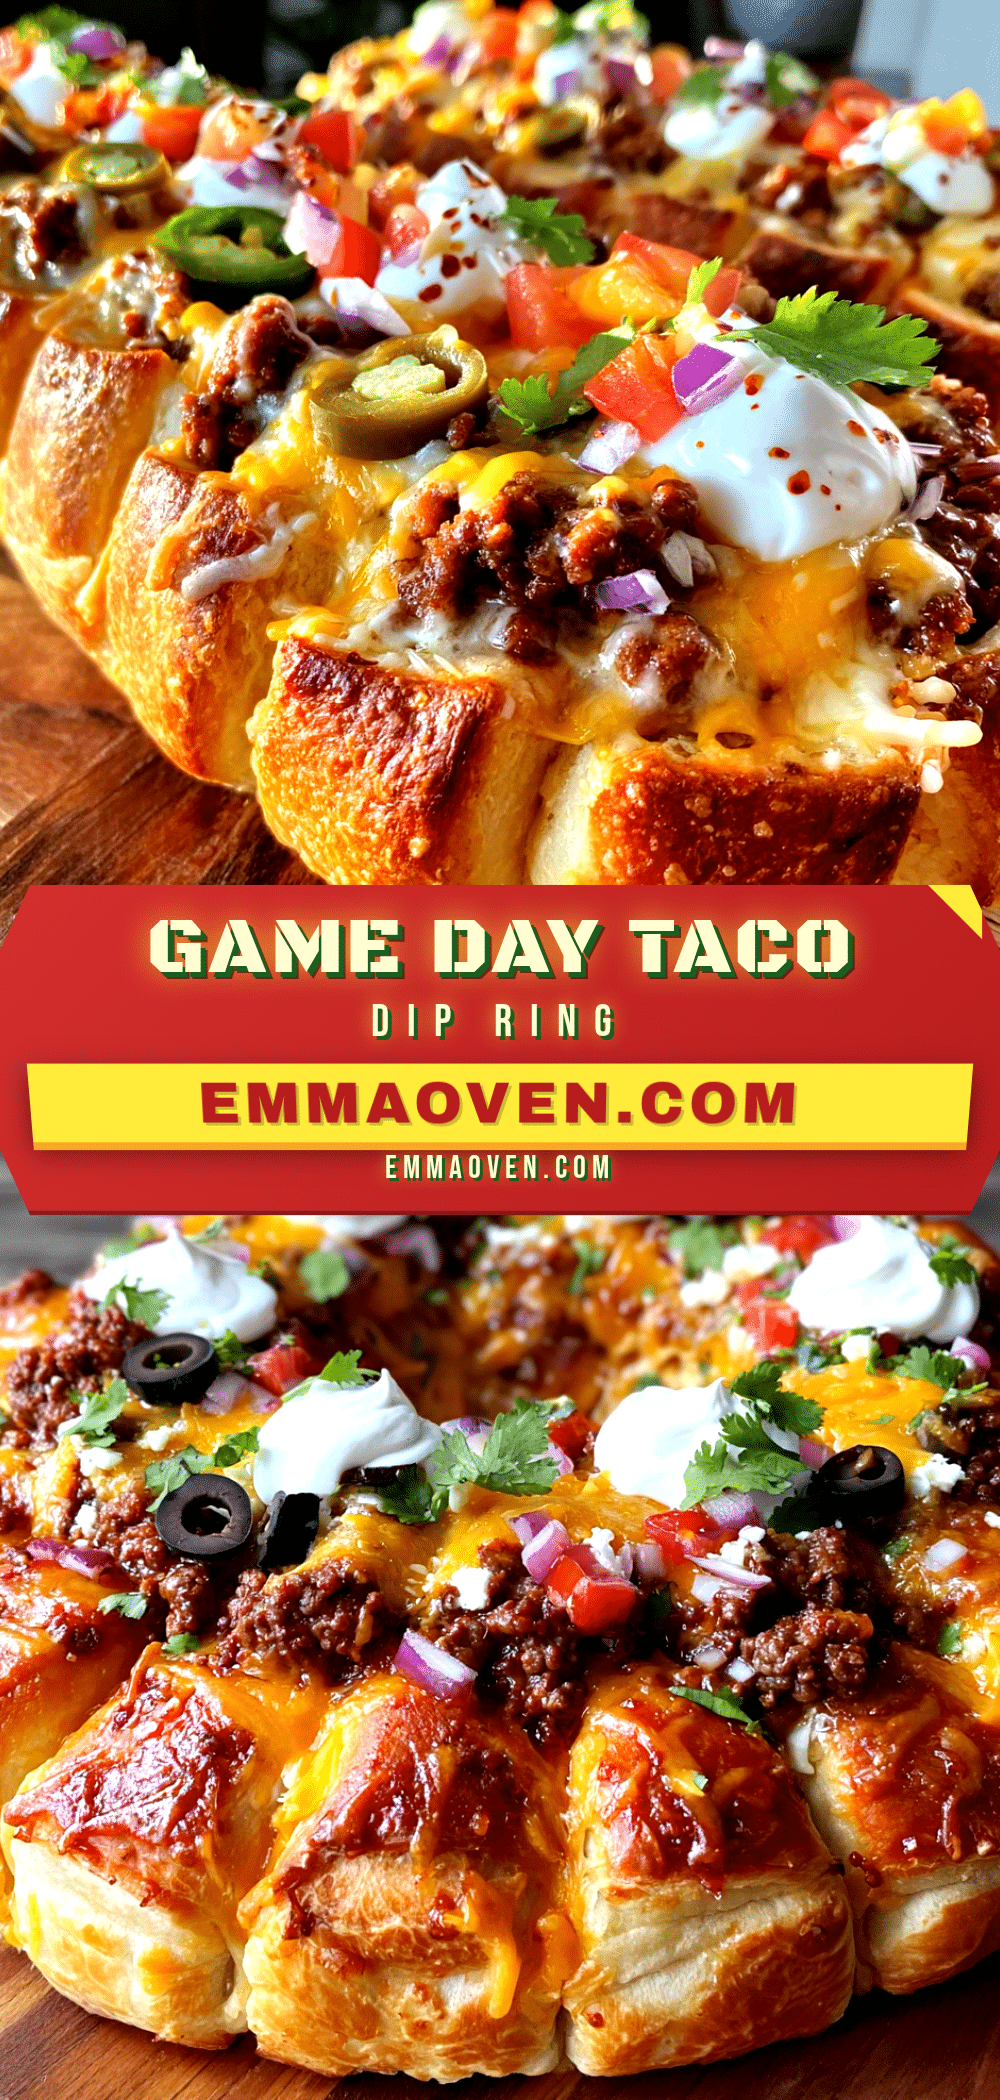
Game Day Taco Dip Ring: Easy 20-Minute Appetizer

A quick and impressive appetizer featuring a golden, flaky crescent ring filled with seasoned ground beef, cream cheese, salsa, and melted cheeses. Perfect for game day gatherings, ready in just 20 minutes.
- Prep Time: 10 minutes
- Cook Time: 18 minutes
- Total Time: 28 minutes
- Yield: 8 servings 1x
- Category: Appetizer
- Cuisine: Mexican-American
Ingredients
- 1 pound ground beef (80/20 works best)
- 1 packet taco seasoning (e.g., Old El Paso)
- 1 cup salsa (medium heat, drained slightly if watery)
- 8 ounces cream cheese, softened
- 1 cup shredded cheddar cheese (sharp cheddar recommended)
- 1/2 cup shredded Monterey Jack cheese
- 2 cans (8 oz each) refrigerated crescent rolls (e.g., Pillsbury)
- 1 egg, beaten (for egg wash)
- Optional toppings: chopped cilantro, sliced jalapeños, diced tomatoes, sour cream for dipping
Instructions
- Preheat oven to 375°F (190°C). Line a large baking sheet with parchment paper.
- Cook ground beef in a large skillet over medium-high heat for 5-7 minutes, breaking it apart, until no longer pink. Drain excess fat.
- Add taco seasoning and 1/4 cup water to the beef. Stir and simmer for 2 minutes until thickened. Remove from heat and let cool slightly (about 5 minutes).
- In a large bowl, combine cooked beef, softened cream cheese, salsa, cheddar cheese, and Monterey Jack cheese. Stir until well incorporated.
- Open both cans of crescent rolls. Separate triangles along perforated lines. Arrange triangles in a circle on the prepared baking sheet with wide ends overlapping in the center and pointed ends outward, leaving a 4-5 inch open space in the middle.
- Spoon the taco filling evenly onto the wide ends of the crescent triangles (about 1/4 cup per triangle).
- Gently lift each pointed end of dough and fold it over the filling, tucking the tip under the center ring. Ensure all filling is covered.
- Brush the exposed dough with beaten egg.
- Bake for 15-18 minutes until deep golden brown and filling is bubbly. Let cool on baking sheet for 5 minutes before serving.
- Add optional toppings and serve warm with sour cream, guacamole, or extra salsa.
Notes
Don’t overfill the dough to prevent leaks. Let beef cool slightly before mixing with cream cheese. Seal edges well. Use parchment paper for easy cleanup. Check oven at 15 minutes to avoid burning.
Nutrition
- Serving Size: 1 serving (1/8 of ri
- Calories: 410
- Sugar: 4
- Sodium: 890
- Fat: 26
- Saturated Fat: 12
- Carbohydrates: 24
- Fiber: 2
- Protein: 22
Keywords: taco dip ring, game day appetizer, crescent roll recipe, easy appetizer, 20-minute recipe, ground beef appetizer