I pulled the last oatmeal cup out of the freezer on a Tuesday morning that felt particularly chaotic. My toddler had decided socks were the enemy, the coffee maker was making a sound I didn’t trust, and I was running on approximately four hours of sleep. I popped that little cup in the microwave for thirty seconds, and the smell of cinnamon and baked apples filled the kitchen. My son stopped mid-tantrum to say, “Yummy, mama.” That was the moment I knew this recipe was a keeper — not just a good idea, but a genuine life raft.
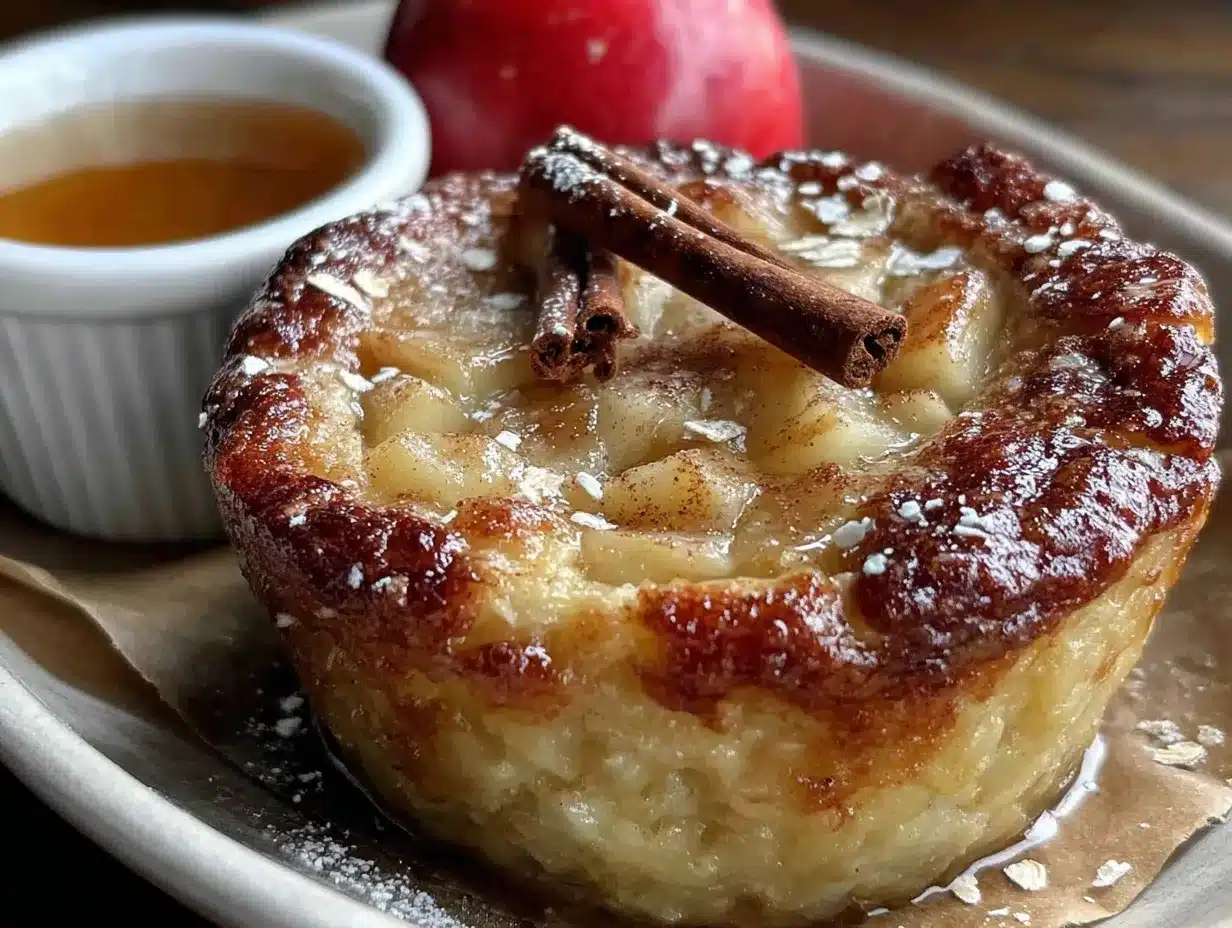
These cozy apple cinnamon baked oatmeal cups started as an experiment during a particularly ambitious meal prep Sunday. I had a bag of apples that were about to turn, a container of oats I needed to use up, and a deep desire for something I could grab on my way out the door. The first batch was a little dry, honestly. The second batch was too sweet. But the third? That was the one. Soft, tender, with little pockets of warm apple and that unmistakable cinnamon hug. They tasted like fall in a muffin tin, but they worked for any season.
What I love most about these oatmeal cups is that they don’t need a special occasion. They’re not a weekend-only breakfast or a holiday treat. They’re for the Tuesday mornings and the rushed afternoons and the days when you need something good without having to think too hard about it. They freeze beautifully, they reheat in seconds, and they make you feel like you’ve got your act together even when you absolutely do not.
Why You’ll Love This Recipe
I’ve tested this recipe more times than I care to admit, tweaking the oat-to-liquid ratio, experimenting with different apple varieties, and figuring out the perfect bake time so the cups stay tender without getting mushy. Here’s why these oatmeal cups have become a staple in my kitchen:
- Quick & Easy : From mixing bowl to oven in about 10 minutes. No complicated techniques, no fancy equipment.
- Simple Ingredients : You probably have everything you need right now — oats, apples, cinnamon, eggs, milk, and a little sweetener.
- Perfect for Meal Prep : Make a batch on Sunday and have breakfast sorted for the entire week. Or the entire month — they freeze that well.
- Crowd-Pleaser : Kids love them, adults love them, and they’re great for brunches, playdates, or just surviving a busy week.
- Unbelievably Cozy : The combination of tender oats, sweet apples, and warm cinnamon is comfort food at its simplest and best.
What makes these different from other baked oatmeal recipes is the texture. I use a specific ratio of rolled oats to liquid that gives you a soft, almost custard-like interior with slightly crisp edges. The apples are diced small so they soften evenly throughout the cup, and the cinnamon isn’t shy — it’s warm and present without being overwhelming. This isn’t just another oatmeal recipe; it’s the one I reach for again and again.
There’s something about biting into a warm oatmeal cup on a chilly morning that feels like a small act of kindness to yourself. It’s simple, it’s nourishing, and it tastes like someone took the time to make you something good — even if that someone is just you, a few days ago, during meal prep.
What Ingredients You Will Need
This recipe uses simple, wholesome ingredients that come together to create something genuinely satisfying. No weird additives, no hard-to-find specialty items — just real food that tastes good.
For the Oatmeal Cups
- Rolled oats — 2 cups (180g). Use old-fashioned rolled oats, not instant or steel-cut. They hold their shape and give the best texture. I prefer Bob’s Red Mill or Quaker Old Fashioned.
- Apples — 1 ½ cups diced (about 2 medium apples). I like Honeycrisp or Fuji for natural sweetness, but Granny Smith works beautifully if you want a tangier flavor. Leave the peel on for texture and fiber.
- Milk — 1 cup (240ml). Whole milk adds richness, but any milk works — almond, oat, or 2% are all fine. I’ve used all three with great results.
- Eggs — 2 large, room temperature. They bind everything together and add structure. Let them sit out for 15 minutes if you can.
- Maple syrup — ⅓ cup (80ml). Pure maple syrup gives a warm, deep sweetness that pairs perfectly with apples. Honey works too, but maple is better here.
- Coconut oil or butter — 3 tablespoons, melted. Adds moisture and richness. I use melted coconut oil for a slightly lighter texture, but butter gives a more classic flavor.
- Vanilla extract — 1 teaspoon. Pure vanilla, not imitation. It rounds out the flavors beautifully.
- Cinnamon — 1 ½ teaspoons. This is the star spice — don’t skimp. I use Ceylon cinnamon for a milder, sweeter flavor, but regular cinnamon works great.
- Baking powder — 1 teaspoon. Helps the cups rise just a little and keeps them tender.
- Salt — ¼ teaspoon. A tiny pinch balances the sweetness and wakes up all the flavors.
Optional Add-Ins
- Chopped walnuts or pecans — ½ cup. Adds crunch and healthy fats. Toast them lightly first for more flavor.
- Raisins or dried cranberries — ¼ cup. For little bursts of sweetness.
- Chia seeds or flaxseed meal — 1 tablespoon. A sneaky way to add fiber and omega-3s.
I recommend using a good quality cinnamon — it really does make a difference. And when it comes to apples, don’t overthink it. Any apple you’d happily eat raw will work beautifully here. If you’re feeling adventurous, try mixing two varieties for a more complex flavor.
Equipment Needed
You don’t need a lot of fancy tools for this recipe, which is part of what makes it so approachable. Here’s what you’ll need:
- Muffin tin — A standard 12-cup muffin tin. I use a non-stick one, but any will work with proper greasing.
- Mixing bowls — One large bowl for the dry ingredients and one medium bowl for the wet ingredients.
- Whisk — For combining the wet ingredients smoothly.
- Rubber spatula — For folding everything together without overmixing.
- Measuring cups and spoons — Accurate measurements matter for baked goods.
- Paring knife and cutting board — For dicing the apples into small, even pieces.
- Ice cream scoop or large spoon — For portioning the batter evenly into the muffin cups.
If you don’t have a muffin tin, you can bake this in a greased 8×8 dish and serve it like traditional baked oatmeal — just add about 10 minutes to the bake time. I’ve done it both ways, and honestly, the muffin cups are more fun and way more portable.
Preparation Method
Let me walk you through this step by step. I’ve made these oatmeal cups more times than I can count, so I’ll share all the little things I’ve learned along the way.
- Preheat your oven to 375°F (190°C). Give it a full 15 minutes to come to temperature. A properly preheated oven ensures even baking and those beautiful golden edges.
- Grease your muffin tin generously. I use a little softened butter or coconut oil and rub it into each cup, making sure to get the sides. Even non-stick pans need this step — trust me, I learned the hard way. You can also use paper liners, but I find the cups brown better without them.
- Dice your apples into small, even pieces. Aim for about ¼-inch cubes. I leave the peel on because it adds texture and fiber, but you can peel them if you prefer. Small pieces mean the apples soften evenly and you get a little in every bite. This usually takes me about 5 minutes.
- In a large bowl, combine the dry ingredients. Add the rolled oats, cinnamon, baking powder, and salt. Whisk them together so the cinnamon and baking powder are evenly distributed throughout the oats. If you’re adding nuts or dried fruit, stir them in now.
- In a separate medium bowl, whisk together the wet ingredients. Crack the eggs and whisk them until they’re uniform and slightly frothy. Add the maple syrup, melted coconut oil (or butter), milk, and vanilla extract. Whisk until everything is smooth and well combined. The mixture should look like a thin, golden liquid.
- Pour the wet ingredients into the dry ingredients. Add the diced apples at the same time. Use a rubber spatula to fold everything together gently. Stir just until the oats are evenly moistened — about 15 to 20 strokes. Overmixing can make the cups dense, so stop as soon as you don’t see any dry oats.
- Let the mixture rest for 5 minutes. This is a step I didn’t use to do, but it makes a real difference. The oats absorb some of the liquid, which helps the cups hold their shape better and gives them a creamier texture. Use this time to clean up a bit or get your baking sheet ready.
- Divide the batter evenly among the 12 muffin cups. I use an ice cream scoop for this — it makes the portions perfectly even and keeps things tidy. Fill each cup almost to the top, about ¾ full. The cups won’t rise much, so you can fill them generously.
- Bake for 20 to 25 minutes. Place the muffin tin on the middle rack of your oven. At 20 minutes, check for doneness — the tops should be golden brown and firm to the touch, and a toothpick inserted in the center should come out clean or with just a few moist crumbs. My oven runs hot, so I usually start checking at 18 minutes.
- Let them cool in the tin for 5 minutes. This helps them set and makes them easier to remove. After 5 minutes, run a butter knife around the edges of each cup and gently lift them out. Transfer to a wire rack to cool completely.
Your kitchen will smell absolutely incredible at this point — like a bakery and a cozy autumn day had a baby. Try not to eat them all straight out of the pan. I speak from experience.
Cooking Tips & Techniques
After making these oatmeal cups more times than I care to count, I’ve picked up a few tricks that make the process smoother and the results more consistent.
Don’t skip the rest time. I know it’s tempting to get them in the oven as fast as possible, but letting the batter sit for 5 minutes allows the oats to absorb some liquid. This means the cups hold their shape better and have a creamier, more cohesive texture. The first few times I made these, I skipped this step and wondered why they were a little loose and crumbly. Now I set a timer and everything.
Use room temperature ingredients. Cold eggs and cold milk can cause the melted coconut oil or butter to seize up, creating little lumps in your batter. If you forget to take them out ahead of time, place the eggs in a bowl of warm water for 5 minutes and microwave the milk for 15 seconds. It makes a real difference in how smoothly everything comes together.
Watch your bake time closely. Every oven is different, and even the same oven can vary from batch to batch. Start checking at 18 minutes. You want the tops to be golden and set, but you don’t want them to dry out. Overbaked oatmeal cups are still edible, but they lose that lovely tender texture that makes these so special.
Let them cool completely before freezing. I know it’s hard to wait, but if you freeze them while they’re still warm, you’ll end up with a block of ice-glazed oatmeal cups instead of individual portions. Give them a full hour on the wire rack. Your future self will thank you.
Double the batch if you can. These freeze so well that it’s almost silly not to make extra. I often make 24 at a time — one tray for the week and one tray for the freezer. It takes the same amount of effort and gives you twice the payoff.
Variations & Adaptations
One of the best things about this recipe is how flexible it is. I’ve tried quite a few variations, and most of them have been delicious. Here are some of my favorites:
Vegan Version : Replace the eggs with flax eggs (2 tablespoons ground flaxseed mixed with 6 tablespoons water, let sit for 5 minutes). Use a plant-based milk like oat or almond, and swap the butter for coconut oil. The texture is slightly denser but still really good. I made this version for a friend with egg allergies and she asked for the recipe.
Gluten-Free Option : Use certified gluten-free rolled oats. That’s literally it — oats are naturally gluten-free, but some are processed in facilities that also process wheat. Bob’s Red Mill makes a great gluten-free option. Everything else in the recipe is already gluten-free.
Seasonal Twists : In the fall, add ¼ teaspoon of nutmeg and a pinch of cloves along with the cinnamon. In the summer, swap the apples for diced peaches or berries — just reduce the milk by 2 tablespoons since berries have more moisture. I’ve made a pumpkin version too by replacing half the apples with pumpkin puree and adding a teaspoon of pumpkin pie spice.
Lower Sugar : Reduce the maple syrup to ¼ cup and add an extra ripe banana, mashed, for natural sweetness. The banana adds moisture and sweetness without making things too sugary. My husband actually prefers this version.
Protein Boost : Add a scoop of vanilla or unflavored protein powder. You’ll need to increase the milk by about 2 tablespoons to compensate for the extra dry ingredient. I like using collagen peptides because they dissolve without changing the texture.
Serving & Storage Suggestions
These oatmeal cups are incredibly versatile when it comes to serving and storing. Here’s how I handle both.
Serving : I like these warm, straight from the oven or reheated. A quick 20 to 30 seconds in the microwave does the trick. If I’m feeling fancy, I’ll drizzle a little extra maple syrup on top or add a dollop of Greek yogurt. They’re also great at room temperature — perfect for packing in lunchboxes or taking on road trips. For a more substantial breakfast, serve them alongside scrambled eggs or a piece of fruit.
Refrigerator Storage : Store cooled oatmeal cups in an airtight container in the refrigerator for up to 5 days. Place a paper towel at the bottom of the container to absorb any excess moisture, and another paper towel on top. Change the paper towels if they get damp. This keeps the cups from getting soggy.
Freezer Storage : This is where these cups really shine. Once the cups are completely cool, place them on a baking sheet in a single layer and freeze for 1 to 2 hours, until they’re solid. Transfer the frozen cups to a freezer-safe bag or container. They’ll keep for up to 3 months. I label mine with the date and a little note about what’s inside — trust me, frozen things all start to look the same after a while.
Reheating from Frozen : Microwave a frozen cup for 45 to 60 seconds, or until warmed through. You can also reheat them in a 350°F oven for about 10 minutes if you’re doing a larger batch. The texture stays remarkably close to fresh — soft and tender with those lovely cinnamon-spiced apple bits throughout.
Flavor Development : Here’s something interesting — these cups actually taste better the next day. The flavors have time to meld and deepen, and the texture evens out. I often think they’re at their peak on day two or three. So don’t worry if you’re making them ahead; they’re only going to get better.
Nutritional Information & Benefits
These oatmeal cups are as nourishing as they are delicious. Here’s a rough breakdown per cup (based on the recipe as written, without optional add-ins):
- Calories : Approximately 180-200
- Protein : 5-6 grams
- Carbohydrates : 28-30 grams
- Fiber : 3-4 grams
- Fat : 6-7 grams
- Sugar : 12-14 grams (mostly from maple syrup and apples)
Health Benefits : Rolled oats are a fantastic source of soluble fiber, which helps with heart health and keeps you feeling full. Apples add more fiber plus vitamin C and antioxidants. Cinnamon has anti-inflammatory properties and can help regulate blood sugar. Eggs provide high-quality protein. This is a breakfast that actually fuels your body instead of just filling it up.
Dietary Considerations : This recipe is naturally nut-free (unless you add nuts), and can easily be made gluten-free, vegan, or lower in sugar. It’s a great option for families with different dietary needs because one recipe can work for everyone with minor adjustments.
Potential Allergens : Contains eggs and dairy (if using butter and milk). Both can be substituted as noted in the variations section.
I love that these oatmeal cups feel like a treat but are genuinely good for you. They’re the kind of breakfast that makes you feel energized and satisfied, not sluggish and weighed down. That’s a win in my book.
Frequently Asked Questions
Can I use quick oats instead of rolled oats?
You can, but the texture will be different. Quick oats are more finely processed and will absorb liquid faster, resulting in a softer, almost mushy texture. Rolled oats give you that nice chewy texture and hold their shape better. If you only have quick oats, reduce the milk by 2 tablespoons and check for doneness a few minutes earlier.
Why did my oatmeal cups turn out dry?
This usually happens for one of two reasons: overbaking or not enough liquid. Every oven is different, so start checking at 18 minutes. If your cups are dry even with the correct bake time, try adding an extra tablespoon of milk to the batter next time. Also, make sure your apples are juicy — older, mealy apples can contribute to dryness.
Can I make these without eggs?
Absolutely. Use a flax egg (1 tablespoon ground flaxseed mixed with 3 tablespoons water per egg, let sit for 5 minutes) or a chia egg (same ratio). The texture will be slightly denser and a bit more tender, but they’ll still be delicious. I’ve made this swap many times with great results.
How do I keep the oatmeal cups from sticking to the pan?
Grease your muffin tin generously, making sure to get the sides and the bottom of each cup. I use butter or coconut oil and rub it in well. Let the cups cool in the tin for exactly 5 minutes before removing — any longer and they can steam and stick; any shorter and they might fall apart. If you’re still having trouble, try using paper liners, though the cups won’t brown as nicely on the bottom.
Can I add chocolate chips?
You absolutely can, and I fully support this decision. Add about ⅓ cup of dark or semi-sweet chocolate chips along with the apples. The combination of warm cinnamon, sweet apples, and melted chocolate is honestly incredible. Just be aware that it adds sugar and calories, so adjust your nutritional expectations accordingly. No judgment here — sometimes breakfast needs a little chocolate.
Conclusion
These cozy apple cinnamon baked oatmeal cups have become a genuine staple in my kitchen, and I have a feeling they’ll become one in yours too. They’re simple enough for a beginner baker, flexible enough for dietary needs, and delicious enough to win over even the pickiest eaters. The fact that they freeze beautifully is just the cherry on top.
I love that I can make a batch on a Sunday afternoon and have breakfast sorted for weeks. I love that my toddler asks for them by name. I love that they make my kitchen smell like comfort and warmth. But mostly, I love that they make busy mornings feel a little less chaotic and a little more manageable.
If you’re looking for a breakfast that’s nourishing, practical, and genuinely delicious, give these a try. Play around with the add-ins, make them your own, and don’t be afraid to double the batch. And when you do, I’d love to hear about it — drop a comment below and let me know how they turned out, what variations you tried, or just share your favorite way to enjoy them. Happy baking, friends.
Pin This Recipe!

Cozy Apple Cinnamon Baked Oatmeal Cups (Freezer-Friendly)

Soft, tender baked oatmeal cups with warm cinnamon and sweet apples. Perfect for meal prep, freezer-friendly, and ready in under 30 minutes. A cozy breakfast that makes busy mornings easier.
- Prep Time: 10 minutes
- Cook Time: 22 minutes
- Total Time: 32 minutes
- Yield: 12 servings 1x
- Category: Breakfast
- Cuisine: American
Ingredients
- 2 cups (180g) rolled oats
- 1 ½ cups diced apples (about 2 medium apples, such as Honeycrisp, Fuji, or Granny Smith)
- 1 cup (240ml) milk (whole, almond, oat, or 2%)
- 2 large eggs, room temperature
- ⅓ cup (80ml) pure maple syrup
- 3 tablespoons melted coconut oil or butter
- 1 teaspoon vanilla extract
- 1 ½ teaspoons cinnamon (Ceylon or regular)
- 1 teaspoon baking powder
- ¼ teaspoon salt
- ½ cup chopped walnuts or pecans (optional)
- ¼ cup raisins or dried cranberries (optional)
- 1 tablespoon chia seeds or flaxseed meal (optional)
Instructions
- Preheat your oven to 375°F (190°C). Grease a 12-cup muffin tin generously with butter or coconut oil.
- Dice the apples into small, even pieces (about ¼-inch cubes). Leave the peel on for texture and fiber.
- In a large bowl, whisk together the rolled oats, cinnamon, baking powder, and salt. If using nuts or dried fruit, stir them in now.
- In a separate medium bowl, whisk the eggs until uniform and slightly frothy. Add the maple syrup, melted coconut oil (or butter), milk, and vanilla extract. Whisk until smooth.
- Pour the wet ingredients into the dry ingredients. Add the diced apples. Use a rubber spatula to fold everything together gently until the oats are evenly moistened (about 15 to 20 strokes). Do not overmix.
- Let the mixture rest for 5 minutes to allow the oats to absorb some liquid.
- Divide the batter evenly among the 12 muffin cups, filling each about ¾ full. Use an ice cream scoop for even portions.
- Bake for 20 to 25 minutes, until the tops are golden brown and firm to the touch, and a toothpick inserted in the center comes out clean or with a few moist crumbs. Start checking at 18 minutes.
- Let the cups cool in the tin for 5 minutes. Run a butter knife around the edges and gently lift them out. Transfer to a wire rack to cool completely.
Notes
Let the batter rest for 5 minutes before baking for a creamier texture. Use room temperature ingredients to prevent the fat from seizing. For best results, cool completely before freezing. These cups taste even better the next day as flavors meld. To freeze: place cooled cups on a baking sheet in a single layer, freeze until solid (1-2 hours), then transfer to a freezer-safe bag or container for up to 3 months. Reheat from frozen in the microwave for 45-60 seconds.
Nutrition
- Serving Size: 1 oatmeal cup
- Calories: 190
- Sugar: 13
- Sodium: 95
- Fat: 7
- Saturated Fat: 3.5
- Carbohydrates: 29
- Fiber: 3.5
- Protein: 5.5
Keywords: baked oatmeal cups, apple cinnamon oatmeal, freezer-friendly breakfast, meal prep breakfast, healthy oatmeal cups, toddler-friendly breakfast