Introduction
“Why bother with all that baking when you can just chill it and call it dessert?” — and that was it. My cousin Lisa tossed out that line last Thanksgiving right as the oven conked out on us. Honestly, I was skeptical at first. Pumpkin pie without baking? It sounded like a shortcut destined for disaster, or at least a sad consolation prize. But then she pulled out these Easy No-Bake Pumpkin Pie Bars with Gingersnap Crust, all set and ready in the fridge, and I have to admit—it was a game changer.
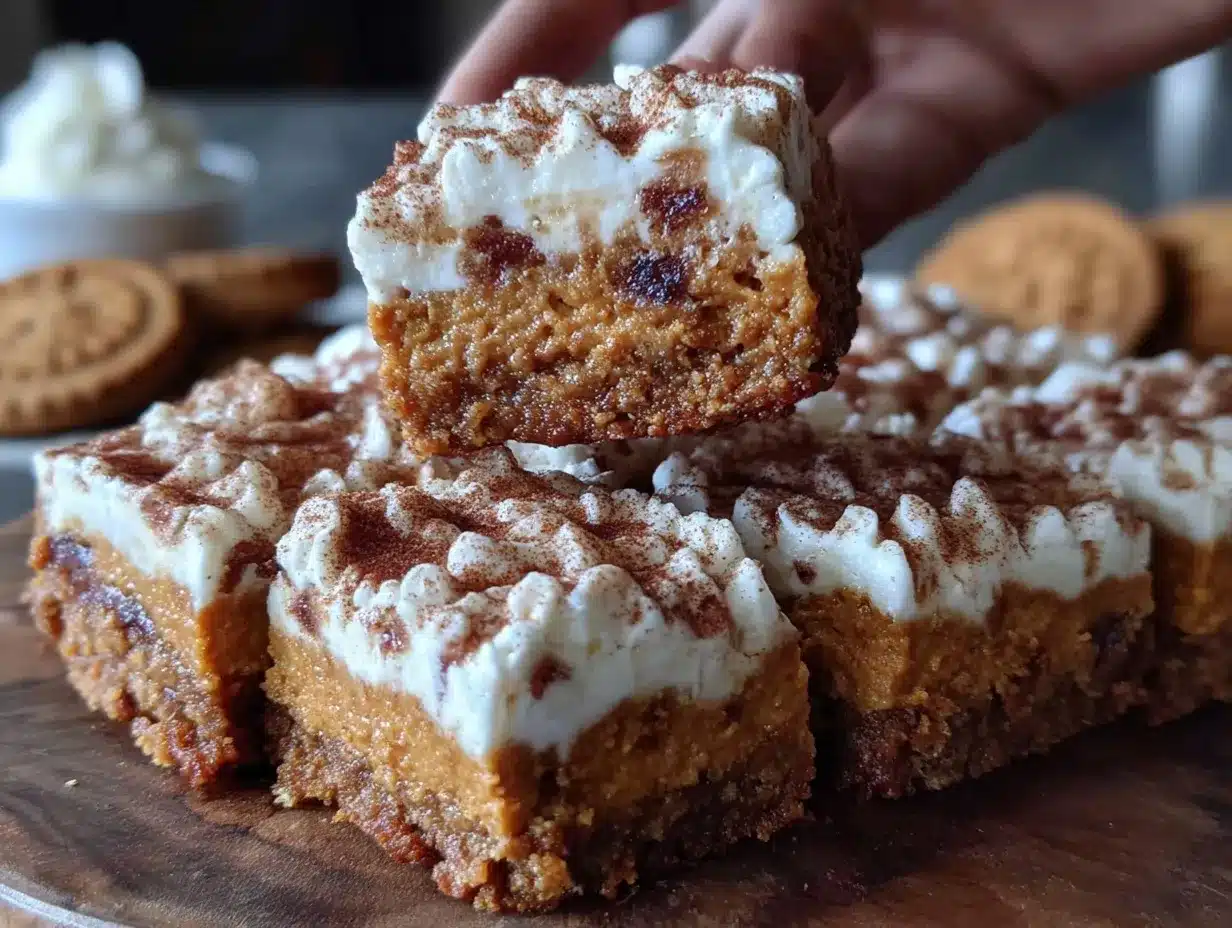
The moment I took that first bite, the spicy crunch of the gingersnap crust mingled perfectly with the creamy pumpkin filling. It wasn’t just a dessert; it was a cozy fall hug you didn’t have to wait hours for. The best part? No oven required, so it saved us from the usual kitchen chaos, especially when you’re juggling side dishes and a turkey. The bars had this smooth, velvety texture that made me close my eyes and savor every mouthful, and honestly, it stuck with me.
Since then, this recipe has been my go-to for fall gatherings, last-minute guests, or when I just want that pumpkin pie mood without the fuss. It’s the kind of dessert that feels homemade but without the stress. I guess what really sold me was how it captured that traditional pumpkin pie flavor, but with a twist that’s just so darn easy to pull off. So, if you’ve ever wondered how to get pumpkin pie vibes without firing up the oven, this recipe might just be your new best friend.
Why You’ll Love This Recipe
This Easy No-Bake Pumpkin Pie Bars recipe is honestly one of the most satisfying fall treats I’ve come across. Here’s why it quickly became a staple in my kitchen:
- Quick & Easy: Ready in about 20 minutes plus chilling time, which makes it perfect for when you’re short on time but craving something seasonal.
- Simple Ingredients: It uses pantry staples and common fall spices—no hunting down weird specialty items.
- Perfect for Fall Entertaining: Whether it’s a casual get-together or a holiday meal, these bars feel festive without the stress of pies.
- Crowd-Pleaser: Everyone I’ve served them to (kids and adults alike) has asked for seconds. The gingersnap crust adds a nice crunch that balances the creamy filling.
- Unbelievably Delicious: The silky pumpkin layer blends warm spices with just the right sweetness, making for a comforting yet refreshing dessert.
What sets this recipe apart is the gingersnap crust—it’s not just a base but a flavor star, giving a spicy kick that you don’t get with plain graham crackers. Also, blending the pumpkin filling until ultra-smooth (a trick I picked up during recipe testing) gives it that luscious texture that feels like pumpkin pie but easier. Honestly, it’s the kind of dessert that makes you pause and appreciate simple ingredients done right. It’s fall in every bite, without the oven heat or the long wait.
What Ingredients You Will Need
This recipe uses simple, wholesome ingredients to deliver bold flavor and satisfying texture without the fuss. Most of these are pantry staples, so you can whip this up whenever the pumpkin craving hits.
- For the Gingersnap Crust:
- Gingersnap cookies (about 2 cups crushed) – I like using Stauffer’s brand for great spice balance
- Unsalted butter, melted (6 tablespoons / 85g) – adds richness and helps bind the crust
- Granulated sugar (2 tablespoons) – just a touch to sweeten the crust
- For the Pumpkin Filling:
- Pure pumpkin puree (1 can, 15 oz / 425g) – not pumpkin pie filling, just pure pumpkin
- Sweetened condensed milk (1 can, 14 oz / 396g) – for creamy sweetness
- Ground cinnamon (1 teaspoon) – warms up the flavor
- Ground ginger (1/2 teaspoon) – essential for that signature pumpkin pie spice blend
- Ground nutmeg (1/4 teaspoon) – adds a subtle earthy note
- Ground cloves (1/8 teaspoon) – a little goes a long way for depth
- Vanilla extract (1 teaspoon) – brings everything together
- Salt (1/4 teaspoon) – balances the sweetness and spices
- Lemon juice (1 tablespoon) – brightens the flavor and cuts richness
If you want a dairy-free or vegan version, swap the butter with coconut oil and use sweetened condensed coconut milk. And hey, if you can’t find gingersnaps, a mix of graham crackers and a pinch of ground ginger and cinnamon works well too. But honestly, the gingersnap crust is the magic here.
Equipment Needed
- 9×9-inch (23×23 cm) square baking pan – I prefer glass for even chilling but metal works too
- Mixing bowls – one large for the crust, one medium for the filling
- Food processor or a plastic bag with a rolling pin – for crushing the gingersnap cookies
- Measuring cups and spoons – accuracy matters for spices
- Rubber spatula – great for scraping every bit of that pumpkin filling
- Electric mixer or whisk – to combine the filling smoothly (I usually use a handheld mixer to save time)
- Plastic wrap or foil – to cover and chill the bars
If you don’t have a food processor, just crush the cookies in a sealed plastic bag with a rolling pin or heavy pan. It might take a bit longer, but it works just fine. Also, if you want to get fancy, a springform pan can be used, but I find the square pan easier for neat bars.
Preparation Method
- Crush the gingersnap cookies: Place about 2 cups (200g) of gingersnap cookies into a food processor and pulse until fine crumbs form. No processor? Toss them in a sealed plastic bag and crush with a rolling pin. This should take about 3–5 minutes.
- Make the crust: In a mixing bowl, combine the gingersnap crumbs, 6 tablespoons (85g) melted unsalted butter, and 2 tablespoons granulated sugar. Stir until the crumbs are evenly coated and the mixture holds together when pressed. This usually takes about 2 minutes.
- Press crust into pan: Transfer the crust mixture into a 9×9-inch (23×23 cm) square pan. Use the back of a spoon or your fingers to press it evenly into the bottom, making a compact layer. Chill in the fridge for 15 minutes while you prepare the filling. This step helps the crust set so it doesn’t crumble when cut.
- Mix the pumpkin filling: In a separate bowl, combine 1 can (15 oz / 425g) pure pumpkin puree, 1 can (14 oz / 396g) sweetened condensed milk, 1 teaspoon cinnamon, 1/2 teaspoon ground ginger, 1/4 teaspoon nutmeg, 1/8 teaspoon ground cloves, 1 teaspoon vanilla extract, 1 tablespoon lemon juice, and 1/4 teaspoon salt. Use a handheld mixer or whisk to blend until smooth and creamy—about 3 minutes. The filling should feel thick but pourable.
- Pour filling over crust: Remove the crust from the fridge and pour the pumpkin filling evenly over it. Use a spatula to smooth the top gently. This step is quick—about 2 minutes.
- Chill the bars: Cover the pan tightly with plastic wrap or foil and refrigerate for at least 4 hours, preferably overnight. The chilling allows the filling to set fully, giving you those perfect, sliceable bars.
- Slice and serve: Once chilled, run a knife around the edges to loosen the bars. Cut into 12 squares for perfect portions. For cleaner cuts, dip your knife in warm water and wipe dry between slices.
If you want to speed things up, freezing the bars for 2 hours works too, but longer chilling is best for texture. Watch out for over-mixing the filling—it should be smooth, but too much air can make it less dense.
Cooking Tips & Techniques
Making these pumpkin pie bars is pretty straightforward, but a few pro tips can keep things on point:
- Choosing your gingersnaps: Go for a crunchy, spicy variety—not the soft kind. They hold up better and add a lovely snap to the crust.
- Crushing cookies evenly: Avoid big chunks in the crust by pulsing in short bursts. If using a rolling pin, spread crumbs evenly and crush gently to avoid powdery dust.
- Butter temperature: Melted but not hot butter is ideal. Hot butter can make the crust oily and soggy.
- Spices balance: Don’t skip the lemon juice—it brightens the pumpkin flavor and keeps the filling from tasting too sweet or flat.
- Mix filling thoroughly: Use an electric mixer to get that creamy texture, but don’t overbeat. You want smooth, not fluffy.
- Chilling time matters: Resist temptation to slice too soon. The filling needs time to firm up for clean cuts.
- Storage: Keep leftovers refrigerated in an airtight container for up to 4 days. They actually taste better the next day as flavors meld.
One mistake I made early on was skipping the sugar in the crust, thinking the filling’s sweetness would cover it. Big nope. That little sugar boost in the crust lifts the whole dessert. Also, if you’re ever pressed for time but want a similar flavor, try my Easy Cheesy Tater Tot Breakfast Casserole for a no-fuss crowd-pleaser with a different spin.
Variations & Adaptations
There’s room to play with these bars, depending on your mood or dietary needs:
- Gluten-free option: Use gluten-free gingersnap cookies or swap for almond flour mixed with a pinch of cinnamon for the crust.
- Vegan adaptation: Replace butter with coconut oil and sweetened condensed milk with coconut condensed milk or a blend of coconut cream and maple syrup.
- Spiced up: Add a teaspoon of pumpkin pie spice instead of individual spices for convenience or mix in a splash of bourbon for a grown-up twist.
- Adding texture: Sprinkle chopped pecans or walnuts over the crust before pouring the filling for a nutty crunch.
- Seasonal swap: In summer, try swapping pumpkin for sweet potato puree and add a touch of orange zest for brightness.
I once tried a version with a graham cracker crust and a dollop of whipped cream infused with cinnamon on top—it was a hit for a casual fall brunch. For those who love a bit of savory balance, pairing these bars with a cup of spiced apple cider is just magical.
Serving & Storage Suggestions
These pumpkin pie bars are best served cold or slightly chilled, making them ideal for warm kitchens or potlucks where oven access is limited. Slice them into neat squares and serve on a rustic wooden board or festive fall plate for that cozy vibe.
They pair beautifully with a dollop of whipped cream or a scoop of vanilla ice cream. For drinks, I like hot chai tea or a lightly spiced coffee to complement the warming spices.
To store, keep the bars in an airtight container in the refrigerator for up to 4 days. They also freeze well—wrap tightly in plastic wrap and foil, then thaw overnight in the fridge before serving. The flavors actually deepen after a day or two, so leftovers can be just as good, if not better!
If you’re interested in more crowd-friendly, no-fuss dishes, you might appreciate the Crispy Buffalo Chicken Tater Tot Casserole, which shares the same spirit of easy prep and big flavor for your next gathering.
Nutritional Information & Benefits
Each bar (based on 12 servings) roughly contains:
| Calories | 280 |
|---|---|
| Fat | 12g |
| Carbohydrates | 40g |
| Protein | 3g |
| Fiber | 2g |
The pumpkin puree is a great source of vitamin A and antioxidants, contributing to eye health and immune support. The warming spices like cinnamon and ginger also offer anti-inflammatory benefits. This recipe is naturally gluten-friendly if you use gluten-free gingersnaps, and you can make it dairy-free with simple substitutions. Just a heads up, it does contain dairy and eggs via sweetened condensed milk unless swapped out.
From a wellness perspective, these bars satisfy sweet cravings with wholesome ingredients and avoid the heavy butter-laden crust of traditional pumpkin pies. It’s a little treat that feels indulgent but with a lighter footprint.
Conclusion
Easy No-Bake Pumpkin Pie Bars with Gingersnap Crust are a sweet little slice of fall that’s as simple as it is satisfying. You don’t have to fuss with pastry or wait around for baking, yet you still get that classic pumpkin pie flavor and spice. I love how this recipe lets me bring a bit of tradition to the table without the usual stress. Plus, it’s flexible enough to tweak for all kinds of dietary needs or flavor preferences.
Give it a try and make it your own—add nuts, switch up the spices, or pair it with your favorite fall beverage. And hey, if you end up loving these bars, I’d love to hear about your twists or how they went for your crew. Sharing food stories is what makes these recipes feel like home, right?
So, grab those gingersnaps and pumpkin puree and let this recipe be your new seasonal secret weapon.
FAQs
- Can I make these bars ahead of time? Absolutely! They actually taste better after chilling overnight. Just keep them covered in the fridge.
- What if I don’t have gingersnap cookies? You can substitute with graham crackers and add some ground ginger and cinnamon to mimic the flavor.
- Can I freeze the pumpkin pie bars? Yes, wrap them tightly and freeze for up to 2 months. Thaw in the fridge overnight before serving.
- Is this recipe suitable for vegans? With some swaps—use coconut oil instead of butter and a plant-based condensed milk alternative—it can be vegan-friendly.
- Can I use fresh pumpkin instead of canned? You can, but make sure it’s cooked and pureed smooth. Fresh pumpkin is less dense, so you might need to adjust sweetener slightly.
Easy No-Bake Pumpkin Pie Bars Recipe with Gingersnap Crust Perfect for Fall
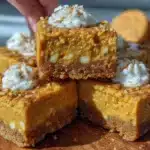
These no-bake pumpkin pie bars feature a spicy gingersnap crust and a creamy pumpkin filling, delivering classic fall flavors without the oven. Perfect for quick, stress-free seasonal desserts.
- Prep Time: 20 minutes
- Cook Time: 0 minutes
- Total Time: 4 hours 20 minutes
- Yield: 12 servings 1x
- Category: Dessert
- Cuisine: American
Ingredients
- 2 cups gingersnap cookies, crushed (about 200g)
- 6 tablespoons unsalted butter, melted (85g)
- 2 tablespoons granulated sugar
- 1 can (15 oz / 425g) pure pumpkin puree
- 1 can (14 oz / 396g) sweetened condensed milk
- 1 teaspoon ground cinnamon
- 1/2 teaspoon ground ginger
- 1/4 teaspoon ground nutmeg
- 1/8 teaspoon ground cloves
- 1 teaspoon vanilla extract
- 1/4 teaspoon salt
- 1 tablespoon lemon juice
Instructions
- Crush the gingersnap cookies using a food processor or place in a sealed plastic bag and crush with a rolling pin until fine crumbs form (about 3–5 minutes).
- In a mixing bowl, combine the gingersnap crumbs, melted unsalted butter, and granulated sugar. Stir until evenly coated and the mixture holds together when pressed (about 2 minutes).
- Press the crust mixture evenly into the bottom of a 9×9-inch (23×23 cm) square pan. Chill in the refrigerator for 15 minutes to set.
- In a separate bowl, combine pumpkin puree, sweetened condensed milk, cinnamon, ground ginger, nutmeg, ground cloves, vanilla extract, lemon juice, and salt. Blend with a handheld mixer or whisk until smooth and creamy (about 3 minutes).
- Pour the pumpkin filling evenly over the chilled crust and smooth the top with a spatula (about 2 minutes).
- Cover the pan tightly with plastic wrap or foil and refrigerate for at least 4 hours, preferably overnight, to allow the filling to set.
- Once chilled, loosen the edges with a knife and cut into 12 squares. For cleaner cuts, dip the knife in warm water and wipe dry between slices.
Notes
Use crunchy, spicy gingersnap cookies for best crust texture. Melt butter but do not overheat to avoid soggy crust. Do not overmix the filling to keep it dense and creamy. Chill bars at least 4 hours or overnight for best slicing. Bars keep refrigerated up to 4 days and freeze well for up to 2 months. For vegan version, substitute butter with coconut oil and sweetened condensed milk with coconut condensed milk or a blend of coconut cream and maple syrup. Gluten-free gingersnaps or almond flour can be used for gluten-free crust.
Nutrition
- Serving Size: 1 bar (1/12th of rec
- Calories: 280
- Fat: 12
- Carbohydrates: 40
- Fiber: 2
- Protein: 3
Keywords: no-bake pumpkin pie bars, pumpkin dessert, gingersnap crust, fall dessert, easy pumpkin recipe, no oven pumpkin pie, pumpkin bars